

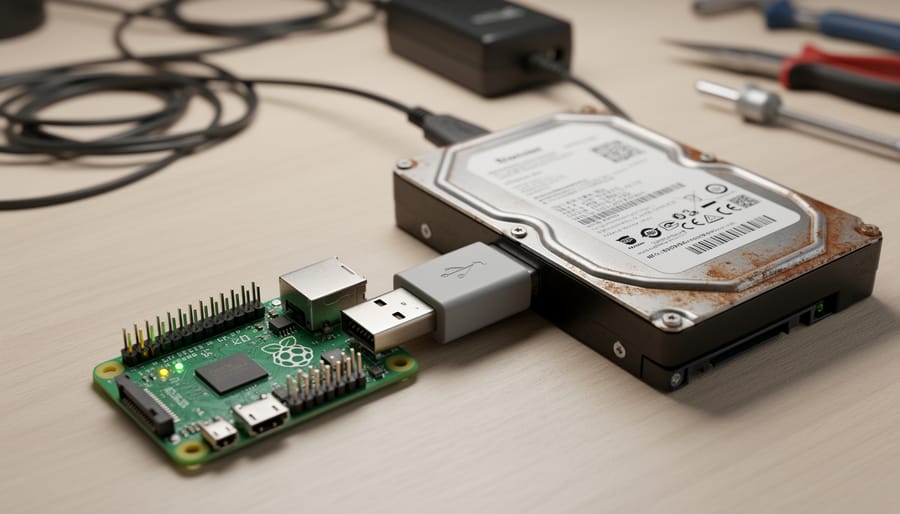
Connecting vintage storage media to your Raspberry Pi is surprisingly straightforward once you understand the adapter ecosystem and power requirements. Most obsolete storage devices like IDE hard drives, floppy disk drives, cassette tape interfaces, and even SCSI drives can interface with modern Raspberry Pi boards through USB adapters or direct GPIO connections. Success hinges on three factors: choosing the right adapter for your specific storage type, ensuring adequate power delivery (many vintage drives draw more current than USB ports can safely provide), and confirming Linux driver support for the protocol you’re using.
This hands-on guide walks you through the complete process of resurrecting data from aging storage devices using your Raspberry Pi as a modern bridge. Whether you’re a retro computing enthusiast preserving classic software, a data archivist recovering historical files, or someone who simply needs to access old backups stored on obsolete media, this tutorial covers the essential tools, safety precautions, and step-by-step procedures for each major vintage storage format.
The Raspberry Pi’s Linux foundation gives it native support for many legacy file systems and protocols that modern Windows and Mac systems have long abandoned. Combined with its low cost, compact size, and extensive community support, it has become the go-to platform for vintage storage recovery projects. Let’s examine exactly what you need and how to safely connect each type of obsolete storage device.
What You’ll Need: Tools and Materials
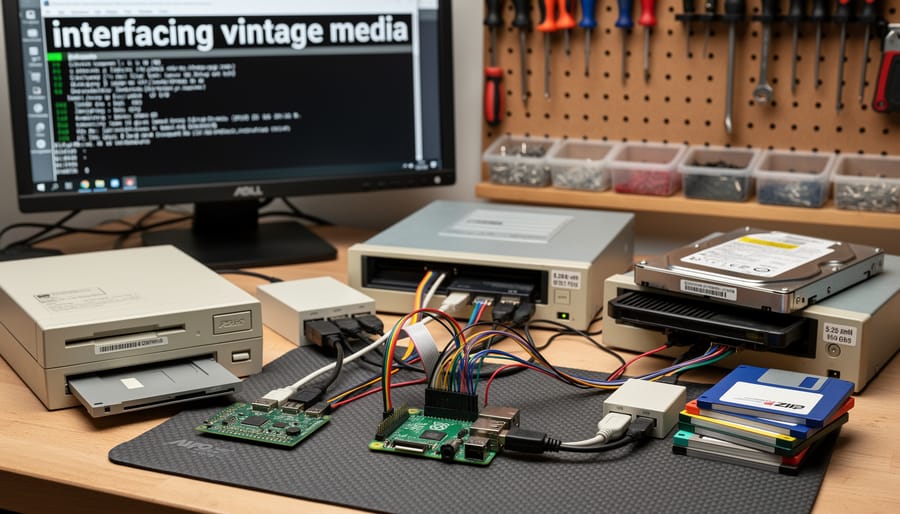
Getting your Raspberry Pi ready to work with vintage storage media requires careful preparation. The right combination of hardware and software depends on which types of storage you plan to access, but certain essentials apply across most projects.
Hardware Requirements
Start with a Raspberry Pi 4 (4GB or 8GB model) or Raspberry Pi 5, both of which offer superior USB power delivery and multiple USB 3.0 ports compared to older models. While a Pi 3 can handle some tasks, the improved power management on newer boards prevents issues with drives that draw significant current. You’ll need a quality power supply rated at 3A minimum, underpowered setups cause the most common connection failures.
The adapters you need vary by storage type:
- USB-to-IDE/PATA adapter for connecting 2.5″ and 3.5″ hard drives and CD-ROM drives from 1990s-2000s computers
- USB floppy drive (external) or USB-to-floppy controller for 3.5″ disks
- USB-to-SCSI adapter for enterprise and workstation drives from the 1980s-1990s
- USB audio interface or 3.5mm audio cable for cassette tape storage systems
- GPIO breakout board and ribbon cables if you’re planning direct hardware interfacing
External power supplies become necessary when working with 3.5″ IDE drives or older full-height devices. These drives require 12V power that USB ports can’t provide. Look for Molex-compatible power adapters or repurpose an old ATX computer power supply.
For physical setup, grab a microSD card (32GB or larger), USB keyboard and mouse, and either an HDMI display or the ability to connect a VGA display for monitoring your work. Anti-static wrist straps protect sensitive vintage components, and a small screwdriver set helps with jumper configuration on older drives.
Software Essentials
Install Raspberry Pi OS (64-bit recommended for better performance with large disk images). The base system includes most tools you’ll need: `lsblk` and `fdisk` for drive detection, `mount` for file system access, and `dd` for creating disk images. Add `ddrescue` through apt for recovering data from failing media, and install `ntfs-3g` if you’re working with Windows-formatted drives.
Consider downloading specialized retro computing tools like HxC Floppy Emulator software for exotic disk formats or Audacity for processing cassette tape audio signals. These expand your capability beyond standard file systems.
Safety Precautions and Compatibility Warnings
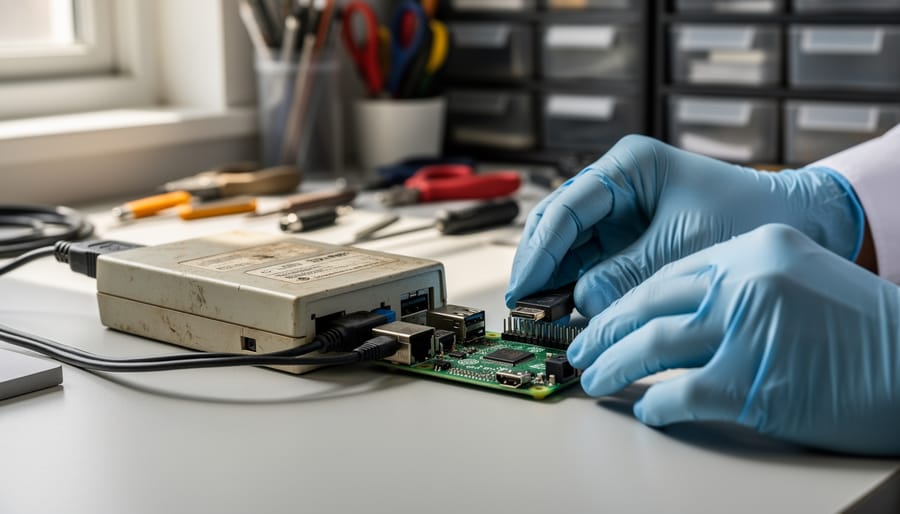
Working with vintage storage media requires caution because you’re bridging decades-old electronics with modern hardware. The age difference creates several compatibility traps, and a single mistake can damage your Raspberry Pi, destroy irreplaceable data, or fry a piece of vintage hardware that can’t be replaced.
Start with electrostatic discharge protection. Vintage electronics often lack the ESD protection built into modern components, making them vulnerable to static shocks from your body. Touch a grounded metal object before handling drives, or wear an anti-static wrist strap. Work on a non-carpeted surface and avoid synthetic clothing that generates static.
Voltage requirements vary widely across vintage storage. Older 3.5-inch IDE hard drives and 5.25-inch floppy drives typically need both 5V and 12V power rails, which the Raspberry Pi cannot provide through its USB ports. Even devices that run on 5V alone may draw more current than the Pi can safely deliver. The USB power limit on Pi models caps around 1.2A total across all ports, and a single vintage drive can exceed that. Use a powered USB hub or an external power supply rated for your specific drive.
File system compatibility presents another hurdle. Vintage media might use FAT12, Amiga FFS, or proprietary formats that Raspberry Pi OS doesn’t mount automatically. Research the expected format before connecting and install the necessary file system drivers beforehand. Some formats are read-only in Linux, which protects against accidental writes but limits recovery options.
Finally, understand that vintage media degrades over time. Magnetic fields weaken, oxide layers flake off tapes, and capacitors in drive electronics fail. Your first read attempt might be your last chance to recover data, so always create a complete disk image before trying to access individual files.
Connecting IDE/PATA Hard Drives and CD-ROM Drives
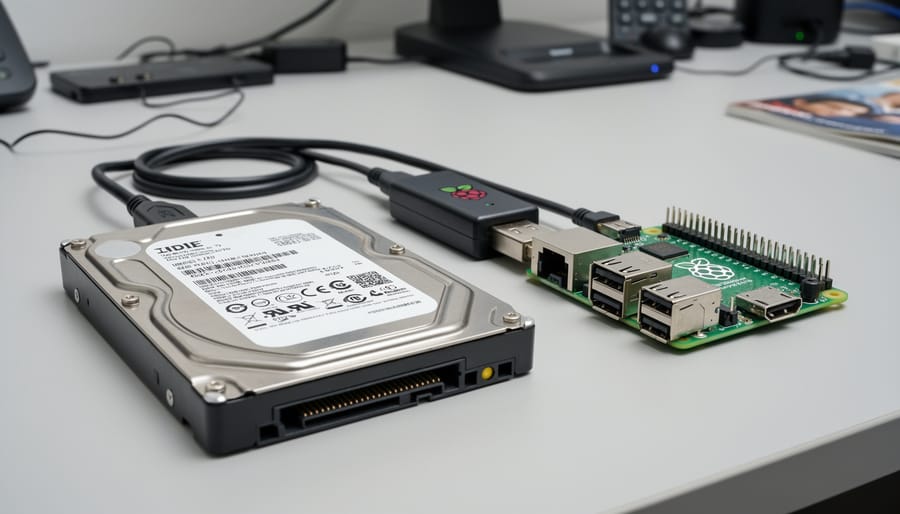
Setting Up the USB-to-IDE Adapter
The USB-to-IDE adapter is your bridge between vintage storage and modern hardware. Most adapters support both 2.5″ and 3.5″ IDE drives, but the setup process differs slightly based on your drive type.
Start by examining the IDE drive’s jumper block, usually located near the power and data connectors. You’ll see a small diagram printed on the drive label showing jumper positions. Set the jumper to “Master” or “Single” mode, never “Slave” or “Cable Select” for direct USB adapter connections. Remove the jumper entirely if the diagram indicates that’s the master configuration for your specific drive.
- Configure the drive jumper to Master or Single position using needle-nose pliers or tweezers
- Connect the 40-pin IDE ribbon cable from your USB adapter firmly to the drive’s IDE port, aligning the red stripe on the cable with pin 1 (usually marked or nearest the power connector)
- For 3.5″ drives, connect a 12V Molex power adapter to the drive’s power port before proceeding, these larger drives require both 5V and 12V rails that the Raspberry Pi cannot provide
- For 2.5″ drives, connect the power cable from your USB adapter if it includes one, or rely on USB bus power for low-power laptop drives
- Plug the adapter’s USB cable into a USB 3.0 port on your Raspberry Pi 4 or Pi 5 for optimal power delivery and data transfer speeds
Power up any external 12V adapter first, then boot your Raspberry Pi. You should hear the drive spin up within a few seconds. If the drive remains silent or you hear repeated clicking, disconnect power immediately and verify all connections and the jumper setting.
Mounting and Accessing the Drive
Once you’ve physically connected your IDE drive, open a terminal and run `lsblk` to see all detected storage devices. Your vintage drive typically appears as `/dev/sda` or similar, with partitions listed as `/dev/sda1`, `/dev/sda2`, etc. For more detailed partition information, use `sudo fdisk -l` which shows partition types and sizes.
Before accessing the drive, create a mount point. Run `sudo mkdir /mnt/vintage` to establish a directory where the file system will be accessible. Then mount the partition with the appropriate file system type. For FAT32 drives, use `sudo mount -t vfat /dev/sda1 /mnt/vintage`. NTFS requires `sudo mount -t ntfs-3g /dev/sda1 /mnt/vintage` (install ntfs-3g first if needed with `sudo apt install ntfs-3g`). For ext2 or ext3, substitute `-t ext2` or `-t ext3` accordingly.
Navigate to `/mnt/vintage` and you’ll see the drive’s contents. Copy files normally with `cp` commands or through the file manager.
If the drive doesn’t appear in `lsblk`, check physical connections and power. Sometimes older drives need a few seconds to spin up before detection. Try `sudo dmesg | tail` to view recent system messages about USB or drive detection. If you see errors mentioning power issues, the drive likely needs an external power supply rather than drawing from the USB adapter alone.
Working with Floppy Disk Drives
USB Floppy Drive Method
USB floppy drives are the simplest route for accessing 3.5″ disks on your Raspberry Pi. Most modern USB floppy drives work immediately with Raspberry Pi OS, no driver compilation or kernel modules required. Sony, Mitsumi, and Teac drives generally offer the best compatibility, though cheaper generic models often work fine for standard 1.44MB disks.
Plug the USB floppy drive into an available port, preferably one of the blue USB 3.0 ports on a Pi 4 or Pi 5 for better power delivery. Insert a formatted disk, then open a terminal and run `lsblk` to confirm detection. The drive typically appears as `/dev/sda` if it’s the only external drive connected.
- Connect your USB floppy drive to the Raspberry Pi and wait 5-10 seconds for enumeration to complete.
- Run `dmesg | tail -20` to check the kernel log and confirm the drive was recognized as a removable media device.
- Insert a floppy disk fully and wait for the drive activity light to stop flashing.
- Create a mount point with `sudo mkdir /mnt/floppy` if one doesn’t already exist.
- Mount the disk using `sudo mount /dev/sda /mnt/floppy` (adjust device name if needed).
- Access files through `/mnt/floppy` or create a disk image with `sudo dd if=/dev/sda of=~/floppy-backup.img bs=512`.
For disks that won’t mount directly, raw imaging with `dd` preserves the entire contents for later analysis. This approach captures everything, including damaged sectors and boot sectors that file-level copying would miss. Store images with descriptive names and always verify the byte count matches the expected disk size: 1,474,560 bytes for standard 1.44MB disks.
GPIO Direct Interfacing for Advanced Users
Direct GPIO interfacing connects a bare floppy drive to your Raspberry Pi’s GPIO pins, bypassing USB adapters entirely. This advanced method gives you low-level control over the drive’s read/write head and requires soldering, wiring skills, and comfort with hardware projects.
You’ll need a 34-pin floppy cable, a separate 5V power supply for the drive, and detailed wiring diagrams that map each floppy pin to specific GPIO connections. Projects like Greaseweazle and custom Python libraries handle the software side, sending precise timing signals to control the drive motor, head positioning, and data reading.
This approach becomes necessary when USB adapters fail with non-standard disk formats. Copy-protected commercial software, Amiga disks with modified track layouts, Apple II GCR-encoded floppies, and some early PC game disks use timing tricks and unusual encoding that confuse standard USB controllers. Direct GPIO access lets you capture raw magnetic flux transitions from the disk surface, which specialized software can then decode.
The main challenges are timing precision and electrical safety. GPIO interfacing requires microsecond-accurate signal control, and incorrect wiring can damage both your Pi and the floppy drive. Expect several hours of careful assembly following community-created schematics.
The GreaseWeazle wiki and various Raspberry Pi retro computing forums provide tested wiring diagrams with pin mappings. Start there rather than experimenting, since a single misconnected power pin can destroy components instantly.
Interfacing with Cassette Tape Storage
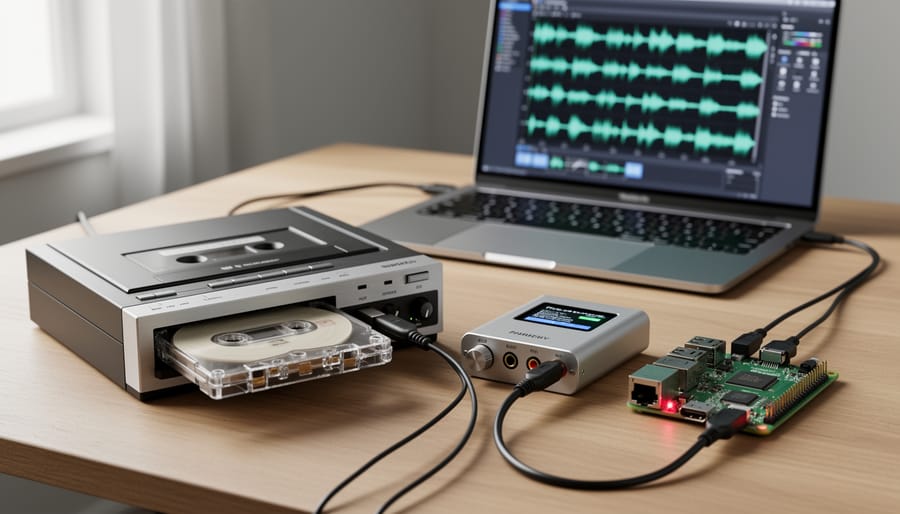
Cassette tapes served as primary storage for many 1980s home computers, encoding programs and data as audio signals. Connecting these systems to your Raspberry Pi requires capturing that audio and decoding it back into usable files.
The basic approach uses your Pi’s audio input to record the cassette playback, then specialized software interprets the audio patterns as data. You’ll need a 3.5mm audio cable to connect your cassette player’s headphone or line-out jack to the Pi’s audio input. Note that Raspberry Pi 4 and 5 don’t have built-in audio inputs, so you’ll need a USB sound card with line-in capability. Models like the Behringer UCA202 work well and cost under $30.
For the actual recovery process:
- Connect your cassette player to the USB sound card’s line input using a 3.5mm stereo cable. Set the player’s volume to around 70 percent to avoid distortion while maintaining adequate signal strength.
- Install Audacity on your Pi with
sudo apt install audacity. Open Audacity, select your USB sound card as the input device, and start recording while playing the cassette tape. - Save the recording as a WAV file. Keep the original audio settings (typically 44.1kHz, 16-bit) rather than compressing or altering the file.
- Use platform-specific decoder software to convert the audio into program files. For Commodore formats, try
audiotaporc64tapedecode. ZX Spectrum tapes work withplaytzxortzxwav. Install these via apt or compile from source. - Run the decoder on your WAV file, which will extract the original program files in formats like TAP, TZX, or PRG depending on the source system.
Success rates vary based on tape condition and recording quality. Clean the cassette player’s tape head with isopropyl alcohol before starting, and expect to make multiple attempts with volume adjustments if the first pass fails. Older tapes may have degraded magnetic coating, producing dropout errors the software can’t always overcome.
Some enthusiasts build dedicated tape interfaces using the Pi’s GPIO pins and simple transistor circuits, which can provide cleaner signal capture than consumer audio equipment. Search for “TZXDuino” or “Ardu64Tape” projects if you’re interested in this approach for high-volume archiving work.
Connecting SCSI Drives
SCSI drives were once the performance standard for servers and high-end workstations in the 1990s and early 2000s, but interfacing them with a Raspberry Pi presents unique challenges. Unlike IDE or floppy drives where affordable USB adapters are readily available, SCSI requires specialized hardware that can be significantly more expensive and harder to configure.
The most practical approach is a USB-to-SCSI adapter, which converts the SCSI protocol to USB that your Raspberry Pi can understand. These adapters typically support multiple SCSI standards including SCSI-1, SCSI-2, and Ultra SCSI, but expect to pay between $50 and $200 for a quality unit. Popular models include adapters based on the ASIX AX88772 chipset, though availability fluctuates as these remain niche products.
SCSI drives require proper termination to function correctly. The SCSI bus must be terminated at both physical ends of the chain, either through terminator plugs, termination switches on the drive itself, or internal termination resistors. Without correct termination, you’ll experience data corruption or the drive won’t be detected at all.
Each SCSI device needs a unique ID between 0 and 7 (or 0 to 15 for Wide SCSI). Set these IDs using jumpers on the drive before connecting. The host adapter typically uses ID 7, so avoid that for your drives. Many SCSI hard drives also require external 12V power supplies since the Raspberry Pi cannot deliver sufficient power through USB alone.
Once connected, Linux should detect the drive as a standard SCSI device. Use dmesg to check for detection messages and lsscsi to list connected SCSI devices. The learning curve and cost make SCSI interfacing worthwhile mainly if you regularly work with vintage server hardware or have irreplaceable data on SCSI media.
Software Tools for Data Recovery and Imaging
Once your vintage storage media is connected and detected, you’ll need the right software to actually recover and preserve the data. Raspberry Pi OS includes several powerful command-line tools, and you can install additional specialized utilities for working with legacy formats.
The dd command is your starting point for basic disk imaging. It creates bit-for-bit copies of entire drives or partitions, preserving everything including file system metadata. A typical imaging command looks like `sudo dd if=/dev/sdb of=~/vintage_drive.img bs=4M status=progress`, where /dev/sdb is your vintage drive. The bs parameter sets block size (4M works well for most drives), and status=progress shows you real-time transfer information. Always double-check your device names, dd will overwrite data without confirmation if you mix up source and destination.
For damaged or degraded media, ddrescue is essential. Unlike dd, it doesn’t abort on read errors. Instead, it logs bad sectors and makes multiple passes to extract as much data as possible. Install it with `sudo apt install gddrescue`, then run something like `sudo ddrescue -f /dev/sdb recovered.img rescue.log`. The log file lets you resume interrupted recoveries, crucial when working with failing drives that might take hours to image.
File system tools help you mount and explore different formats. Install ntfs-3g for NTFS support and exfat-fuse for exFAT. For vintage file systems like Amiga’s ADF or Apple’s HFS, you’ll want specialized tools: adflib handles Amiga disk files, hfsutils works with classic Mac volumes, and mtools provides DOS/FAT filesystem access without mounting.
Retro computing enthusiasts should explore packages like cpmtools for CP/M systems, cbmtools for Commodore disk images, and disk-utilities for reading various exotic formats. These tools understand the quirky directory structures and file attributes that generic utilities miss.
Verifying Success and Troubleshooting Common Issues
Once your vintage storage device is connected, confirming everything works properly is just as important as the physical setup. Start by checking system logs with `dmesg | tail` immediately after connecting the drive, you should see detection messages showing the device name (usually `/dev/sda` or similar) and any initialization details. Run `lsblk` to verify the drive appears with the correct size and partition structure. If you’re working on a dedicated retro computing setup or battery-saving Pi that also needs classic monitor compatibility or a low-power display verifying storage functionality early prevents wasted troubleshooting time later.
Create a disk image immediately as a safety measure using `sudo dd if=/dev/sda of=~/backup.img bs=4M status=progress`. This protects your data if the vintage media fails during later work. Test read speeds with `sudo hdparm -tT /dev/sda` to establish a baseline, extremely slow speeds (under 1MB/s) often indicate failing media or connection problems requiring attention before you proceed.
- Drive not detected: Check USB cable connections, try a different USB port (avoid hubs), and verify the drive is receiving adequate power
- Permission denied errors: Use sudo when accessing raw devices, or add your user to the disk group with `sudo usermod -a -G disk $USER`
- File system shows as corrupted: Run `sudo fsck -f /dev/sda1` to check and repair, but expect some vintage media to have genuine age-related damage
- Drive clicks or doesn’t spin up: Your Raspberry Pi’s USB ports likely can’t provide enough power, connect a separate 12V power adapter to the drive
- Intermittent disconnections: Often caused by insufficient power or loose adapter connections, sometimes by failing vintage electronics in the drive itself
If verification passes, mount the file system and spot-check a few files to confirm they’re readable and not corrupted. For critical data recovery projects, always work from the disk image rather than the original media to minimize wear on fragile vintage storage.
Next Steps and Project Ideas
Once you’ve successfully connected vintage storage media to your Raspberry Pi, a world of retro computing possibilities opens up. Here are practical directions to explore with your newly acquired skills.
Transform your setup into a dedicated data recovery station by organizing multiple adapters in a compact enclosure alongside your Pi. Many enthusiasts build custom cases with labeled ports for IDE, floppy, and SCSI connections, making it easy to handle media recovery requests from friends or local historical societies. Add a small display showing transfer progress and you’ll have a professional-grade recovery tool.
Retro gaming setups benefit enormously from reading original game media. Use your Pi to extract disk images from vintage computer games, then run them through emulators like RetroPie or VICE. You’ll preserve the authentic loading experience while protecting deteriorating originals from repeated use.
Contributing to software preservation projects gives your work lasting value. The Internet Archive, and similar initiatives actively seek disk images from rare software, especially regional releases or obscure business applications. Even mundane floppies from defunct companies can fill gaps in computing history.
For automation enthusiasts, build a disk imaging station that processes multiple floppies or cartridges with minimal intervention. Scripts can automatically detect media insertion, create checksummed images, and catalog contents into a database. The Raspberry Pi’s GPIO pins excel at sensing drive activity and controlling indicator LEDs.
Join communities like the Vintage Computer Federation forums or r/retrobattlestations to share discoveries, troubleshoot unusual formats, and find collaborators for larger preservation efforts.
Connecting vintage storage media to your Raspberry Pi is entirely doable once you have the right adapters and a basic understanding of the process. Whether you’re recovering old family data, preserving retro software, or building a nostalgic computing project, the Raspberry Pi provides a flexible and affordable platform for interfacing with legacy storage systems.
If you’re just getting started, stick with the simpler approaches first. USB-to-IDE adapters and USB floppy drives offer plug-and-play convenience that lets you succeed quickly and build confidence. Save the more advanced GPIO interfacing projects for when you’re comfortable with the basics and have specific needs that USB solutions can’t address.
Remember that vintage storage media is often fragile and degrading. Handle disks, tapes, and drives carefully, create backup images as soon as possible, and never work directly on original media if you can avoid it. Once you’ve successfully imaged a vintage disk or tape, you’ve preserved a piece of computing history that might otherwise be lost forever. Take your time, follow the safety precautions, and enjoy the satisfaction of breathing new life into old technology.
Frequently Asked Questions
Can Raspberry Pi 4 or 5 handle all vintage storage types, or do you need specific models? Both Pi 4 and Pi 5 work well with most vintage storage media through USB adapters, but the Pi 5’s improved power delivery gives it an edge when running multiple devices or power-hungry older drives. Earlier models like the Pi 3 can manage many adapters too, but you’ll likely need a powered USB hub for 3.5″ IDE drives or multiple devices. The Pi Zero isn’t recommended due to its single USB port and limited power output.
What’s the oldest storage media I can successfully connect to a Raspberry Pi?
You can interface with storage dating back to the late 1970s and early 1980s, including cassette tapes from 8-bit home computers and 8-inch floppy drives with the right adapters. The limiting factor is usually finding a working adapter or building a GPIO interface, not the Raspberry Pi itself.
Do I need special drivers to read vintage storage on Raspberry Pi OS?
Most common vintage formats work with standard Linux drivers already included in Raspberry Pi OS, including IDE, SATA, and USB floppy drives. You may need additional packages for specific file systems like HFS or specialized tools for reading proprietary formats from old computers.
How should I handle damaged or degrading vintage media?
Work quickly but carefully since old magnetic media degrades with each read attempt. Use ddrescue instead of dd to create images, as it can skip bad sectors and retry reads multiple times. Always create a full disk image first before attempting to mount or modify the original media.
Can I read proprietary vintage formats like Commodore 64 floppy disks?
Yes, but you’ll need specialized hardware and software combinations. Standard USB floppy drives can’t handle these formats, so you’ll need solutions like direct GPIO interfacing with vintage controllers or purpose-built adapters that preserve the original low-level disk encoding.
Is it safe to power vintage drives directly from the Raspberry Pi’s USB ports?
Only for low-power devices like modern USB floppy drives or 2.5″ laptop IDE drives. Never attempt to power 3.5″ desktop drives, CD-ROM drives, or anything requiring 12V from the Pi’s USB ports, as this can damage your Raspberry Pi or cause data corruption.
What if my vintage drive isn’t detected after connecting it?
Check power connections first since insufficient power is the most common issue. Run lsblk and dmesg immediately after connecting to see if the kernel recognizes the device, and verify that your adapter’s chipset has Linux support.
Will a powered USB hub solve most power-related problems? Yes, a quality powered hub eliminates the majority of detection and stability issues when working with vintage storage. Choose one with individual port switches so you can control power to each device independently, which helps when dealing with finicky older drives that need a specific power-up sequence. Make sure the hub provides at least 2A per port for demanding devices.
What about reading disks with physical damage or mold? If you spot visible mold or deterioration, clean the media gently with isopropyl alcohol and a lint-free cloth before attempting to read it. For disks with surface damage, ddrescue’s multiple-pass approach gives you the best chance of recovering data, but set realistic expectations since some degradation is irreversible. Store any successfully imaged data redundantly since you may not get another chance to read the original.