

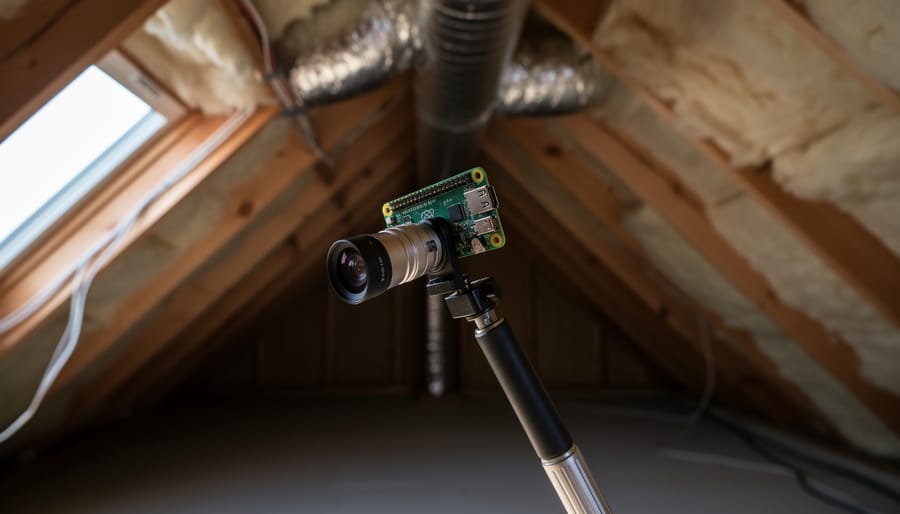
Selling a house in poor condition demands transparency, and building a Raspberry Pi-powered inspection camera gives you complete control over documenting every flaw before potential buyers discover them. Assemble a Pi Zero W with a Camera Module v2 and wide-angle lens to capture high-resolution images in tight spaces like crawlspaces, attics, and behind walls where moisture damage or structural issues hide. Mount the camera on an extendable pole or flexible arm to reach ceiling corners, foundation cracks, and HVAC ductwork without expensive contractor visits.
Program your Pi to automatically timestamp and GPS-tag each photo, creating an organized digital trail that proves disclosure and protects against future liability claims. Configure motion detection to monitor problem areas over several days, revealing intermittent leaks or pest activity that single-visit inspectors miss. Add infrared LEDs for thermal imaging capabilities that expose insulation gaps, water intrusion, and electrical hotspots invisible to the naked eye.
This DIY approach to inspection camera systems costs under 75 dollars compared to hiring professional inspectors at 400-600 dollars per visit. You gain unlimited access to reinspect areas after repairs, document improvement progress, and build a comprehensive condition report that accelerates negotiations. Buyers appreciate sellers who proactively identify issues rather than concealing them, often leading to faster closings despite property defects.
The technical barrier is lower than you think. Basic Python scripts handle image capture, while pre-built camera software like MotionEyeOS requires zero coding knowledge. Whether you’re documenting foundation settling, roof damage, or outdated electrical panels, this project transforms uncertainty into concrete evidence that builds trust and streamlines the entire selling process.
Why Pre-Sale Documentation Matters When Your Home Needs Work
Selling a home that needs work presents unique challenges that can derail even the most motivated transactions. Buyers typically approach fixer-uppers with heightened skepticism, and surprises discovered during professional inspections often lead to renegotiations, reduced offers, or completely abandoned deals. The statistics are sobering: homes with undisclosed defects are significantly more likely to experience failed closings or costly legal disputes after sale.
This is where transparency becomes your most valuable asset. Rather than hoping buyers won’t notice issues or waiting for their inspector to compile a lengthy defect list, proactive documentation puts you in control of the narrative. When you’ve already identified problems and can present clear visual evidence of your home’s condition, you shift from appearing evasive to demonstrating honesty and preparedness.
A Raspberry Pi camera system transforms this documentation process from overwhelming to manageable. Instead of hiring expensive pre-inspectors or relying on smartphone photos that lack consistency, you can systematically photograph every area of concern. The crawl spaces you’ve been avoiding, the attic insulation that needs attention, the foundation cracks you’ve noticed, these all become documented facts rather than hidden liabilities.
The real power lies in prioritization. Once you’ve captured comprehensive footage, you can make informed decisions about which repairs offer the best return on investment. Maybe that cosmetic bathroom issue matters less than addressing visible water damage. Perhaps the roof needs immediate attention while interior paint can wait. Your camera documentation helps you allocate limited budgets strategically.
Furthermore, having visual records protects you during negotiations. When buyers request credits for issues you’ve already disclosed and documented, you’re positioned to respond with evidence-based counteroffers. You’ve demonstrated good faith by being upfront, which often translates to smoother transactions and buyers who feel confident proceeding despite imperfections. This proactive approach doesn’t just prevent surprises, it builds trust that keeps deals on track.
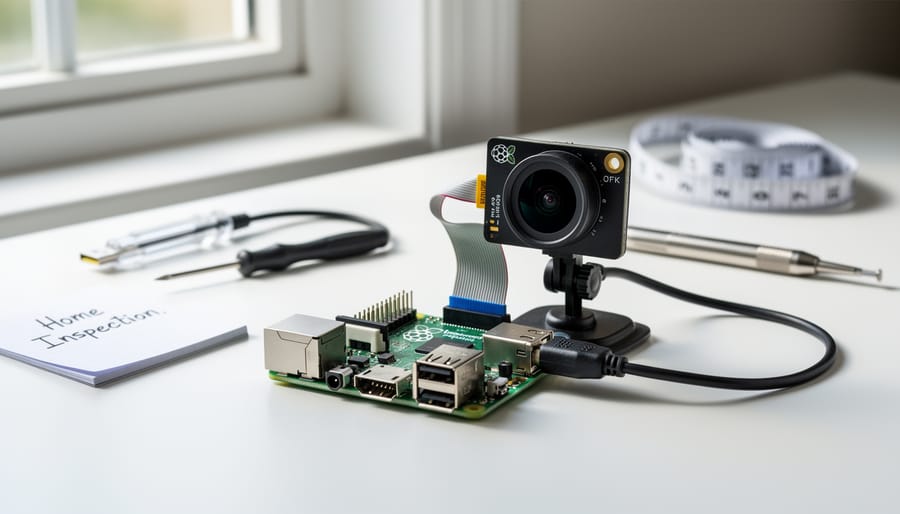
What You’ll Need: Hardware Components Breakdown
The Raspberry Pi Board and Camera Module
Choosing the right hardware is crucial for creating an effective home inspection camera. For most inspection tasks, the Raspberry Pi Zero W offers an excellent balance of portability and capability. Its compact size makes it perfect for squeezing into tight spaces like crawlspaces or behind appliances, while built-in WiFi enables wireless image transfer. However, if you need faster processing for real-time video streaming or plan to add multiple sensors, the Raspberry Pi 4 provides significantly more power, though at the cost of size and higher power consumption.
When selecting Raspberry Pi camera modules, you’ll face a choice between official modules and third-party alternatives. The official Camera Module v2 delivers reliable 8-megapixel images suitable for documenting most home issues. For tighter budgets, third-party options can work well, but verify compatibility with your Pi model first. If you’re inspecting darker areas like attics or basements, consider the Pi NoIR camera, which captures infrared light and works with IR illuminators to see in complete darkness. For professional-grade documentation of significant property defects, the High Quality Camera module’s 12-megapixel sensor and interchangeable lens system provides exceptional detail that can strengthen your disclosure documentation.
Power Solutions for Remote Locations
Navigating cramped attics and dark crawl spaces requires reliable power without hunting for outlets. A quality 10,000mAh power bank easily provides several hours of continuous operation for your Raspberry Pi camera setup, perfect for thorough inspections. Look for models with multiple USB ports to simultaneously power both the Pi and LED lighting accessories.
For extended inspection sessions, consider 20,000mAh capacity banks or explore portable power solutions that offer even greater runtime. Use short, flexible USB cables (6-12 inches) to minimize bulk and prevent snagging on insulation or joists.
A right-angle USB adapter proves invaluable in tight spaces, keeping cables flush against the Pi rather than protruding awkwardly. Mount your power bank directly to your camera pole or housing using velcro straps for a streamlined, tangle-free setup that moves easily through confined areas.
Lighting and Mounting Accessories
Navigating tight crawl spaces, attics, and wall cavities requires the right accessories to make your Raspberry Pi inspection camera truly effective. Start with LED lighting solutions that attach directly to your camera module. Compact LED rings or strip lights powered by your Pi’s GPIO pins illuminate dark corners without requiring separate batteries. For about $5-10, these lights transform grainy footage into clear, detailed documentation of potential issues.
Flexible mounts are essential for reaching awkward angles. Gooseneck mounts or flexible tripod legs allow you to position the camera precisely while keeping your hands free. Look for models with strong grips that can attach to pipes, beams, or shelving units. Extension poles, whether telescoping painter’s poles or simple PVC pipe attachments, help you inspect high ceilings and deep spaces without ladders.
Protection matters when working in dusty, cramped environments. Clear acrylic or 3D-printed cases shield your Pi and camera from debris while maintaining visibility of status LEDs. Consider designs with mounting points for accessories and cable management clips. Waterproof cases add protection for damp basements or crawl spaces, though they may require external battery packs if sealed completely. These accessories collectively transform your basic setup into a professional-grade inspection tool.
Software Setup: Turning Your Pi Into an Inspection Tool
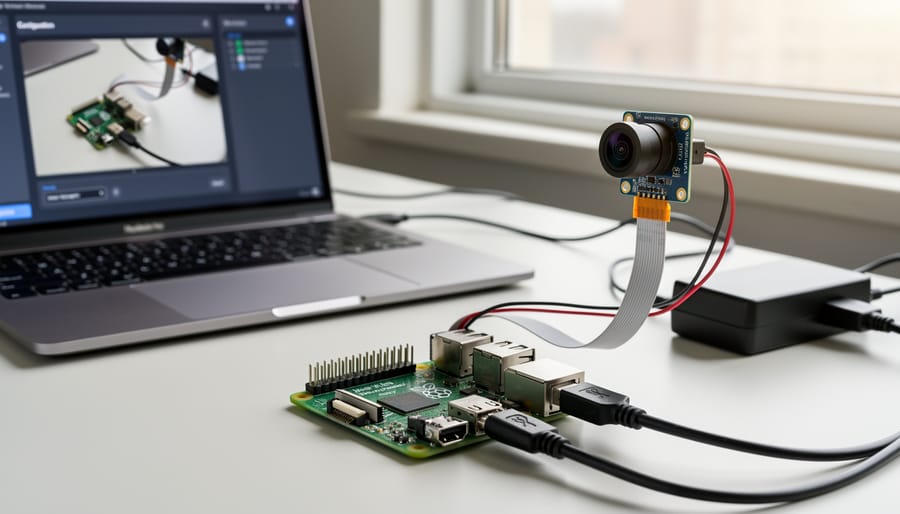
Installing and Configuring Raspberry Pi OS Lite
For a streamlined inspection camera that boots quickly and runs efficiently, Raspberry Pi OS Lite is your ideal choice. This minimal version strips away the desktop environment and unnecessary applications, leaving you with just what’s needed for camera operations and remote access.
Start by downloading Raspberry Pi OS Lite from the official Raspberry Pi website. You’ll need the Raspberry Pi Imager tool to write the image to your microSD card. This free utility works on Windows, macOS, and Linux, making the process remarkably simple.
Insert your microSD card (minimum 8GB recommended) into your computer and launch Raspberry Pi Imager. Select “Raspberry Pi OS (other)” from the operating system menu, then choose “Raspberry Pi OS Lite (32-bit)”. Click the gear icon to access advanced settings where you’ll configure headless operation.
Enable SSH for remote access by checking the appropriate box and setting a secure password for the default “pi” user. Configure your WiFi credentials by entering your network name and password, which allows the Pi to connect automatically on first boot. Set your locale and timezone to ensure accurate timestamps on your inspection footage.
After writing the image and safely ejecting the card, insert it into your Raspberry Pi and power it on. Within a couple of minutes, you can SSH into your device from any computer on the same network using the hostname “raspberrypi.local” or its IP address. Run “sudo apt update && sudo apt upgrade” to ensure all packages are current before proceeding with camera configuration.
Camera Software Options and Configuration
Once you’ve assembled your Raspberry Pi camera hardware, it’s time to choose the right software to capture those crucial home inspection images and videos. Let’s explore three popular options that will help you document your property effectively.
Motion is an excellent choice if you want automatic recording triggered by movement. This lightweight software detects changes in the camera’s field of view and can save images or video clips automatically. For home inspections, this means you can set up the camera in a room and let it capture activity over time, which is perfect for monitoring potential issues like water leaks or pest activity.
RPi-Cam-Web-Interface offers a user-friendly browser-based control panel that’s ideal for beginners. You can access your camera from any device on your network, making it simple to capture still images, record video, or even set up live streaming as you walk through different rooms. The interface provides intuitive controls for adjusting camera settings like resolution, exposure, and image quality without touching the command line.
For those comfortable with coding, custom Python scripts using the picamera2 library give you maximum flexibility. You can create automated routines that capture images at specific intervals, adjust settings based on lighting conditions, or organize files by room location. A simple script can snap high-resolution stills of problem areas every few seconds while you conduct your inspection.
Configuration tips: Set still images to maximum resolution for detailed documentation, use 1080p at 30fps for video walkthroughs, and enable 720p streaming when you need real-time viewing on mobile devices during your inspection.
Setting Up Remote Access and Control
Accessing your inspection camera remotely is essential when navigating tight crawl spaces or hard-to-reach areas. Enable SSH on your Raspberry Pi through the configuration menu (sudo raspi-config) to control it via command line from your smartphone using apps like Termius or JuiceSSH. For visual control, VNC Server comes pre-installed on Raspberry Pi OS and provides a full desktop interface accessible from mobile VNC viewer apps. Simply enable VNC in the interface options and connect using your Pi’s IP address.
For the smoothest experience during inspections, consider setting up a lightweight web interface using Motion or RPi Cam Web Interface. These stream live video directly to your phone’s browser without additional apps. Complete remote access configuration before your inspection day and test connectivity in different rooms. This setup lets you position the camera in confined spaces while monitoring the feed from a comfortable distance, capturing footage of foundation cracks, roof conditions, or plumbing issues that potential buyers need to see documented.
Assembly and Deployment: Making It Inspection-Ready
Mounting the Camera for Flexibility
Getting your Raspberry Pi camera into hard-to-reach areas requires creative mounting solutions. For basic extensions, attach your camera module to telescoping poles commonly used for painting or cleaning. Use zip ties or 3M Command strips to secure the camera housing to the pole end, ensuring the lens faces the area you need to inspect.
For maximum flexibility, consider using a ribbon cable extension for your camera module. These extensions come in lengths up to 1 meter and allow you to snake the camera through tight spaces like crawlspaces or behind appliances. Just be careful not to bend the cable too sharply, as this can damage the delicate connections.
A handheld inspection rig offers excellent control for detailed work. Mount your Raspberry Pi and camera to a small clipboard or acrylic sheet, adding a portable battery pack for mobility. This setup works perfectly for inspecting wall cavities, attic spaces, and under sinks where you need both visibility and maneuverability.
For crawlspace and basement inspections, attach an LED ring light around your camera lens using hot glue or mounting tape. This addition dramatically improves image quality in dark spaces and helps potential buyers see exactly what condition those hidden areas are in.
Protecting Your Setup in Harsh Environments
Home inspections often take you into challenging spaces where electronics typically fear to tread. Protecting your Raspberry Pi camera setup ensures it survives these harsh conditions and delivers the documentation you need.
For damp crawl spaces and basements, moisture is your primary enemy. Consider housing your Raspberry Pi in a waterproof case with IP65 or higher rating. These enclosures keep out dust and water while maintaining visibility for the camera lens. You can find affordable options designed specifically for Raspberry Pi models, or create a DIY solution using waterproof electrical junction boxes with a clear acrylic window for the camera. Add silica gel packets inside the enclosure to absorb any residual moisture.
Dusty attics present different challenges. Fine particles can clog cooling vents and damage circuit boards over time. Use cases with filtered ventilation or opt for fanless operation if you’re only running quick inspection sessions. A microfiber cloth should be handy to wipe the camera lens between shots, as dust significantly degrades image quality.
Temperature extremes also matter. The Raspberry Pi operates reliably between 0°C and 50°C, but attics can exceed this range. Schedule inspections during cooler parts of the day, or allow the equipment to acclimate gradually to avoid condensation when moving between temperature zones.
Physical protection counts too. Attach a sturdy carrying handle to your camera rig and consider adding corner bumpers to absorb accidental impacts against joists or foundation walls. A simple lanyard attachment prevents drops when navigating tight spaces. With these precautions, your inspection camera will reliably document every corner of your property.
Inspection Strategies: What to Document and How
Critical Areas to Inspect Before Listing
Before you list your fixer-upper, you need to document potential issues that buyers will eventually discover anyway. Your Raspberry Pi camera becomes an invaluable tool for accessing and recording hard-to-reach areas that traditional inspections might miss.
Start with roof spaces and attics. Look for water stains, mold growth, inadequate insulation, and structural damage. Your compact Pi camera can navigate tight spaces while capturing clear footage. Use a high-resolution imaging setup to ensure details like small cracks or moisture patches are visible in your documentation.
Foundation crawl spaces require careful attention. Check for standing water, termite damage, foundation cracks, and proper ventilation. Mount your camera on an extension pole or attach it to a small wheeled robot for easier navigation through cramped areas.
For plumbing access points, inspect visible pipes for corrosion, leaks, and outdated materials like polybutylene. Capture images of water heater condition, shut-off valves, and any signs of previous repairs. The Pi camera’s adjustable angles help document pipe connections behind fixtures.
Electrical panels should be photographed clearly, showing breaker labels, any signs of scorching, and overall organization. Document HVAC systems by capturing filter conditions, ductwork integrity, and equipment age labels.
Remember to timestamp all footage and organize files by location. This systematic documentation protects you from liability while demonstrating transparency to potential buyers, ultimately building trust and potentially speeding up your sale process.
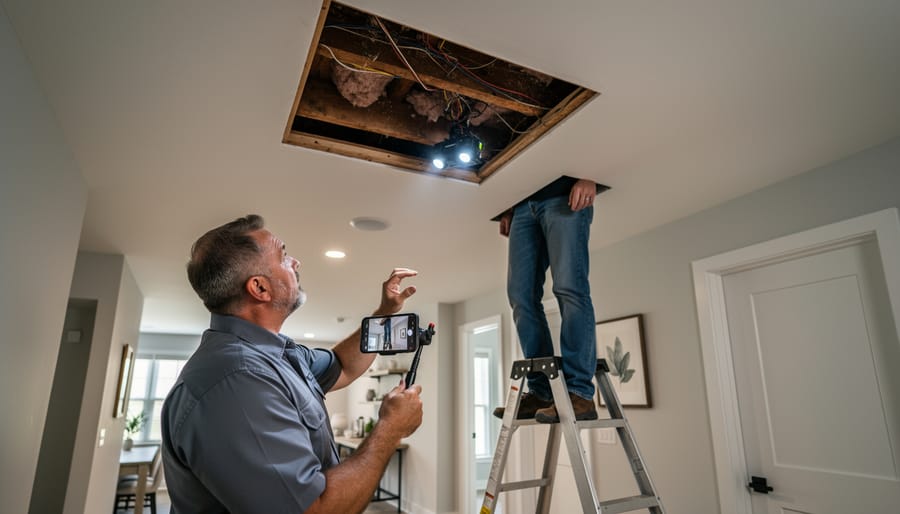
Creating a Visual Inspection Report
Once you’ve captured all your inspection footage, the next step is transforming raw data into a professional, shareable report that potential buyers and inspectors can easily review. Start by organizing your photos and videos into logical folders on your computer, categorized by room or issue type (electrical, plumbing, structural, etc.). This makes navigation simple and demonstrates thoroughness.
Timestamping is crucial for documentation integrity. Your Raspberry Pi camera automatically embeds metadata in each file, but consider using free tools like ExifTool to verify and display this information prominently. For video clips, add visible timestamps using software like OpenShot or Kdenlive. This proves when each inspection occurred and protects you from any disputes about property condition.
Creating the actual report can be straightforward. Use free tools like Google Docs or LibreOffice to compile a document with embedded images and brief descriptions of each finding. For a more polished presentation, consider PDF creators that allow you to arrange photos in a grid layout with captions. Include a summary page highlighting major concerns versus minor issues.
Make your reports easily shareable by uploading them to cloud storage services like Google Drive or Dropbox, then generating shareable links with appropriate permissions. This allows buyers, real estate agents, and contractors to access documentation from any device without large email attachments. Some sellers even create unlisted YouTube videos for walkthrough footage, providing an immersive viewing experience that static photos cannot match.

Advanced Features to Consider Adding
Thermal Imaging and Moisture Detection
Taking your home inspection camera to the next level means incorporating thermal imaging capabilities. While the standard Raspberry Pi camera captures visible light, adding a thermal sensor like the MLX90640 or AMG8833 opens up a world of hidden problems that standard cameras miss entirely.
Thermal sensors excel at detecting temperature variations that indicate insulation gaps around windows and doors, moisture intrusion behind walls, and potential electrical hotspots. These issues are critical for pre-sale inspections because they represent real problems buyers will eventually discover during professional inspections.
The setup is straightforward: connect your thermal sensor to the Raspberry Pi’s GPIO pins and install the accompanying Python libraries. Most thermal modules communicate via I2C protocol, making integration simple even for beginners. You’ll write basic scripts to capture thermal images alongside standard photos, creating comprehensive documentation.
For moisture detection specifically, thermal cameras reveal cooler spots where water has accumulated, since wet materials have different thermal properties than dry ones. This proves invaluable for identifying roof leaks, plumbing issues, or foundation problems before listing your property.
Time-Lapse and Monitoring Capabilities
One of the most powerful features of your Raspberry Pi inspection camera is its ability to capture changes over time. This is particularly valuable when dealing with active issues that potential buyers need to understand. Using simple Python scripts or ready-made tools like raspistill with cron jobs, you can set up automated image capture at regular intervals—every hour, day, or week depending on your needs.
This time-lapse functionality proves invaluable for documenting foundation settling, tracking moisture problems as they develop, or showing the progression of repairs you’re making before listing. For example, if you’re fixing a leaky basement, continuous monitoring creates a visual record proving the issue is resolved. The Raspberry Pi can operate unattended for extended periods, automatically saving timestamped images to an SD card or uploading them to cloud storage. This hands-off approach means you can monitor multiple problem areas simultaneously without constant manual oversight, creating compelling documentation that builds buyer confidence and demonstrates transparency about your property’s condition.
Real-World Benefits: How This Helps Your Sale
Having comprehensive documentation before listing your fixer-upper creates tangible advantages that can make or break your sale. Let’s explore the real-world benefits of using your Raspberry Pi inspection camera system.
First, you gain significant negotiating power. When potential buyers point out issues during showings, you can immediately reference your documented evidence showing you’ve already identified and priced these problems into your asking price. This prevents buyers from using discovered issues as leverage for dramatic price reductions. One homeowner reduced their average price negotiation from 8% to just 3% by presenting timestamped inspection footage upfront.
Second, you eliminate surprise contingencies that derail deals. The inspection contingency period is where most fixer-upper sales fall apart. Buyers discover unexpected problems and either walk away or demand major concessions. By conducting your own thorough inspection first, you’ve already factored known issues into your pricing strategy. This transparency actually attracts serious buyers who appreciate knowing exactly what they’re getting into, rather than gambling on unknown problems.
Third, your documentation demonstrates good faith and builds trust. Presenting organized inspection footage shows you’re an honest seller, not someone hiding problems. This psychological advantage is particularly valuable in competitive markets where multiple fixer-uppers are available. Buyers remember the seller who was upfront about foundation cracks or electrical concerns.
The financial impact is measurable. Homes sold with pre-inspection documentation typically spend 15-20 fewer days on market and receive offers closer to asking price. Your Raspberry Pi camera system costs under $100 to build but can save thousands in negotiations while accelerating your sale timeline. For tech-savvy homeowners, this project transforms a potential liability into a documented, manageable selling point.
Knowledge is power, especially when you’re preparing to sell your home. By building your own Raspberry Pi pre-sale inspection camera, you’ve gained the invaluable advantage of discovering issues before potential buyers do. This proactive approach transforms what could be uncomfortable surprises during professional inspections into opportunities for honest disclosure and strategic pricing decisions.
The financial benefits alone make this project worthwhile. While professional pre-listing inspections typically cost between $300 and $500, your DIY Raspberry Pi solution comes in under $100 for basic setups. Even with additional accessories like flexible mounts or better lighting, you’re still saving substantially while gaining reusable equipment for future projects.
More importantly, transparency has become a powerful selling strategy in today’s real estate market. Buyers appreciate sellers who openly acknowledge a property’s condition rather than hiding problems. Your documented inspection footage demonstrates good faith and can actually speed up sales by attracting the right buyers—those specifically interested in fixer-uppers who value honest assessments over glossy presentations.
Starting this project might seem daunting if you’re new to Raspberry Pi, but the learning curve is gentler than you’d expect. The skills you develop while building your inspection camera extend far beyond this single application, opening doors to countless other home automation and monitoring projects.
Take that first step today. Your future self—and your home buyers—will thank you for the transparency and thoroughness this simple yet powerful tool provides.