

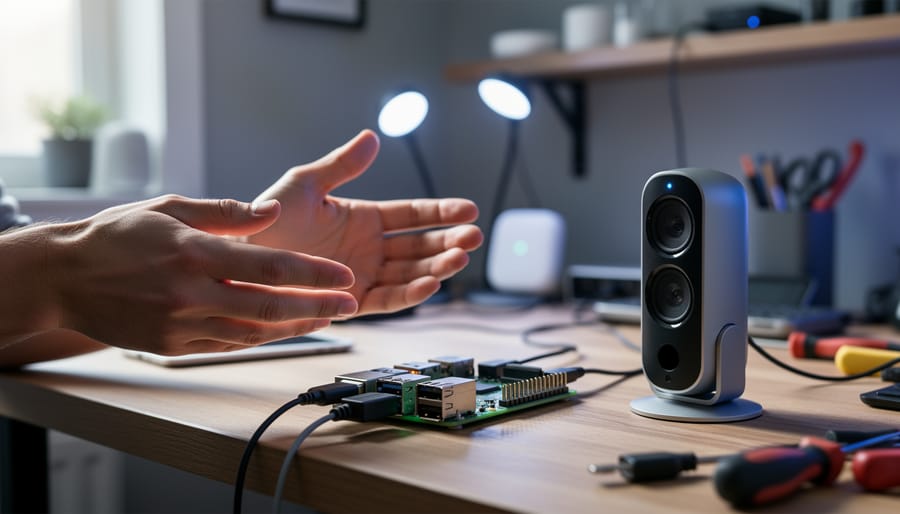
Q voice assistant is an open-source voice control system designed for privacy-conscious users who want to run their own personal AI assistant on local hardware like the Raspberry Pi. Unlike cloud-dependent alternatives such as Alexa or Google Assistant, Q processes voice commands entirely on your device, keeping your conversations and data under your control.
The growing demand for privacy-focused technology has made Q particularly relevant for makers and hobbyists in 2026. You get the convenience of voice-activated automation for your smart home, projects, and daily tasks without sending audio recordings to corporate servers. This matters whether you’re building a custom home automation setup, creating educational tools, or simply want to explore AI without compromising your personal information.
Q stands out because it’s built specifically for resource-constrained devices. The Raspberry Pi 4 and 5 can run Q smoothly, making it accessible for beginners while offering enough flexibility for advanced users to customize everything from wake words to response behavior. You can train it to understand your specific commands, integrate it with existing projects, and modify the source code to fit unique requirements.
This article breaks down exactly what Q voice assistant is, how its personalization engine works behind the scenes, which components you need to get started, and practical applications you can build today. You’ll also find a complete setup tutorial that takes you from a fresh Raspberry Pi installation to your first working voice command in under an hour.
What Q Voice Assistant Means for Raspberry Pi Projects
Q voice assistant is an open-source, privacy-focused voice platform designed to run entirely on local hardware, making it an ideal match for Raspberry Pi projects. Unlike commercial assistants that send your voice data to corporate servers for processing, Q performs speech recognition, natural language understanding, and personalization directly on your device. This means faster response times, complete control over your data, and no reliance on internet connectivity for basic functions.
The assistant’s modular architecture lets you customize every component, from the wake word you use to activate it, to the skills it can perform. You can strip out features you don’t need, add custom capabilities tailored to your specific project, and modify the underlying code to experiment with new approaches. This flexibility is what sets Q apart from locked-down platforms like Alexa or Google Assistant, where you’re limited to what the manufacturer allows.
For Raspberry Pi enthusiasts, Q offers a practical entry point into voice AI without the complexity of building from scratch. The project builds on the foundation laid by earlier open-source voice assistants like Mycroft on Raspberry Pi but with streamlined setup and lower resource requirements. You can run Q on a Raspberry Pi 4 with 2GB RAM and still have processing power left for other tasks, or deploy it on a Pi Zero 2 W for compact, dedicated voice projects.
- Wake Word
- A specific phrase that activates the voice assistant and signals it to start listening for commands, similar to “Hey Google” or “Alexa.”
- Natural Language Processing (NLP)
- The AI technology that enables Q to understand the meaning and context of spoken words, not just transcribe them.
- Speech-to-Text (STT)
- The component that converts your spoken words into written text that the system can analyze and process.
- Text-to-Speech (TTS)
- The engine that generates spoken responses by converting Q’s text-based replies into audible speech.
- Intent Recognition
- The process of determining what action you want the assistant to perform based on your command, such as setting a timer or checking the weather.
What makes Q particularly valuable for makers is its transparent operation. You can inspect exactly how it processes your voice commands, modify its behavior at the code level, and integrate it with any other software or hardware running on your Pi. There’s no proprietary API limiting what you can connect, no licensing fees for commercial use, and no risk of the service being discontinued because a company changed its priorities.
How Q Voice Assistant Works
The Role of AI-Driven Personalization
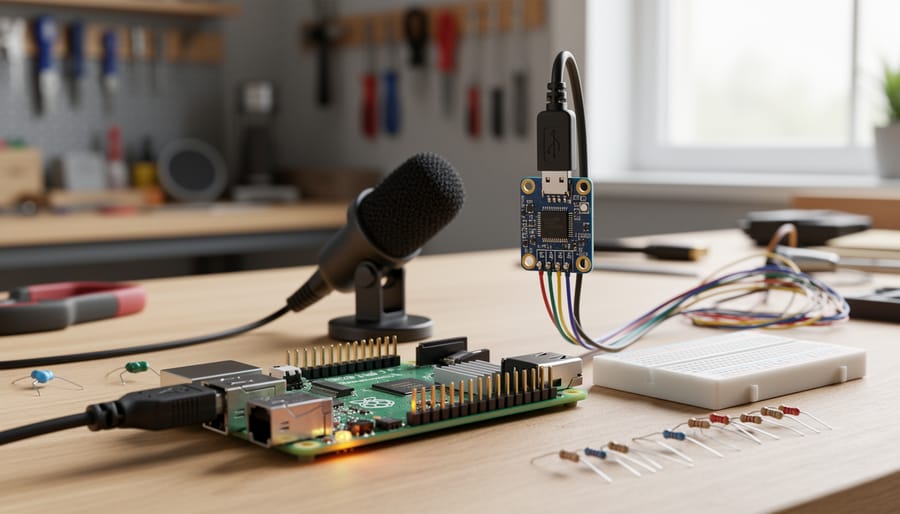
Q’s personalization engine learns from every interaction you have with it, building a model of your speech patterns, preferences, and habits over time. When you first set up Q, it relies on general language models. Within days, however, the system begins recognizing your voice’s unique characteristics, your accent, speaking pace, commonly used phrases, and even the context in which you issue certain commands. If you regularly ask about weather at 6 AM before requesting coffee machine control, Q learns this sequence and can proactively offer relevant suggestions.
The machine learning pipeline operates in two distinct ways depending on your configuration. In cloud-assisted mode, Q uploads anonymized interaction data to remote servers where more powerful neural networks refine the personalization models, then download updated parameters back to your device. This approach delivers faster adaptation and access to broader language understanding but requires constant internet connectivity and raises privacy considerations.
Alternatively, a no-cloud setup keeps all learning strictly on your Raspberry Pi. The device runs lightweight models that adapt through incremental learning, each successful command slightly adjusts the neural network weights stored locally. This method protects your privacy completely since no voice data leaves your network, though adaptation happens more gradually and the system won’t benefit from aggregate improvements across multiple users.
Q’s personalization extends beyond speech recognition to intent understanding. If you say “turn on the lights” in your office during work hours versus your bedroom at night, Q learns these contextual preferences. It tracks which smart devices you control most frequently, which music genres you prefer at different times, and even adjusts response verbosity based on whether you typically want brief confirmations or detailed explanations.
Hardware Requirements for Raspberry Pi
Running Q voice assistant on a Raspberry Pi requires careful hardware selection to ensure smooth performance. The processor-intensive nature of speech recognition and AI personalization means not all Pi models deliver the same experience.
The Raspberry Pi 4 with 4GB or 8GB RAM represents the sweet spot for most Q installations. It handles wake word detection, speech processing, and personalization tasks without noticeable lag. The Pi 5, with its improved CPU and memory bandwidth, offers even better responsiveness and can manage more complex skills simultaneously. You’ll experience faster command processing and smoother interactions with smart home integrations.
The Raspberry Pi Zero 2 W presents a budget option but comes with trade-offs. While technically capable of running Q, expect slower response times and limited multitasking. It works best for simple voice commands in low-demand scenarios like bedroom lights or basic information queries. Avoid it for projects requiring quick responses or running multiple services.
Beyond the board itself, you’ll need quality peripherals. A USB microphone with noise cancellation dramatically improves recognition accuracy. The PlayStation Eye camera or ReSpeaker arrays work well for far-field detection. For audio output, any powered speaker or headphones connected via the 3.5mm jack or USB will suffice.
Storage matters too. Use a fast microSD card (Class 10 or better) or, ideally, boot from an external SSD via USB 3.0 on the Pi 4 or 5. This prevents bottlenecks during the intensive read-write operations that personalization features generate.
Core Components and Features of Q

Q voice assistant builds on a modular architecture where discrete components work together to deliver a responsive, customizable experience. Unlike monolithic commercial assistants, Q separates core functions into independent modules you can configure, replace, or extend based on your project needs.
The speech engine handles the fundamental task of converting spoken words into text and generating audio responses. This component includes the wake word detector that listens for your chosen activation phrase, an automatic speech recognition (ASR) module that transcribes your commands, and a text-to-speech (TTS) system that converts Q’s responses back into natural-sounding audio. The modular design lets you swap TTS engines depending on whether you prioritize naturalness, speed, or offline capability, making it ideal for voice synthesis projects where audio quality matters.
At the heart of Q sits the skills and plugins systemwhich defines what your assistant can actually do. Skills are self-contained modules that handle specific tasks: checking weather, controlling smart lights, setting timers, or playing music. You can install community-developed skills from the Q repository, modify existing ones to suit your needs, or write custom skills in Python to integrate with any service or device your Raspberry Pi can access. This extensibility transforms Q from a basic voice interface into a platform for building exactly the assistant you need.
The personalization engine distinguishes Q from simpler voice assistants by learning from your interactions. It tracks which skills you use most, adapts to your speech patterns and accent over time, remembers context from previous commands, and tailors responses based on time of day or usage patterns. This layer runs primarily on-device, keeping your behavioral data local while still delivering the adaptive experience users expect from modern AI assistants.
Key capabilities available in Q for 2026 include:
- Offline operation for core functions without internet dependency
- Multi-language support with community-contributed language packs
- Custom wake word training for personalized activation phrases
- Voice profile management supporting multiple household users
- Scheduled routines and automation triggers
- Real-time intent parsing with contextual command understanding
Privacy controls give you granular authority over data handling. You decide whether voice recordings are stored, whether the personalization engine can learn from your commands, and which skills can access network resources. A built-in dashboard shows exactly what data Q has collected and lets you delete it selectively or entirely. Because Q runs locally on your Pi, you maintain physical control over the hardware processing your voice data.
The integration APIs expose Q’s functionality to other applications and services running on your Raspberry Pi. REST endpoints let you trigger skills programmatically, subscribe to event streams, and query the assistant’s state. MQTT support enables seamless integration with home automation systems, while the Python SDK gives developers direct access to Q’s internal functions for building tightly coupled applications. These APIs transform Q from a standalone assistant into a voice interface layer you can embed in larger projects.
What You Can Do with Q Voice Assistant
Home Automation Projects
Q transforms your Raspberry Pi into a voice-controlled hub for managing everything from lights and thermostats to door locks and security cameras. Unlike commercial assistants that lock you into specific ecosystems, Q’s open-source nature lets you integrate virtually any smart device through protocols like MQTT, Zigbee, or Z-Wave. You can create custom voice commands that trigger multi-step automations, say “goodnight” to turn off all lights, lock doors, arm your security system, and adjust the thermostat simultaneously. Pair Q with Home Assistant or openHAB running on your Pi to control Philips Hue bulbs, TP-Link smart plugs, Sonoff switches, or DIY sensors built with ESP32 boards. For a more interactive setup, combine Q with a touchscreen assistant to get visual feedback alongside voice control, perfect for a centralized smart home control panel in your kitchen or hallway. The real power emerges when you connect Q to IoT sensors: motion detectors that announce visitors, temperature probes that vocalize readings, or moisture sensors that alert you to water leaks, all responding to natural voice queries.
Educational and Accessibility Uses
Q voice assistant opens new doors for education and accessibility, particularly when cost and customization matter. In classrooms, teachers have built Q-powered Raspberry Pi stations where students interact with learning modules through voice, asking math problems aloud, requesting science facts, or practicing spelling words without touching a keyboard. The open-source nature means educators can tailor responses to specific curricula or reading levels.
For accessibility, Q transforms Raspberry Pi into affordable assistive devices. Users with limited mobility control lights, thermostats, or computers entirely by voice. Visually impaired students use Q to read text aloud from connected cameras, navigate educational content, or set reminders, all running locally for privacy. One community project converted Q into a reading companion that paces itself to individual comprehension speeds.
Language learners benefit from Q’s pronunciation feedback and conversation practice. Since you control the underlying models, you can emphasize specific vocabularies or regional accents. STEM educators use Q as a hands-on platform where students learn programming by creating custom voice skills, connecting sensors, or building voice-controlled robots, teaching both AI concepts and practical coding simultaneously.
Setting Up Q on Your Raspberry Pi
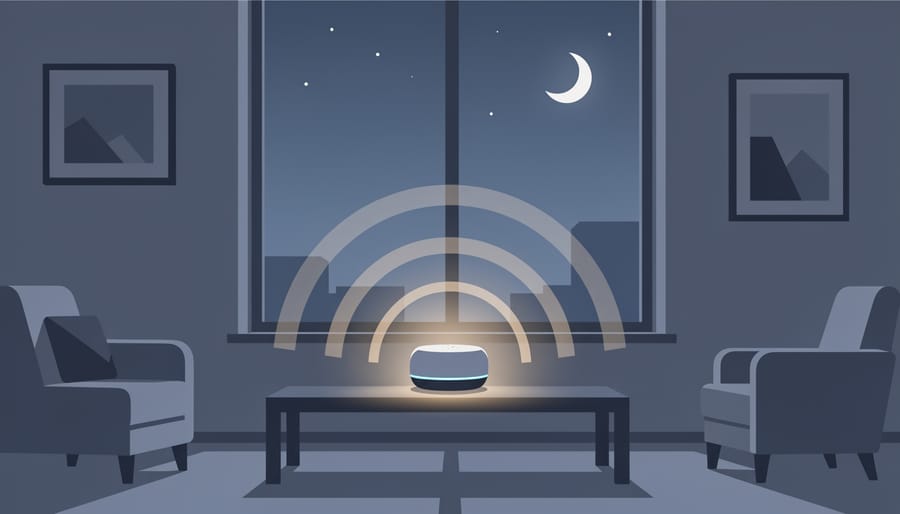
Before you begin setting up Q voice assistant on your Raspberry Pi, make sure you have a Raspberry Pi 4 or Pi 5 with at least 4GB of RAM, a microSD card with 16GB or more storage running Raspberry Pi OS (64-bit recommended), a USB microphone or HAT with microphone array, and speakers or a 3.5mm audio output device. You’ll also need a stable internet connection for the initial download and setup.
Start by updating your system packages. Open a terminal and run `sudo apt update && sudo apt upgrade -y` to ensure you have the latest software. This prevents compatibility issues with dependencies. Next, install the required audio libraries by running `sudo apt install portaudio19-dev python3-pyaudio python3-pip git -y`. These packages handle audio input and output processing that Q relies on.
Clone the Q voice assistant repository from GitHub using `git clone ` (note: this is a placeholder path; consult the official Q documentation for the actual repository). Navigate into the directory with `cd q-core` and install Python dependencies by running `pip3 install -r requirements.txt`. This process takes several minutes as it downloads machine learning models and speech recognition libraries.
Configure your audio devices next. Run `arecord -l` to list available microphones and `aplay -l` to list speakers. Note the card and device numbers for your hardware. Edit the Q configuration file using `nano config.yaml` and update the audio section with your hardware details. Set `microphone_device` to your input device number and `speaker_device` to your output device number. Save the file with Ctrl+X, then Y, then Enter.
Now initialize Q by running `python3 q_setup.py`. This script tests your audio configuration, downloads the base language model, and creates your user profile. When prompted, speak clearly to record your voice sample for personalization. The setup wizard asks for your preferred wake word (default is “Hey Q”), timezone, and measurement units. Complete these steps to finish the basic configuration.
Test your installation by starting Q with `python3 q_start.py`. Wait for the terminal to display “Ready for commands.” Say your wake word followed by a simple command like “What time is it?” Q should respond through your speakers. If you hear the wake word chime but no response, check your speaker connections and volume levels using `alsamixer`.
Common issues include microphone sensitivity problems (adjust gain in `config.yaml` under `microphone_gain`), delayed responses (check CPU usage with `top` and consider overclocking if below 1.8GHz), and wake word false triggers (increase threshold in configuration from default 0.5 to 0.7). If Q fails to start, verify all dependencies installed correctly by running `pip3 list` and comparing against `requirements.txt`.
To run Q automatically at boot, create a systemd service file with `sudo nano /etc/systemd/system/q-assistant.service` and configure it to launch the Q startup script. Enable it using `sudo systemctl enable q-assistant.service`. Your Raspberry Pi will now start Q every time it powers on, ready to respond to voice commands.
Privacy and Security Considerations
Running Q on your Raspberry Pi gives you significant control over your voice data, but understanding the privacy trade-offs is essential. Unlike commercial assistants that route most processing through cloud servers, Q lets you choose between fully local operation and cloud-assisted features.
In local-only mode, all wake word detection, speech recognition, and intent processing happen on your Raspberry Pi. Your voice recordings never leave the device, and no transcripts get uploaded to external servers. This setup maximizes privacy but requires more powerful hardware (a Pi 4 with at least 4GB RAM works best) and limits access to some advanced AI features that demand cloud computing power.
When you enable cloud-assisted features for better natural language understanding or third-party integrations, Q sends voice snippets to processing servers. The key difference from commercial assistants: you can configure which queries trigger cloud processing and which stay local. Time-sensitive commands like “turn off the lights” can run entirely on-device, while complex queries might use cloud services.
Voice recordings in Q are temporary by default. Local processing deletes audio after transcription, keeping only the text intent for personalization learning. You can disable even this logging in the settings if you prioritize privacy and ethics over adaptive learning.
For security, change Q’s default administrator password immediately after installation, enable SSH key authentication instead of password login, and keep your Raspberry Pi OS updated. If you’re exposing Q to your home network, place your Pi behind a firewall and avoid opening ports to the internet unless you’ve configured VPN access. Regular backups of your Q configuration protect against SD card failures and let you quickly restore your personalized settings.
Frequently Asked Questions
Can Q run completely offline on my Raspberry Pi?
Yes, Q is designed with offline capability as a core feature. The speech recognition engine processes most commands locally on your Raspberry Pi without requiring an internet connection. You’ll need connectivity only for internet-dependent tasks like weather lookups, web searches, or controlling cloud-based smart home devices. This makes Q particularly valuable for privacy-conscious users and projects in locations with unreliable internet access.
How does Q’s performance compare to commercial assistants like Alexa or Google Assistant?
Q trades some raw speed and polish for privacy and customization. Commercial assistants leverage massive cloud infrastructure and years of data collection, giving them faster response times and broader general knowledge. However, Q excels where it matters for Raspberry Pi projects: complete control over your data, the ability to create custom behaviors without corporate restrictions, and surprisingly accurate performance on even modest hardware like the Pi 4. For specialized tasks and personalized workflows, Q often outperforms commercial options because you can train it exactly for your needs.
What programming skills do I need to create custom skills for Q?
Can Q work completely offline?
Yes, Q processes most voice commands locally on your Raspberry Pi. You only need internet for tasks that inherently require it, like web searches or cloud-connected smart devices.
How does Q compare to Alexa or Google Assistant?
Q offers complete privacy control and unlimited customization at the cost of some speed and polish. Commercial assistants are faster for general queries, but Q excels at personalized, specialized tasks you can train yourself.
What languages does Q support?
Q currently supports English, Spanish, French, and German natively. The community has contributed experimental support for several additional languages, though accuracy varies.
Can beginners successfully set up Q?
Absolutely. If you can follow basic command-line instructions and have set up a Raspberry Pi before, you can install Q. The community provides detailed tutorials and troubleshooting support for newcomers.
Basic Python knowledge is helpful but not strictly required for simple skills. Q’s skill framework uses straightforward Python scripts with clear templates you can modify. Many users start by copying existing skills and adjusting the responses and actions to their needs. If you can edit a configuration file and understand basic if-then logic, you can create functional custom skills. The Q documentation includes beginner-friendly examples that walk you through creating your first skill step by step.
Where can I find help if I run into problems?
The Q community maintains an active Discord server and subreddit where experienced users help troubleshoot issues, often responding within hours. The official GitHub repository includes comprehensive documentation, and many community members have published video tutorials covering common setup challenges. For hardware-specific questions related to Raspberry Pi compatibility, the Raspberry Pi forums also have dedicated threads where Q users share solutions.
Q voice assistant represents a significant opportunity for Raspberry Pi enthusiasts who want control, privacy, and genuine personalization in their voice-enabled projects. Unlike commercial assistants that lock you into proprietary ecosystems, Q gives you the freedom to build exactly what you need, whether that’s a custom smart home hub, an educational tool, or an accessibility device that adapts to individual users.
The AI-driven personalization layer is what makes Q genuinely useful over time. As it learns your speech patterns, preferences, and routines, it becomes more accurate and context-aware without sending your voice data to cloud servers. This local processing approach means you maintain ownership of your interactions while still benefiting from adaptive intelligence.
Start experimenting with Q on your Raspberry Pi 4 or Pi 5 today. The Q voice assistant community maintains active forums, detailed documentation, and ready-made skills you can deploy immediately. Join the discussion on the official Q Discord server or browse the GitHub repository for example projects that range from simple wake-word demos to fully integrated home automation systems. The best way to understand Q’s potential is to build something with it, so grab a microphone, flash your SD card, and see what you can create.