


Transform your Raspberry Pi into a versatile synthesizer powerhouse by connecting a MIDI keyboard, installing Sonic Pi, and leveraging Raspberry Pi’s powerful capabilities for real-time audio processing. Building a DIY synthesizer with Raspberry Pi combines affordable hardware with professional-grade sound synthesis, opening up endless possibilities for music creation and experimentation.
Install Pure Data or SuperCollider alongside custom GPIO controls to create a fully customizable synthesizer interface that rivals commercial units at a fraction of the cost. The Pi’s 40-pin GPIO header enables direct connection to potentiometers, buttons, and LED indicators, transforming your creation into a professional-grade instrument.
Master synthesis fundamentals through hands-on experimentation with oscillators, filters, and envelope generators, all while learning valuable coding and electronics skills. Whether you’re a musician seeking affordable synthesis tools or a maker passionate about audio electronics, the Raspberry Pi synthesizer project delivers studio-quality sound generation in a compact, hackable package.
Connect multiple Raspberry Pi synths via network protocols to create a distributed sound processing system, enabling complex audio routing and collaborative music creation. This modular approach allows for endless expansion and customization of your synthesizer setup.

Essential Hardware Setup for Pi Synthesis
Audio Interface Options
When it comes to audio interfaces for your Raspberry Pi synthesizer project, you have several compelling options to consider. The most straightforward solution is using the built-in 3.5mm audio jack, which provides decent sound quality for basic synthesis projects. However, for better audio fidelity, you might want to explore dedicated audio interfaces.
The HiFiBerry DAC+ Pro is a popular choice among synth enthusiasts, offering 192kHz/24-bit audio output and exceptional sound clarity. It connects directly to the Raspberry Pi’s GPIO pins and requires minimal setup. Another excellent option is the Audio Injector Zero, which provides both input and output capabilities, making it ideal for sampling and live recording applications.
For those seeking USB solutions, the Behringer UCA202 offers an affordable entry point with reliable performance. It provides RCA outputs and is widely compatible with various Linux audio systems. The Focusrite Scarlett Solo is a higher-end alternative that delivers professional-grade audio quality, though it requires more power and setup consideration.
Budget-conscious makers can also consider the pHAT DAC, a compact solution that doesn’t compromise on quality. It’s particularly suitable for portable synth projects due to its small footprint and efficient power usage.
Remember that your choice should depend on your specific needs: consider factors like audio quality requirements, portability, power consumption, and whether you need input capabilities for sampling or recording.
MIDI Controller Integration
Integrating a MIDI controller with your Raspberry Pi synthesizer setup opens up a world of expressive musical possibilities. Most USB MIDI keyboards and controllers work seamlessly with the Pi through plug-and-play functionality, though some older devices might require additional configuration.
To connect your MIDI controller, simply plug it into one of the Raspberry Pi’s USB ports. The system should recognize it automatically. You can verify the connection by opening a terminal and running ‘aconnect -l’ to list all MIDI devices. Your controller should appear in the list of available ports.
For optimal performance, ensure your MIDI controller is connected before launching your synthesis software. Most popular music applications like Pure Data and Sonic Pi automatically detect connected MIDI devices. If you’re using traditional DIN MIDI connections, you’ll need a MIDI-to-USB adapter, which typically costs around $10-20.
To configure your controller, use the ALSA MIDI configuration tools. The command ‘aconnect -i’ shows input ports, while ‘aconnect -o’ displays output ports. Connect devices by using ‘aconnect [input] [output]’ with the appropriate port numbers.
Common troubleshooting steps include:
– Checking USB power supply (some controllers need powered USB hubs)
– Verifying MIDI routing in your software
– Ensuring proper driver installation
– Testing different USB ports
Remember to save your MIDI configuration settings to avoid reconfiguring after each reboot.
Software Solutions for Pi Synthesis
Pure Data Installation
Pure Data (Pd) is an essential component for turning your Raspberry Pi into a synthesizer. This open-source visual programming environment offers powerful audio processing capabilities, and installing it on your Pi is straightforward.
First, ensure your Raspberry Pi is running the latest version of Raspberry Pi OS and is connected to the internet. Open the terminal and update your system by running:
sudo apt update
sudo apt upgrade
To install Pure Data, enter the following command:
sudo apt install puredata
For enhanced functionality, you’ll want to install some additional libraries and externals. Enter these commands:
sudo apt install pd-extended
sudo apt install pd-vanilla
Once the installation is complete, you can launch Pure Data by typing ‘puredata’ in the terminal or finding it in your applications menu. Before diving in, it’s important to configure your audio settings:
1. Launch Pure Data
2. Go to Media > Audio Settings
3. Select “ALSA” as your audio system
4. Set both input and output devices to your preferred audio interface
5. Click “Apply” and “OK”
To ensure Pure Data starts smoothly with your projects, create a startup script:
1. Open a text editor
2. Add the line: puredata -nogui your_patch.pd
3. Save as “start_pd.sh”
4. Make it executable with: chmod +x start_pd.sh
Test your installation by creating a simple sine wave patch. If you hear sound, congratulations – you’re ready to start experimenting with synthesis on your Raspberry Pi!
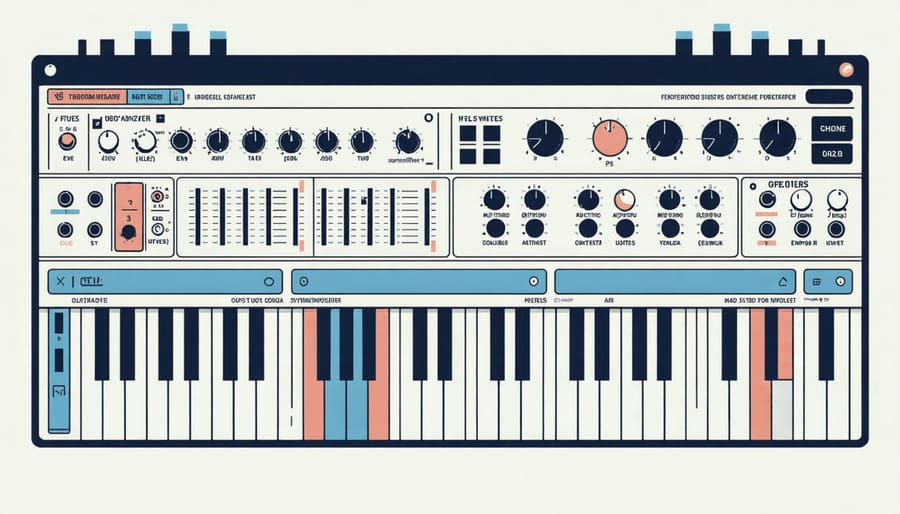
Sonic Pi Configuration
Getting started with Sonic Pi on your Raspberry Pi is straightforward, but proper configuration is essential for the best synthesis experience. First, ensure you’re running the latest version of Sonic Pi, which comes pre-installed on recent Raspberry Pi OS images. If you need to update, use the package manager by running ‘sudo apt-get update’ followed by ‘sudo apt-get install sonic-pi’ in the terminal.
Launch Sonic Pi and familiarize yourself with the interface. The main window consists of multiple buffers where you’ll write your code, and a log panel that displays useful information about your synthesis operations. To optimize performance, adjust the audio settings by clicking on Preferences in the top menu. Set your audio latency to a value between 50-100ms for a good balance between responsiveness and stability.
Configure your workspace by enabling line numbers and auto-completion in the Editor tab of Preferences. These features will help you write and debug your synthesis code more efficiently. For better sound quality, ensure your audio output is properly selected in the Audio tab. If you’re using external speakers or an audio interface, make sure they’re selected as the output device.
Memory management is crucial for smooth operation. In the Studio tab, you can adjust the synthesis memory limit. For basic synthesis, 256MB should suffice, but increase this if you plan to work with complex arrangements or multiple synths simultaneously. Enable auto-save to prevent losing your work, and consider setting up custom keyboard shortcuts for frequently used commands.
Remember to reboot your Raspberry Pi after making significant configuration changes to ensure all settings are properly applied.

Creating Your First Synthesizer Patch
Oscillator Setup
The heart of any synthesizer lies in its oscillators, which generate the basic waveforms that form your sounds. In our Raspberry Pi synth setup, we’ll configure four fundamental waveform types: sine, square, sawtooth, and triangle waves.
To begin, launch the Python IDE and create a new oscillator class. Each waveform requires different mathematical calculations:
For sine waves, use the numpy library’s sin() function to generate smooth, rounded tones perfect for bass and pure sounds. The code is straightforward:
oscillator = np.sin(2 * np.pi * frequency * t)
Square waves produce a more harsh, electronic sound. Generate these using the np.sign() function:
oscillator = np.sign(np.sin(2 * np.pi * frequency * t))
Sawtooth waves create bright, buzzy tones ideal for leads and aggressive sounds. Use the following formula:
oscillator = 2 * (t * frequency – np.floor(0.5 + t * frequency))
Triangle waves offer a middle ground between sine and square waves. Generate them with:
oscillator = 2 * abs(2 * (t * frequency – np.floor(0.5 + t * frequency))) – 1
Remember to implement amplitude control for each oscillator to adjust the volume. A simple multiplication factor between 0 and 1 will work:
final_output = oscillator * amplitude
Test each waveform individually before combining them. This ensures proper functionality and helps you understand their unique characteristics.
Filter and Effects
Adding filters and effects to your Raspberry Pi synthesizer can transform basic waveforms into rich, complex sounds. Start by implementing a basic low-pass filter using Python’s NumPy library, which helps smooth out harsh frequencies and adds warmth to your synth’s output. You can adjust the cutoff frequency in real-time using a potentiometer connected to your Pi’s GPIO pins.
For delay effects, create a simple buffer that stores audio samples and plays them back after a specified time interval. This creates everything from subtle echoes to spacey, ambient textures. Experiment with feedback levels by feeding a portion of the delayed signal back into the buffer.
Distortion effects can be achieved by applying wave-shaping functions to your audio signal. Start with simple clipping algorithms and progress to more complex functions like cubic or exponential distortion. Remember to include a mix control to blend the dry and processed signals.
For modulation effects, implement an LFO (Low-Frequency Oscillator) to create tremolo, vibrato, or filter sweeps. Connect the LFO to different parameters of your synth for evolving, dynamic sounds. Consider using multiple LFOs at different rates for complex modulation patterns.
Don’t forget about reverb! While computationally intensive, you can implement basic room simulation using delay lines and feedback networks. Start with simple room algorithms and optimize your code to maintain stable performance on the Pi.
Remember to monitor your CPU usage when adding effects, as complex processing chains can impact performance. Consider using buffer sizes that balance latency with processing overhead.
Performance Optimization Tips
Getting the best performance from your Raspberry Pi for audio synthesis requires careful optimization. Start by overclocking your Pi safely through the raspi-config tool, but monitor temperatures to prevent overheating. A small heatsink and fan can help maintain stable performance during intensive synthesis tasks.
Memory management is crucial for smooth audio processing. Allocate more RAM to your audio applications by adjusting the GPU memory split in raspi-config. For synthesis work, setting GPU memory to 128MB is usually sufficient, leaving more RAM for your real-time processing capabilities.
Optimize your system by disabling unnecessary services. Using systemctl, disable Bluetooth, WiFi, and other unused services that might interrupt audio processing. Install a lightweight desktop environment like LXDE, or better yet, run your synth headless for maximum performance.
Buffer settings in your audio configuration are critical. Edit your /etc/asound.conf file to adjust buffer sizes – smaller buffers reduce latency but may cause audio glitches, while larger buffers are more stable but increase latency. Start with a buffer size of 256 and adjust based on your needs.
Use real-time scheduling priorities for your audio processes. Add your user to the audio group and configure JACK with real-time privileges. Edit the limits.conf file to allow real-time scheduling, which significantly improves audio timing accuracy.
Finally, maintain a clean system by regularly removing unused packages and temporary files. Keep your system updated but avoid major updates before important performances. Consider creating a backup image of your optimized system to quickly restore your setup if needed.
Remember to monitor CPU usage with top or htop while running your synth applications. If you notice performance issues, use these tools to identify and address resource-hungry processes that might affect your audio synthesis quality.
Building a synthesizer with your Raspberry Pi opens up endless possibilities for musical creation and experimentation. Throughout this guide, we’ve explored the essential components, software options, and practical steps needed to transform your Pi into a powerful music synthesis tool. Whether you’re a beginner or an experienced maker, this project represents just one of many exciting Raspberry Pi projects you can undertake.
Remember to start with the basics: ensure your hardware setup is correct, take time to understand the fundamental concepts of synthesis, and gradually explore more advanced features as you become comfortable. The beauty of using Raspberry Pi for synthesis lies in its flexibility and potential for customization. You can continually expand your setup by adding new modules, experimenting with different software synthesizers, or even creating your own custom patches.
For your next steps, consider joining online communities dedicated to Raspberry Pi music making, where you can share experiences and learn from others. Don’t be afraid to experiment with different configurations and push the boundaries of what’s possible. With regular practice and exploration, you’ll soon be creating unique sounds and musical experiences with your DIY synthesizer.
Whether you’re building a simple monophonic synth or aiming for a complex modular system, the skills you’ve learned here will serve as a strong foundation for future audio projects.