

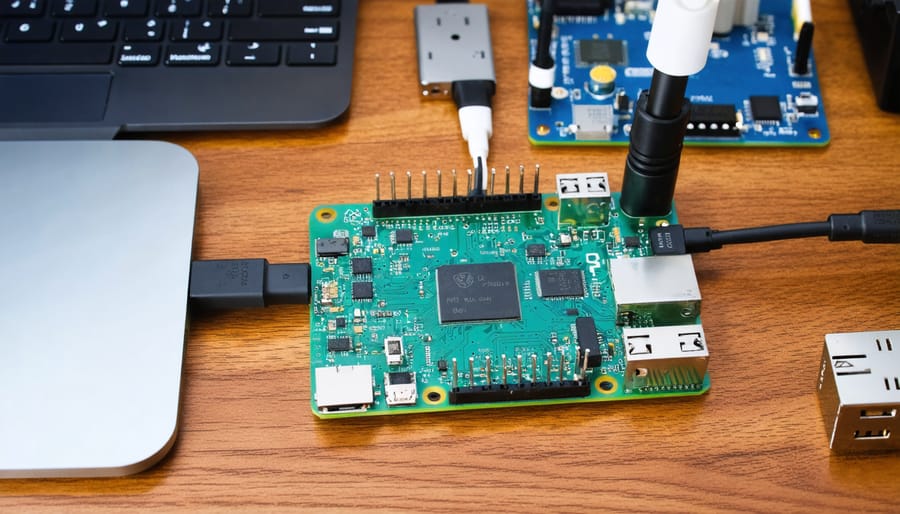
Transform your Raspberry Pi into a sophisticated motion detection system using affordable PIR sensors and Python programming. Whether you’re getting started with Raspberry Pi or building advanced security applications, motion sensors open up endless possibilities for interactive projects and home automation solutions.
Connect a HC-SR501 PIR sensor to your Raspberry Pi’s GPIO pins (VCC to 5V, GND to ground, and OUT to GPIO17) for instant motion detection capabilities. Calibrate sensitivity and delay time using the sensor’s onboard potentiometers to achieve precise detection ranges from 3 to 7 meters. Implement real-time monitoring through Python scripts that trigger actions like camera activation, alert notifications, or home automation responses when movement is detected.
This practical guide walks through hardware setup, Python programming fundamentals, and advanced integration techniques for creating responsive motion-based systems. Master essential concepts like GPIO programming, interrupt handling, and sensor calibration while building professional-grade motion detection solutions with your Raspberry Pi.
Getting Started: Essential Hardware Components
Choosing the Right Motion Sensor
When selecting a PIR (Passive Infrared) sensor for your Raspberry Pi gaming project, several key factors come into play. The HC-SR501 is a popular choice due to its excellent balance of sensitivity and reliability, making it ideal for basic motion detection in games. Its adjustable detection range (3-7 meters) and sensitivity controls allow fine-tuning for different gaming environments.
For more precise gaming applications, consider the AM312 sensor, which offers faster response times and reduced false triggers compared to standard PIR sensors. This makes it particularly suitable for quick-reaction games and motion-controlled interfaces.
Budget-conscious makers might opt for the HC-SR505, a compact sensor perfect for smaller projects. While it has a shorter detection range (3 meters), its smaller form factor makes it ideal for handheld gaming controllers or portable setups.
Advanced users should consider the dual-element PIR sensors like the D203B, which provide better accuracy and reduced interference. These sensors excel in complex gaming scenarios where precise motion tracking is essential, though they come at a higher price point.
Remember to consider factors like power consumption, detection angle, and ambient light sensitivity when making your final choice. The right sensor can make the difference between a sluggish and a responsive gaming experience.
Basic Setup and Connections
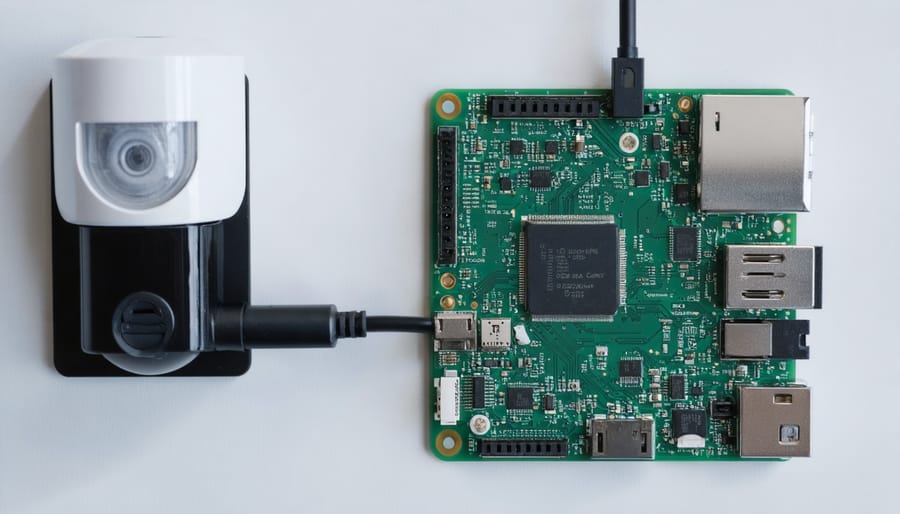
To set up your motion sensor with your Raspberry Pi, you’ll need a PIR (Passive Infrared) sensor, three female-to-female jumper wires, and your Raspberry Pi with GPIO pins accessible. Begin by ensuring your Raspberry Pi is powered off to avoid any short circuits during connection.
Connect the PIR sensor’s VCC pin (usually labeled as ‘+’ or ‘VCC’) to the 5V power pin (physical pin 2) on your Raspberry Pi’s GPIO header using a jumper wire. Next, connect the sensor’s GND pin (typically labeled as ‘-‘ or ‘GND’) to any ground pin on your Raspberry Pi (physical pin 6 works well) with another jumper wire.
Finally, connect the PIR sensor’s signal pin (often labeled as ‘OUT’ or ‘DATA’) to GPIO pin 4 (physical pin 7) on your Raspberry Pi using the third jumper wire. Double-check all connections to ensure they’re secure and correctly placed.
Once connected, power on your Raspberry Pi. The PIR sensor typically needs about 30-60 seconds to calibrate and stabilize before it starts detecting motion accurately. During this warm-up period, avoid movement in the sensor’s detection area for best results.
Software Setup Made Simple
Required Libraries and Dependencies
Before diving into the motion sensor setup, let’s ensure you have all the necessary components installed on your Raspberry Pi. You’ll need both hardware and software dependencies to get your motion detection system up and running.
First, make sure your Raspberry Pi is running the latest version of Raspberry Pi OS (formerly Raspbian). Open the terminal and update your system with:
“`bash
sudo apt-get update
sudo apt-get upgrade
“`
Install the following Python libraries using pip:
“`bash
sudo pip3 install RPi.GPIO
sudo pip3 install time
sudo pip3 install datetime
“`
For advanced features like camera integration or email notifications, you’ll need additional packages:
“`bash
sudo apt-get install motion
sudo pip3 install picamera
sudo pip3 install smtplib
“`
If you’re planning to create a web interface for your motion sensor, install these web frameworks:
“`bash
sudo pip3 install flask
sudo pip3 install requests
“`
Don’t forget to enable the necessary interfaces through raspi-config:
1. Open raspi-config: `sudo raspi-config`
2. Navigate to “Interface Options”
3. Enable GPIO
4. Enable Camera (if using)
5. Enable I2C (if using additional sensors)
After installing all components, reboot your Raspberry Pi to ensure all changes take effect:
“`bash
sudo reboot
Basic Motion Detection Script
Here’s a simple Python script that demonstrates basic motion detection using a PIR sensor with your Raspberry Pi. First, ensure you’ve connected your PIR sensor to GPIO pin 17 (or any available GPIO pin) and have the RPi.GPIO library installed.
“`python
import RPi.GPIO as GPIO
import time
# Set up GPIO using BCM numbering
GPIO.setmode(GPIO.BCM)
GPIO.setwarnings(False)
# Define the sensor pin
PIR_PIN = 17
# Set up the GPIO pin as input
GPIO.setup(PIR_PIN, GPIO.IN)
try:
print(“Motion sensor is starting up… Please wait.”)
time.sleep(2) # Give sensor time to settle
while True:
if GPIO.input(PIR_PIN):
print(“Motion detected!”)
time.sleep(1)
else:
print(“No motion”)
time.sleep(1)
except KeyboardInterrupt:
print(“Program stopped by user”)
GPIO.cleanup()
“`
This script continuously monitors the PIR sensor and prints a message whenever motion is detected. The initial delay allows the sensor to calibrate itself. You can modify the sleep duration and add your own custom actions when motion is detected, such as triggering a camera or sending notifications.
Remember to run this script with sudo privileges, as GPIO access requires root permissions. To test, simply save the code in a .py file and run it using the command: sudo python3 your_script.py
Creating Your First Motion-Controlled Game

Setting Up Game Controls
Once you have your motion sensor properly connected to your Raspberry Pi, the next step is mapping the sensor inputs to actual game controls. This process involves translating physical movements into keyboard or gamepad inputs that your games can understand.
Start by installing the Python evdev library, which allows you to create virtual input devices. You can do this using the command: sudo pip3 install evdev. This library will help you simulate keyboard presses or gamepad movements based on your motion sensor’s data.
Create a Python script that reads data from your motion sensor and defines threshold values for different movements. For example, you might set up your code to recognize:
– Left tilt: Simulates left arrow key
– Right tilt: Simulates right arrow key
– Forward tilt: Simulates up arrow key
– Backward tilt: Simulates down arrow key
Here’s a basic implementation structure:
1. Read sensor values continuously in a loop
2. Compare current values against your defined thresholds
3. Trigger the corresponding keyboard event when a threshold is crossed
4. Add a small delay to prevent input flooding
Consider adding a calibration routine at the start of your script to account for slight variations in sensor positioning. This helps ensure more accurate control mapping and a better gaming experience.
For more advanced implementations, you can create custom profiles for different games, allowing you to switch between control schemes easily. Remember to include some form of deadzone in your calculations to prevent unwanted inputs from slight movements or sensor noise.
Finally, test your controls thoroughly with your target games and adjust the sensitivity and threshold values until you achieve the desired responsiveness and accuracy.
Testing and Calibration
Testing and calibrating your Raspberry Pi motion sensor is crucial for achieving reliable performance. Start by connecting to your Pi via SSH or directly through a monitor, and run a simple test script to verify the sensor’s basic functionality. When the sensor detects movement, you should see the output in your terminal.
To fine-tune sensitivity, adjust the potentiometers on your PIR sensor. Most sensors have two adjustable components: one for sensitivity range (usually 3-7 meters) and another for delay time (how long the sensor stays triggered). Turn these adjustable screws slowly using a small screwdriver, testing after each adjustment.
For optimal performance, consider these calibration tips:
– Allow 30-60 seconds for the sensor to warm up and stabilize
– Test in different lighting conditions to ensure consistent operation
– Position the sensor away from heat sources and air vents
– Start with medium sensitivity and adjust gradually
– Set an appropriate delay time based on your project needs
Create a test environment that mimics your intended use case. For indoor applications, test the sensor’s response at different distances and angles. For outdoor installations, factor in environmental conditions like temperature changes and ambient light.
Monitor false positives and missed detections during testing. If you experience frequent false triggers, reduce the sensitivity or relocate the sensor. Conversely, if the sensor misses movement, increase sensitivity or adjust its positioning.
Document your optimal settings once found. This will help you quickly reconfigure the sensor if needed and serve as a reference for future projects.

Advanced Tips and Troubleshooting
Reducing Input Lag
Input lag can significantly impact the responsiveness of your motion-controlled Raspberry Pi games. To optimize gaming performance and reduce latency, several key adjustments can make a noticeable difference.
First, ensure your motion sensor’s sampling rate is properly configured. Higher sampling rates provide more responsive controls but consume more processing power. For most applications, a rate of 50-100Hz strikes an excellent balance between responsiveness and resource usage.
Implement a basic smoothing algorithm to filter out sensor noise while maintaining quick response times. A simple moving average with a small window size (3-5 samples) can effectively reduce jitter without introducing significant delay.
Memory management is crucial. Clear unused variables and optimize your code to minimize garbage collection interruptions. Consider using a circular buffer for sensor data instead of continuously creating new arrays.
Hardware optimization techniques include:
– Connecting the sensor directly to GPIO pins rather than through USB
– Using hardware interrupts instead of polling
– Keeping cable lengths short to minimize electrical interference
– Ensuring stable power supply to prevent voltage-related glitches
For Python implementations, use the ‘pigpio’ library instead of ‘RPi.GPIO’ as it offers lower-latency GPIO operations. Additionally, running your motion control code with higher process priority can help ensure consistent sampling intervals.
Remember to disable any unnecessary system services and background processes that might compete for CPU time with your motion sensing application.
Common Problems and Solutions
When working with Raspberry Pi motion sensors, you might encounter several common issues. Here’s how to address them effectively:
False Triggers: If your sensor is triggering without apparent motion, try adjusting the sensitivity using the potentiometer on the PIR sensor. Also, ensure there aren’t any heat sources or moving objects (like curtains) in the detection area.
No Detection: If the sensor isn’t detecting motion, first check your wiring connections. Ensure the power (VCC), ground (GND), and signal pins are properly connected. A loose wire is often the culprit. Also, verify that you’ve waited for the initial calibration period (usually 30-60 seconds) after powering up.
Inconsistent Readings: When readings are erratic, double-check your Python code for proper GPIO setup and pin numbering. Use pull-up or pull-down resistors in your circuit to stabilize the signal. If problems persist, try increasing the delay between readings in your code.
Power Issues: If the sensor stops working intermittently, it might be a power supply problem. Ensure your Raspberry Pi’s power supply can handle the additional load. Using a dedicated power supply for the sensor can help resolve this.
Range Problems: When detection range isn’t meeting expectations, check if the sensor lens is clean and unobstructed. Adjust the sensor’s position and angle for optimal coverage. Some PIR sensors also have range adjustment potentiometers you can fine-tune.
Remember to test your setup in different lighting conditions, as some sensors can be sensitive to sudden light changes or infrared interference from nearby electronics.
Setting up a motion sensor with your Raspberry Pi opens up a world of exciting possibilities for home automation, security systems, and interactive projects. Throughout this guide, we’ve explored the fundamentals of motion sensor integration, from basic PIR sensor connections to advanced implementations with camera modules and automation scripts.
Remember that the key to success lies in careful planning and proper wiring. Always double-check your connections before powering up your Raspberry Pi, and start with simple configurations before moving on to more complex implementations. The versatility of motion sensors means you can easily adapt these basic principles to create sophisticated systems tailored to your specific needs.
Whether you’re building a home security system, creating an interactive display, or developing an automated lighting solution, the skills you’ve learned here provide a solid foundation for future projects. Don’t be afraid to experiment with different sensor types, mounting positions, and sensitivity settings to achieve optimal results.
We encourage you to build upon these concepts and share your experiences with the Raspberry Pi community. Each project presents unique challenges and learning opportunities, and the solutions you develop might help others in their journey. Start with the basic setup we’ve outlined, then let your creativity guide you toward innovative applications of this versatile technology.