


Transform your Raspberry Pi into a reliable timekeeper by adding a Real-Time Clock (RTC) module – an essential upgrade for real-time control applications and accurate timestamp logging. Unlike the default network-dependent timekeeping, an RTC module maintains precise time even when your Pi loses power or network connectivity.
The DS3231 stands out as the most popular and accurate RTC choice, delivering temperature-compensated timing with a drift of merely ±2 minutes per year. Connect it to your Pi’s I2C pins (GPIO 2 and 3), enable I2C in raspi-config, and install the necessary drivers with a few simple terminal commands. This plug-and-play solution ensures your projects maintain perfect synchronization without relying on external time servers.
Whether you’re building data logging systems, automated scheduling applications, or offline devices, an RTC module eliminates the frustration of clock drift and network-dependent timing. For less than $10, this fundamental upgrade transforms your Pi from a network-dependent computer into a reliable, autonomous system capable of maintaining accurate time under any condition.
Why Your Raspberry Pi Needs a Real-Time Clock
The NTP Dependency Problem
While the Raspberry Pi basics are straightforward, one common challenge is maintaining accurate time when internet connectivity isn’t available. By default, Raspberry Pi relies on Network Time Protocol (NTP) to synchronize its system clock, requiring an internet connection to fetch the current time from NTP servers.
This dependency becomes problematic in several scenarios. Off-grid projects, remote installations, or applications with intermittent internet access can’t maintain accurate time. When a Pi boots up without internet access, it reverts to its last known time, which can cause issues with time-sensitive applications, logging systems, or scheduling tasks.
Additionally, some projects require precise timing even during network outages or in locations where internet access isn’t feasible. This limitation can affect various applications, from data logging and automation systems to time-stamped security implementations. That’s where a hardware Real Time Clock (RTC) module becomes essential, providing a reliable timekeeping solution independent of internet connectivity.
Power Outage Time Drift Issues
One of the most common challenges with Raspberry Pi systems is their inability to maintain accurate time when powered off. Unlike desktop computers or laptops that have built-in battery-powered real-time clock modules, the Raspberry Pi relies solely on network time synchronization to keep track of time. When the device loses power, it resets to a default time, typically January 1, 1970 (known as the Unix epoch), or the last time saved in the file system.
This time drift becomes particularly problematic in situations where network connectivity isn’t immediately available upon startup, or in offline projects where network time synchronization isn’t possible. Without accurate time, many applications and services might malfunction, logs could become unreliable, and scheduled tasks might execute at incorrect times.
The severity of this issue becomes more apparent in projects requiring precise timing or those dealing with time-sensitive operations like data logging, automation systems, or security applications. For instance, if you’re using your Raspberry Pi for home automation or as a security camera system, incorrect timestamps could compromise the reliability of your entire setup.
Choosing the Right RTC Module

Popular RTC Models Compared
When choosing an RTC module for your Raspberry Pi, several popular models stand out, each with its own strengths. The DS3231 is widely considered the gold standard, offering exceptional accuracy with a temperature-compensated crystal oscillator that maintains precise timing even in varying temperatures. It drifts only a few seconds per month and operates in temperatures from -40°C to +85°C.
The PCF8523, commonly found on Adafruit’s RTC boards, provides a more budget-friendly option while still delivering reliable performance. It includes battery backup and consumes less power than the DS3231, making it ideal for portable projects. However, it may drift up to two minutes per month under normal conditions.
Another notable option is the DS1307, an older but still capable module. While less accurate than the DS3231 and lacking temperature compensation, it’s simple to implement and perfectly suitable for basic timekeeping needs. It offers a square-wave output feature that can be useful for certain applications.
For maximum precision, the high-end DS3232 provides the same excellent accuracy as the DS3231 but includes additional features like more RAM and better temperature compensation. However, its higher cost makes it overkill for most hobby projects.
All these modules use I2C communication and include battery backup capability, typically using a CR2032 coin cell that can maintain time for several years when main power is disconnected.
Temperature Compensation Features
Temperature variations can significantly impact the accuracy of real-time clock modules on the Raspberry Pi, making it crucial to understand and account for these effects. Like many electronic components, RTC crystals experience frequency shifts as temperatures change, which can lead to timing discrepancies. Modern RTC modules address these hardware limitations through built-in temperature compensation features.
Most quality RTC modules for Raspberry Pi, such as the DS3231, incorporate temperature-sensing mechanisms and automatic compensation circuits. These systems continuously monitor ambient temperature and adjust the crystal’s oscillation frequency accordingly, maintaining accuracy across a wide temperature range, typically from -40°C to +85°C.
The compensation process happens automatically in the background, requiring no user intervention. This makes these modules particularly suitable for projects deployed in environments with varying temperatures, such as outdoor installations or industrial settings. While basic RTC modules might drift by several minutes per month due to temperature fluctuations, temperature-compensated modules can maintain accuracy within a few seconds per month, making them ideal for precision timing applications.
Hardware Installation Steps
Before starting the installation, ensure your Raspberry Pi is powered off and you have your RTC module (such as the popular DS3231) and necessary jumper wires ready. For safety, discharge any static electricity by touching a grounded metal surface.
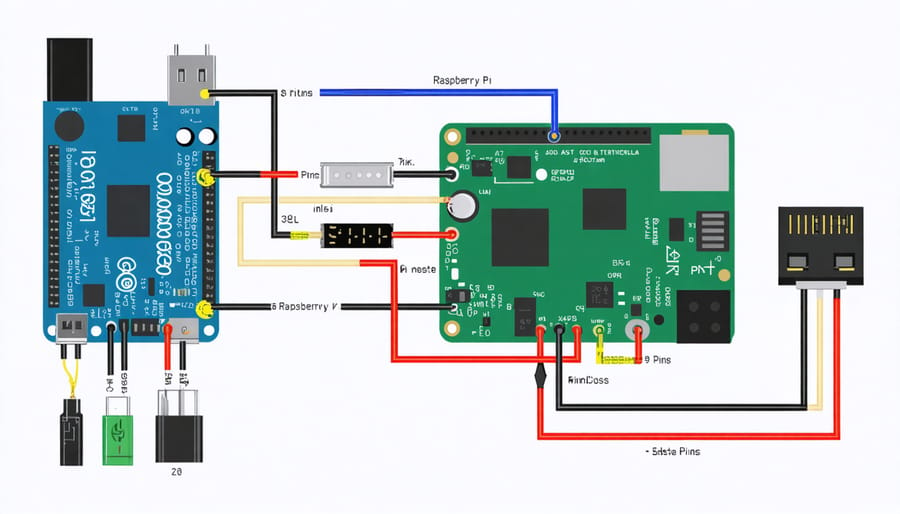
Connect the RTC module to your Raspberry Pi’s GPIO pins using the following connections:
1. VCC/VDD pin on RTC → 3.3V (Pin 1) on Raspberry Pi
2. GND pin on RTC → Ground (Pin 6) on Raspberry Pi
3. SDA pin on RTC → GPIO2/SDA (Pin 3) on Raspberry Pi
4. SCL pin on RTC → GPIO3/SCL (Pin 5) on Raspberry Pi
Take extra care to ensure the connections are secure and correctly aligned. Incorrect wiring could damage both your RTC module and Raspberry Pi. Double-check each connection against your RTC module’s documentation, as pin layouts may vary between different models.
If your RTC module includes a battery backup (typically a CR2032 coin cell), make sure it’s properly inserted. This battery maintains time tracking even when your Raspberry Pi is powered off.
Optional but recommended: Use standoffs or a small case to protect the RTC module from accidental shorts. If your module came with a protective header or case, install it according to the manufacturer’s instructions.
Once all connections are secure, you can power on your Raspberry Pi. The physical installation is complete, but don’t worry if the clock isn’t working yet – we’ll need to configure the software to recognize and use the RTC module.
Pro tip: Take a photo of your connections or make a quick sketch for future reference. This can be invaluable when troubleshooting or reconnecting after maintenance.
Software Configuration
Enabling I2C Interface
Before your RTC module can communicate with your Raspberry Pi, you’ll need to enable the I2C interface. This process is straightforward and can be completed in just a few minutes.
First, open the terminal on your Raspberry Pi and type:
“`
sudo raspi-config
“`
Using the arrow keys, navigate to “Interface Options” and press Enter. Select “I2C” from the list and choose “Yes” when asked if you want to enable the I2C interface. After confirming, reboot your Raspberry Pi for the changes to take effect.
To verify that I2C is working correctly, install the I2C tools by running:
“`
sudo apt-get install i2c-tools
“`
Once installed, you can check if your RTC module is detected using:
“`
sudo i2cdetect -y 1
“`
You should see a grid display showing your device’s address (typically 0x68 for most RTC modules). If you see this address, congratulations! Your I2C interface is now properly configured and ready to communicate with your RTC module.
Installing Required Drivers
Before you can use your RTC module with the Raspberry Pi, you’ll need to enable the necessary drivers and make some configuration changes. First, open the terminal and edit the modules configuration file by entering:
“`
sudo nano /etc/modules
“`
Add these two lines at the bottom of the file if they’re not already present:
“`
i2c-bcm2708
i2c-dev
“`
Next, modify the boot configuration to enable I2C by editing the config file:
“`
sudo nano /etc/boot/config.txt
“`
Add or uncomment these lines:
“`
dtparam=i2c_arm=on
dtoverlay=i2c-rtc,ds3231
“`
Note: Replace “ds3231” with your specific RTC model (like ds1307) if you’re using a different chip.
Now, update your system and install the required I2C tools:
“`
sudo apt-get update
sudo apt-get install -y python-smbus i2c-tools
“`
To verify that your RTC module is properly detected, run:
“`
sudo i2cdetect -y 1
“`
You should see your device listed in the output grid, typically at address 0x68. If you’re using an older Raspberry Pi (version 1), use -y 0 instead of -y 1 in the command.
After installing the drivers, reboot your Raspberry Pi to apply all changes:
“`
sudo reboot
“`
These steps establish the basic driver configuration needed for your RTC module to communicate with your Raspberry Pi.
Testing and Troubleshooting
To verify your RTC module is working correctly, start by checking the current time using the ‘hwclock’ command in the terminal:
sudo hwclock -r
This should display the current time from the RTC module. Compare this with the system time by running ‘date’ to ensure they’re synchronized.
If you encounter discrepancies, a common troubleshooting step is to manually set the hardware clock:
sudo hwclock –systohc
This command synchronizes the RTC with your system time. To test if the RTC maintains time after a power cycle, shut down your Pi, unplug it for a few minutes, then boot it up again. The correct time should be maintained.
Common issues you might encounter include:
1. RTC not detected: Check your I2C connections and ensure the module is properly seated
2. Incorrect time after reboot: Verify your time zone settings and NTP configuration
3. Battery issues: Test the voltage of the RTC battery (should be around 3V)
4. I2C address conflicts: Use ‘i2cdetect -y 1’ to verify proper device detection
If your RTC appears unresponsive, try these steps:
– Recheck all physical connections
– Verify the module is enabled in /boot/config.txt
– Ensure the correct device tree overlay is loaded
– Check system logs using ‘dmesg | grep rtc’
For persistent issues, try removing and re-adding the RTC module configuration, then reboot your Pi. Remember to backup your config files before making any changes.
Testing at regular intervals (weekly or monthly) ensures your RTC continues to maintain accurate time, especially in projects requiring precise timing.
Adding a Real-Time Clock (RTC) module to your Raspberry Pi opens up a world of possibilities for time-sensitive applications and reliable timekeeping. By implementing an RTC solution, you ensure your projects maintain accurate time even during power cycles or network disconnections, making it essential for data logging, scheduling, and other practical Raspberry Pi implementations.
The benefits of incorporating an RTC module are substantial: enhanced reliability, reduced dependency on network time synchronization, and improved accuracy for time-critical applications. Whether you’re building a home automation system, environmental monitoring station, or industrial control system, an RTC module provides the foundation for precise timing and scheduling.
Implementation is straightforward and cost-effective, with most RTC modules available for under $10. The setup process, while requiring some basic configuration, is well-documented and accessible even for beginners. The long-term benefits far outweigh the initial investment of time and resources.
We encourage you to take the next step and add an RTC module to your Raspberry Pi project. Start with a basic implementation, test thoroughly, and gradually integrate it into more complex applications. Remember, reliable timekeeping is often the cornerstone of successful automation and monitoring projects. By mastering RTC integration, you’ll enhance your Raspberry Pi’s capabilities and open doors to more sophisticated project possibilities.