

Transform your Raspberry Pi into a powerful virtual reality platform that brings immersive experiences within reach of any maker or hobbyist. By combining the Pi’s versatile computing capabilities with affordable VR hardware, you can create everything from basic VR viewers to sophisticated motion-tracked environments.
The intersection of Raspberry Pi and virtual reality opens up exciting possibilities for DIY enthusiasts, educators, and developers. While the Pi may not match the processing power of high-end VR systems, its affordability, extensive GPIO capabilities, and strong community support make it an ideal platform for experimenting with VR concepts and building custom solutions.
This guide explores how to harness your Raspberry Pi for VR development, covering essential hardware requirements, software frameworks, and optimization techniques. Whether you’re interested in creating educational VR experiences, developing VR-based assistants, or simply exploring the possibilities of affordable virtual reality, we’ll show you how to get started with minimal investment and maximum creative potential.
Let’s dive into the practical steps of building your own Raspberry Pi VR system, from selecting the right display technology to implementing motion tracking and developing interactive experiences.
Hardware Requirements for Your VR Assistant
Essential Raspberry Pi Components
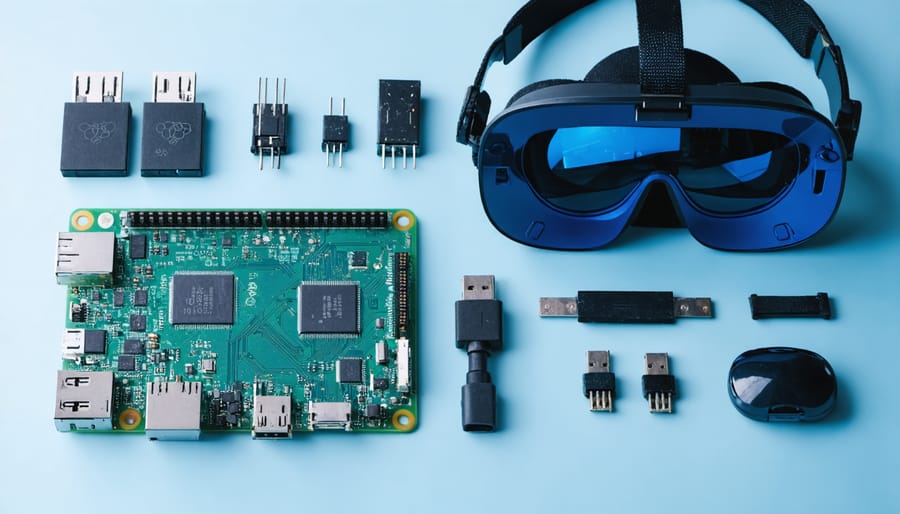
To build a VR system with Raspberry Pi, you’ll need several essential components. At the heart of your setup should be a Raspberry Pi 4 Model B with at least 4GB of RAM to handle the demanding VR processing tasks. A high-quality microSD card (32GB or larger) is crucial for storing your operating system and VR applications.
For display output, you’ll need either a dedicated VR headset compatible with Raspberry Pi or a small LCD screen that can be mounted in a DIY headset housing. An IMU (Inertial Measurement Unit) sensor, such as the MPU-6050, is essential for head tracking and motion detection.
Power management is critical – use a reliable 5V/3A power supply to ensure stable performance. For wireless connectivity, the Pi’s built-in Wi-Fi works well, but you might want to add a Bluetooth module for wireless controllers.
Additional components include:
– USB controllers or motion sensors
– Cooling solution (heatsinks or fan)
– Case or mounting solution
– HDMI cable for initial setup
– Optional: Camera module for augmented reality features
VR Display Options
When setting up your Raspberry Pi VR system, choosing the right display solution is crucial for an immersive experience. There are several compatible VR headset options available, ranging from DIY solutions to commercial products. The most cost-effective approach is using a smartphone-based headset like Google Cardboard or plastic VR viewers, which can be paired with your Raspberry Pi’s video output. These solutions typically require a 5-7 inch display and suitable lenses.
For higher quality experiences, consider dedicated VR displays like the Official Raspberry Pi 7-inch touchscreen or third-party LCD panels designed specifically for VR applications. These displays often feature higher refresh rates and lower latency, which are essential for comfortable VR use. Some makers have successfully adapted commercial VR headset displays, though this requires additional configuration and possibly custom drivers.
When selecting your display, pay attention to resolution (minimum 1280×800 recommended), refresh rate (60Hz or higher), and response time. Also consider the field of view (FOV) your chosen solution provides, as this significantly impacts immersion.
Setting Up Your VR Development Environment
Required Software and Libraries
To get started with your Raspberry Pi VR project, you’ll need several key software components and libraries installed on your system. Begin by ensuring your Raspberry Pi runs the latest version of Raspberry Pi OS (formerly Raspbian), as this provides the most stable foundation for VR development.
Essential software packages include Python 3.7 or higher, which serves as the primary programming language for most VR applications on the Pi. You’ll also need pip, Python’s package manager, to install additional libraries.
For VR development, install OpenCV (cv2) for image processing and computer vision capabilities. This library is crucial for handling visual input and processing stereoscopic images. Next, add NumPy for efficient numerical computations and array manipulations, which are essential for 3D calculations and transformations.
The OpenGL library, specifically PyOpenGL, is vital for 3D rendering and graphics processing. For VR head tracking and motion detection, install the MPU6050 library if you’re using the corresponding sensor.
Key VR frameworks to consider include:
– MonoVR: A lightweight VR framework specifically optimized for Raspberry Pi
– OpenHMD: An open-source API for VR hardware
– WebVR: For browser-based VR experiences
– OpenXR: A standard for VR/AR development
Don’t forget to install SDL2 for handling input devices and pygame for basic game development functionality. These components work together to create a complete VR development environment on your Raspberry Pi.
Initial Configuration Steps
Before diving into the VR setup, ensure your Raspberry Pi is running the latest version of Raspberry Pi OS. Begin by connecting your display output – either a VR headset or standard monitor – to your Pi’s HDMI port. For optimal performance, use a Raspberry Pi 4 with at least 4GB of RAM.
First, open the terminal and update your system:
“`
sudo apt update
sudo apt upgrade
“`
Install the necessary dependencies for VR development:
“`
sudo apt install python3-pip
sudo apt install python3-opencv
pip3 install numpy
“`
Next, enable the required interfaces through raspi-config:
1. Enter sudo raspi-config in the terminal
2. Navigate to Interface Options
3. Enable I2C and SPI interfaces
4. Enable the Camera interface if you’re using one
5. Reboot your Pi
For motion tracking capabilities, connect your IMU sensor to the appropriate GPIO pins:
– VCC to 3.3V
– GND to Ground
– SDA to GPIO2
– SCL to GPIO3
Install the VR development framework of your choice. For beginners, we recommend starting with A-Frame:
“`
npm install aframe
“`
Configure your display settings in /boot/config.txt to match your VR display’s requirements:
“`
hdmi_group=2
hdmi_mode=82
“`
Finally, ensure your Pi’s GPU memory is allocated appropriately by setting gpu_mem=512 in your config.txt file. This balance ensures smooth VR performance while maintaining system stability.
Creating Your Virtual Assistant Interface
Designing the VR Environment
When designing your VR environment for Raspberry Pi, start with a simple, optimized 3D space that won’t overwhelm the system’s resources. Unity3D and Godot are excellent choices for creating these environments, offering good performance on the Pi’s hardware while providing intuitive development tools.
Begin by sketching your virtual space on paper, considering both functionality and performance. Focus on low-polygon models and efficient textures to maintain smooth frame rates. Keep your environment simple initially – a basic room or outdoor scene with essential interactive elements is a good starting point.
For the user interface, design clear, legible elements that are easily visible in VR. Position UI components at comfortable viewing distances, typically between 1-2 meters in virtual space. Create high-contrast buttons and text that remain readable even with the Pi’s limited display resolution.
Consider implementing a head-locked menu system for essential functions, which follows the user’s gaze but doesn’t cause motion sickness. Include basic interaction elements like floating markers or highlighting systems to show users what they can interact with.
Remember to optimize your lighting setup – use baked lighting where possible instead of real-time calculations. Implement level-of-detail (LOD) systems for objects that change detail based on viewing distance, helping maintain performance while preserving visual quality where it matters most.
Test your environment thoroughly on the actual Raspberry Pi hardware, as performance can differ significantly from development machines. Make incremental adjustments based on frame rate measurements and user feedback.
Implementing Assistant Features
Adding voice assistant capabilities to your Raspberry Pi VR system can significantly enhance user interaction and create a more immersive experience. Start by installing the SpeechRecognition library using pip, along with PyAudio for handling audio input. You’ll also need to set up a USB microphone if your Raspberry Pi doesn’t have built-in audio input.
To implement basic voice commands, use Python’s speech_recognition module to capture and process audio input. Create a simple command structure that responds to specific phrases like “start experience,” “pause,” or “exit VR.” You can use text-to-speech libraries such as pyttsx3 or espeak to generate voice responses, making the interaction feel more natural.
Here’s a practical approach to handling voice commands:
1. Set up continuous background listening
2. Process speech-to-text conversion
3. Match recognized text against predefined commands
4. Trigger corresponding VR actions
5. Generate appropriate voice responses
Consider implementing wake words (like “Hey Pi”) to prevent false triggers and optimize resource usage. For better accuracy, you might want to train a custom model using TensorFlow Lite, which works well with Raspberry Pi’s limited resources. Remember to handle errors gracefully and provide audio feedback when commands aren’t recognized.
For optimal performance, run the voice recognition system on a separate thread to avoid impacting the VR rendering process. This ensures smooth operation while maintaining responsive voice interactions.
Interactive Elements and Commands
To create an immersive VR experience on your Raspberry Pi, you’ll need to implement various interactive elements and command systems. The primary input methods typically include keyboard controls, motion sensors, and gesture recognition devices.
For basic keyboard controls, you can use Python’s pygame library to map specific keys to VR actions. For example:
“`python
if event.key == pygame.K_w:
move_forward()
if event.key == pygame.K_s:
move_backward()
“`
Motion tracking can be achieved using sensors like the MPU-6050 gyroscope/accelerometer combination. Connect it to your Raspberry Pi’s GPIO pins and use the following command structure:
“`python
def process_motion_data():
accel_data = sensor.get_accel_data()
gyro_data = sensor.get_gyro_data()
update_view_position(accel_data, gyro_data)
“`
For gesture recognition, you can incorporate a Leap Motion controller or similar device. Create command mappings that feel natural to users:
– Open hand: pause/resume
– Pinch: select/grab objects
– Swipe: navigate menus
– Point: aim/target
Remember to implement a consistent command feedback system through visual or audio cues. This helps users understand when their actions are recognized and processed by the system. Keep latency low by optimizing your code and using efficient data processing methods to maintain a smooth VR experience.
Performance Optimization Tips
Resource Management
Running VR applications on a Raspberry Pi requires careful management of system resources to maintain smooth performance. Start by implementing proper system resource monitoring to track CPU usage, memory consumption, and temperature levels during VR operations.
To optimize performance, close unnecessary background processes and services. Consider using lightweight desktop environments like LXDE or disabling the GUI completely when running VR applications headlessly. Overclocking your Raspberry Pi can provide additional processing power, but monitor temperature levels carefully to prevent thermal throttling.
Memory management is crucial for VR applications. Allocate appropriate GPU memory through raspi-config, typically starting with 128MB and adjusting based on your specific needs. Implement swap space wisely – while it can provide additional virtual memory, excessive swapping can impact performance.
For graphics-intensive VR applications, utilize hardware acceleration when available and optimize your rendering pipeline. Consider implementing level-of-detail (LOD) systems to reduce polygon counts at distance, and employ efficient texture compression to minimize memory usage while maintaining visual quality.
Troubleshooting Common Issues
When running VR applications on your Raspberry Pi, you might encounter several common issues. Frame rate drops are often caused by insufficient GPU memory allocation – adjust this in raspi-config by increasing the GPU memory to at least 256MB. If you experience display lag, ensure your HDMI cable meets the required specifications and try reducing the display resolution temporarily to identify if it’s a bandwidth issue.
Overheating can significantly impact VR performance. Monitor your Pi’s temperature using the vcgencmd measure_temp command, and consider adding additional cooling solutions if temperatures consistently exceed 80°C. For jerky head tracking, check your sensor connections and calibrate your IMU sensors using the built-in calibration tools.
USB connectivity issues with VR peripherals can be resolved by using a powered USB hub to ensure stable power delivery. If you encounter software crashes, verify that you’re using the latest compatible versions of your VR software and that your Raspberry Pi OS is up to date. Memory-related problems can often be addressed by closing unnecessary background processes and optimizing your application’s resource usage.
The combination of Raspberry Pi and virtual reality opens up exciting possibilities for DIY enthusiasts and developers alike. As we’ve explored throughout this guide, creating VR experiences with a Raspberry Pi is not only feasible but also cost-effective, making it an excellent platform for experimentation and learning.
The potential applications are vast, ranging from educational tools and interactive displays to immersive gaming experiences and virtual training simulations. With the continuous advancement of Raspberry Pi hardware and the growing VR development community, we can expect to see even more innovative projects and implementations in the future.
Looking ahead, the integration of more sophisticated sensors, improved display technologies, and enhanced processing capabilities will further expand what’s possible with Raspberry Pi VR systems. The emergence of new software frameworks and development tools will also make it easier for creators to build more complex and engaging virtual experiences.
For those just starting their journey into Raspberry Pi VR development, remember that the field is constantly evolving. Stay connected with the community, experiment with different approaches, and don’t be afraid to push the boundaries of what’s possible. Whether you’re building a simple VR viewer or developing a complex interactive environment, the skills and knowledge gained from these projects will prove invaluable in the growing field of virtual reality development.
Start small, learn continuously, and most importantly, enjoy the process of creating your own VR experiences with Raspberry Pi.