


Transform your Raspberry Pi collection into a powerful, production-grade Kubernetes cluster without breaking the bank. This cost-effective cloud server setup delivers enterprise-level container orchestration capabilities while providing hands-on experience with modern DevOps practices. By combining the accessibility of Raspberry Pi hardware with Kubernetes’ robust container management, you’ll create a scalable, fault-tolerant platform perfect for hosting microservices, testing deployment strategies, and experimenting with cloud-native applications.
Unlike traditional cloud services that can quickly become expensive, this DIY approach offers complete control over your infrastructure while teaching invaluable lessons in cluster management, networking, and containerization. Whether you’re a hobbyist looking to skill up in container orchestration or a developer seeking a personal testing environment, building a Raspberry Pi Kubernetes cluster provides the perfect balance of practicality and educational value.
Get ready to dive into the fascinating world of bare-metal Kubernetes deployment, where we’ll transform humble Raspberry Pis into a sophisticated container orchestration platform capable of running real-world applications.
Hardware Requirements and Setup
Required Components
To build a Kubernetes cluster with Raspberry Pi, you’ll need several key components to ensure successful setup and operation. The foundation of your cluster requires a minimum of two Raspberry Pi 4 boards (one master node and at least one worker node), though three or more boards are recommended for a more robust cluster. Each Pi should have at least 4GB of RAM, with 8GB being optimal for better performance.
For storage, each Raspberry Pi requires a high-quality microSD card with at least 32GB capacity. Choose cards with good read/write speeds (Class 10 or higher) to prevent performance bottlenecks. You’ll also need a power supply for each Pi – use official 15W USB-C power supplies rated at 5V/3A to ensure stable operation.
Networking is crucial for cluster communication. You’ll need a Gigabit Ethernet switch with enough ports for all your Pis, plus CAT6 Ethernet cables for each connection. While Wi-Fi is possible, wired connections provide better reliability and performance.
Additional essential components include:
– A case or rack to house your Pis (preferably with cooling)
– Cooling solutions (heatsinks or fans)
– USB keyboard and HDMI monitor (for initial setup)
– Network router with DHCP capabilities
– Power strip with surge protection
Optional but recommended items include a dedicated UPS for power protection and a network-attached storage (NAS) device for persistent storage solutions.

Network Configuration
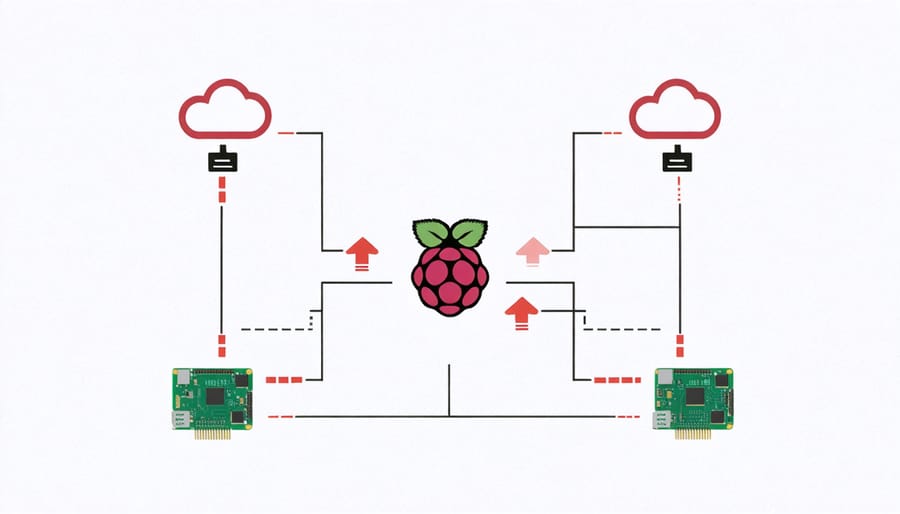
Configuring the network for your Raspberry Pi Kubernetes cluster is crucial for ensuring smooth communication between nodes and enabling cloud connectivity options. Start by assigning static IP addresses to each Pi node through the /etc/dhcpcd.conf file. This prevents IP conflicts and maintains consistent networking across reboots.
For the master node, configure the following settings:
interface eth0
static ip_address=192.168.1.100/24
static routers=192.168.1.1
static domain_name_servers=192.168.1.1
Worker nodes should follow a similar pattern with incremental IP addresses (192.168.1.101, 192.168.1.102, etc.). Update the /etc/hosts file on each node to include the hostnames and IP addresses of all cluster members for proper name resolution.
Enable container networking by adding the following to /etc/sysctl.conf:
net.bridge.bridge-nf-call-iptables=1
net.ipv4.ip_forward=1
For external access, configure your router to forward the necessary Kubernetes ports (6443 for API server, 2379-2380 for etcd, 10250 for kubelet). If you’re planning to expose services, consider setting up MetalLB or Ingress controllers for proper load balancing and routing.
Remember to reboot all nodes after making these network changes to ensure proper implementation of the new settings.
Installing and Configuring Kubernetes
Operating System Preparation
For our Kubernetes cluster, we’ll use Raspberry Pi OS Lite (64-bit), as it’s lightweight and optimized for headless operation. Begin by downloading the official Raspberry Pi Imager tool from the Raspberry Pi website to flash your microSD cards.
Before flashing, click the gear icon in the Imager tool to configure important settings. Enable SSH access, set a hostname (like k8s-master for the control plane and k8s-worker-X for worker nodes), and configure your WiFi credentials if not using ethernet. This saves time compared to manual configuration later.
After flashing all cards, boot up your Pis and verify connectivity by pinging each node. Update the system packages on all nodes:
“`bash
sudo apt update && sudo apt upgrade -y
“`
Next, modify each Pi’s boot configuration by editing /boot/cmdline.txt to add:
“`
cgroup_enable=cpuset cgroup_enable=memory cgroup_memory=1
“`
These parameters are essential for Kubernetes to manage container resources effectively. Also, disable swap to ensure consistent container performance:
“`bash
sudo dphys-swapfile swapoff
sudo dphys-swapfile uninstall
sudo systemctl disable dphys-swapfile
“`
Finally, reboot all nodes to apply the changes. Your Raspberry Pis are now prepared for Kubernetes installation.
Kubernetes Installation
For our Raspberry Pi cluster, we’ll install K3s, a lightweight Kubernetes distribution perfect for resource-constrained environments. K3s provides all the essential Kubernetes features while consuming minimal system resources, making it ideal for Raspberry Pi deployments.
First, ensure your master node (server) is ready by running the K3s installation script:
“`bash
curl -sfL https://get.k3s.io | sh –
“`
After installation, retrieve the node token from your master:
“`bash
sudo cat /var/lib/rancher/k3s/server/node-token
“`
For worker nodes, use this command, replacing the placeholders with your master node’s IP and token:
“`bash
curl -sfL https://get.k3s.io | K3S_URL=”https://MASTER_IP:6443″ K3S_TOKEN=”YOUR_NODE_TOKEN” sh –
“`
Verify your cluster’s status from the master node:
“`bash
sudo kubectl get nodes
“`
K3s automatically configures your cluster with sensible defaults and includes essential components like CoreDNS, Traefik Ingress, and a basic storage provider. This streamlined setup eliminates the complexity of traditional Kubernetes installations while maintaining compatibility with standard kubectl commands and Kubernetes manifests.
Remember to enable container features in your Raspberry Pi’s boot configuration by adding these lines to /boot/cmdline.txt:
“`
cgroup_enable=cpuset cgroup_memory=1 cgroup_enable=memory
Cluster Configuration
The heart of your Kubernetes cluster consists of one master node and multiple worker nodes. Let’s start with the master node configuration. On your designated master Raspberry Pi, initialize the control plane by running ‘kubeadm init –pod-network-cidr=10.244.0.0/16’. This command sets up the necessary components and generates a join token for worker nodes.
After initialization, follow the displayed instructions to set up your kubeconfig file. You’ll need to create a .kube directory in your home folder and copy the admin configuration file there. This enables you to interact with your cluster using kubectl commands.
For worker nodes, copy the join command that was generated during master initialization. It should look something like ‘kubeadm join [master-ip]:6443 –token [token] –discovery-token-ca-cert-hash [hash]’. Run this command on each worker Pi to add them to your cluster.
To verify your setup, use ‘kubectl get nodes’ on the master node. You should see all your Raspberry Pis listed, initially in NotReady status. Install a Container Network Interface (CNI) like Flannel by applying its configuration: ‘kubectl apply -f https://raw.githubusercontent.com/coreos/flannel/master/Documentation/kube-flannel.yml’. After a few minutes, all nodes should transition to Ready status.
Remember to label your worker nodes appropriately for workload distribution using ‘kubectl label node [node-name] node-role.kubernetes.io/worker=worker’.
Cloud Integration
Cloud Provider Setup
Setting up cloud provider connections for your Raspberry Pi Kubernetes cluster opens up powerful possibilities for container orchestration and scalability. While your cluster operates locally, cloud integration enables features like container registry access, load balancing, and persistent storage options.
To get started with AWS integration for Raspberry Pi, you’ll need to create an AWS account and configure the necessary credentials. Install the AWS CLI on your master node using:
“`bash
curl “https://awscli.amazonaws.com/awscli-exe-linux-aarch64.zip” -o “awscliv2.zip”
unzip awscliv2.zip
sudo ./aws/install
“`
Configure your credentials by running:
“`bash
aws configure
“`
For Google Cloud Platform (GCP), install the gcloud CLI tool:
“`bash
curl https://sdk.cloud.google.com | bash
gcloud init
“`
For Azure, install the Azure CLI:
“`bash
curl -sL https://aka.ms/InstallAzureCLIDeb | sudo bash
az login
“`
After setting up your preferred cloud provider, create a secret in your Kubernetes cluster to store the credentials:
“`bash
kubectl create secret generic cloud-credentials –from-file=credentials
“`
Remember to enable necessary APIs and services in your cloud provider’s console, and configure appropriate IAM roles and permissions for your cluster’s access. This setup enables seamless integration between your Raspberry Pi cluster and cloud services, allowing you to leverage cloud-native features while maintaining local control over your infrastructure.
Hybrid Cloud Configuration
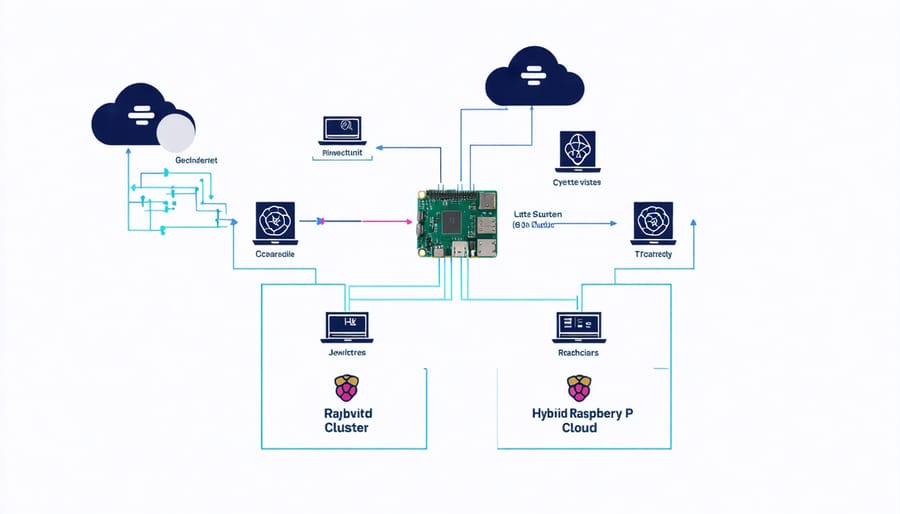
Extending your Raspberry Pi Kubernetes cluster to work with public cloud services creates a powerful hybrid environment that combines local and cloud resources. This setup enables you to leverage the best of both worlds: local processing for sensitive data and cloud scalability for resource-intensive tasks. Understanding different cloud integration architectures is crucial for creating an efficient hybrid setup.
To configure hybrid capabilities, start by installing a cloud provider’s CLI tools on your master node. Popular choices include AWS CLI, Azure CLI, or Google Cloud SDK. Next, set up authentication credentials and ensure your cluster has the necessary cloud provider plugins installed through kubectl.
Create a dedicated namespace for your hybrid workloads:
“`bash
kubectl create namespace hybrid-workloads
“`
Configure your storage classes to support both local and cloud storage:
“`bash
kubectl apply -f cloud-storage-class.yaml
“`
Implement a network policy that allows secure communication between your local cluster and cloud services. This typically involves setting up a VPN or direct connect solution to ensure encrypted traffic between environments.
For workload distribution, use node selectors and taints to control which applications run locally versus in the cloud:
“`bash
kubectl label nodes pi-master cloudtype=local
kubectl label nodes cloud-node1 cloudtype=remote
“`
Remember to monitor resource usage across both environments using tools like Prometheus and Grafana to optimize cost and performance. This hybrid setup provides flexibility while maintaining control over your infrastructure, perfect for testing and development scenarios.
Security Considerations
When integrating your Raspberry Pi Kubernetes cluster with cloud services, security should be your top priority. Following cloud security best practices is essential to protect your infrastructure and data.
Start by implementing strong authentication mechanisms. Use role-based access control (RBAC) to define specific permissions for different users and services. Create separate service accounts for each application and limit their privileges to only what’s necessary for operation.
Encrypt all communication between nodes using TLS certificates. Set up a certificate authority (CA) for your cluster and ensure all internal traffic is encrypted. For external access, implement secure VPN connections or use SSH tunneling to prevent unauthorized access to your cluster’s API server.
Keep your cluster’s components updated regularly. This includes both Kubernetes itself and the underlying operating system on your Raspberry Pis. Enable automatic security updates when possible, but schedule them during maintenance windows to avoid unexpected downtime.
Secure your network configuration by:
– Implementing network policies to control pod-to-pod communication
– Using private networks for internal cluster traffic
– Setting up proper firewall rules to restrict incoming connections
– Regularly monitoring network traffic for suspicious activities
Consider implementing container security measures such as:
– Scanning container images for vulnerabilities before deployment
– Running containers with non-root users
– Setting resource limits for pods
– Using read-only root filesystems where possible
Back up your cluster configuration and data regularly, storing copies in secure, off-site locations. Implement monitoring and logging solutions to detect and alert on potential security incidents. Regular security audits and penetration testing can help identify vulnerabilities before they’re exploited.
Remember that security is an ongoing process, not a one-time setup. Regularly review and update your security measures as new threats emerge and your cluster’s requirements evolve.
Testing and Deployment
Cluster Validation
After setting up your Raspberry Pi Kubernetes cluster, it’s essential to validate its functionality through a series of tests. Start by checking node status with ‘kubectl get nodes’, which should display all your Pi nodes as ‘Ready’. Verify cluster networking by deploying a simple test pod using ‘kubectl create deployment test-nginx –image=nginx:alpine’ and exposing it with ‘kubectl expose deployment test-nginx –port=80’.
To test inter-pod communication, create a second pod and try pinging the first one using its service name. Check that DNS resolution works correctly by attempting to resolve both internal cluster services and external domains from within a test pod.
Monitor cluster health using the dashboard or command line tools. Verify that your cluster can handle basic operations like pod scheduling, service discovery, and load balancing. Try scaling a deployment up and down with ‘kubectl scale deployment test-nginx –replicas=3’ to ensure proper distribution across nodes.
If all tests pass successfully, your Raspberry Pi Kubernetes cluster is ready for real workloads. Remember to clean up test resources after validation is complete.
Sample Application Deployment
Let’s deploy a simple web application to test our Raspberry Pi Kubernetes cluster in action. We’ll use a basic Nginx web server as our test application, which will demonstrate load balancing and scaling capabilities.
First, create a deployment manifest named nginx-deployment.yaml:
“`yaml
apiVersion: apps/v1
kind: Deployment
metadata:
name: nginx-test
spec:
replicas: 3
selector:
matchLabels:
app: nginx
template:
metadata:
labels:
app: nginx
spec:
containers:
– name: nginx
image: nginx:alpine
ports:
– containerPort: 80
“`
Apply the deployment using kubectl:
“`bash
kubectl apply -f nginx-deployment.yaml
“`
To make the application accessible, create a service:
“`bash
kubectl expose deployment nginx-test –type=NodePort –port=80
“`
You can verify your deployment by checking the pods’ status:
“`bash
kubectl get pods
“`
Visit your application by accessing any of your Raspberry Pi nodes using the assigned NodePort. The load balancer will automatically distribute traffic across your three nginx replicas, demonstrating Kubernetes’ orchestration capabilities in action.
Building a Kubernetes cluster with Raspberry Pi devices offers an excellent way to gain hands-on experience with container orchestration while maintaining a cost-effective learning environment. Throughout this guide, we’ve explored the essential steps to set up your own home lab, from initial hardware configuration to deploying your first applications.
Remember that your Raspberry Pi Kubernetes cluster provides a solid foundation for experimenting with containerized applications, continuous integration pipelines, and cloud-native technologies. While the setup process may seem challenging at first, the skills you’ve gained are directly transferable to production environments and enterprise-scale deployments.
To continue your journey, consider exploring advanced topics like implementing high availability, setting up persistent storage solutions, or integrating monitoring tools. You might also want to experiment with different workloads and services to understand how your cluster handles various scenarios.
Keep your cluster updated, regularly back up your configurations, and don’t hesitate to rebuild from scratch if needed – it’s all part of the learning process. With your Raspberry Pi Kubernetes cluster up and running, you’re well-equipped to dive deeper into the world of container orchestration and cloud-native computing.