

Transform your Raspberry Pi into a sophisticated surveillance system that rivals commercial security solutions. By combining affordable hardware with powerful open-source software, you can create a smart monitoring system with facial recognition capabilities and real-time alerts.
This DIY approach offers complete control over your security setup while costing a fraction of traditional systems. Whether securing your home, monitoring a small business, or protecting valuable assets, a Raspberry Pi-based surveillance system delivers enterprise-level features through accessible technology.
Recent advances in machine learning and computer vision have transformed basic Pi cameras into intelligent security devices. These systems can now detect motion, identify objects, track movements, and even recognize familiar faces – all while streaming encrypted footage to your smartphone or cloud storage.
Get ready to build a customizable security solution that combines the reliability of professional systems with the flexibility of open-source software. This guide will walk you through creating a surveillance system that’s both powerful and privacy-focused, putting you in complete control of your security infrastructure.
Hardware Requirements for Your AI Security System
Essential Components
To build an effective Raspberry Pi surveillance system, you’ll need several key components. The foundation is the Raspberry Pi board itself – we recommend using a Raspberry Pi 4 Model B with at least 4GB RAM for optimal performance and processing power. This model provides enough computational capacity for AI-based features like motion detection and facial recognition.
For image capture, the official Raspberry Pi Camera Module V2 or the newer HQ Camera Module are excellent choices for your Raspberry Pi camera setup. The V2 offers 8MP resolution and good low-light performance, while the HQ Camera provides superior image quality with its 12.3MP sensor.
Storage is crucial for maintaining surveillance footage. A high-endurance microSD card (32GB minimum) is essential for the operating system, but consider adding a USB hard drive or SSD for extended footage storage. For continuous recording, a 1TB external drive can store approximately 1-2 weeks of footage at standard resolution.
Don’t forget about power supply – use a reliable 5V/3A power adapter to ensure stable operation, especially when running 24/7 surveillance.
Optional Enhancements
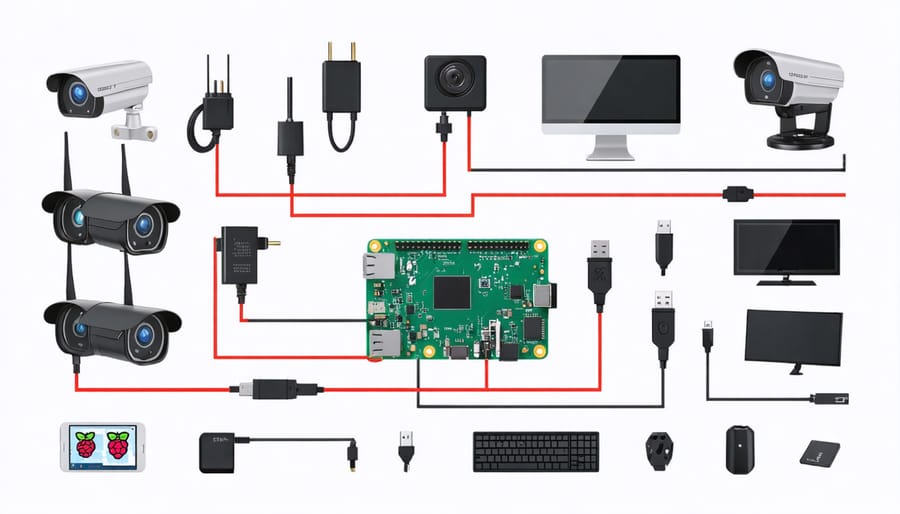
To enhance your Raspberry Pi surveillance system’s capabilities, consider adding these powerful hardware upgrades. A PIR (Passive Infrared) motion sensor can trigger recordings only when movement is detected, saving storage space and making your system more efficient. These sensors are inexpensive and connect easily to the Pi’s GPIO pins.
For night surveillance, integrate an IR-cut camera module or add infrared LED illuminators. These components enable clear vision in complete darkness without visible light that might alert intruders. Some camera modules, like the Raspberry Pi NoIR Camera, come with built-in infrared capabilities.
Weather-proof cases and powered USB hubs can expand your system’s outdoor functionality. A powered hub allows you to connect multiple cameras and sensors while ensuring stable power delivery. For audio monitoring, consider adding a USB microphone or sound sensor module.
Temperature and humidity sensors can provide environmental data alongside security footage, making your system more comprehensive. For remote access, a 4G/LTE modem can provide internet connectivity when Wi-Fi isn’t available, ensuring your surveillance system stays online continuously.
Setting Up the AI-Powered Detection System
Software Installation
Before diving into the AI components, we’ll need to set up the core software foundation for our surveillance system. Start by installing the Raspberry Pi OS (formerly Raspbian) using the Raspberry Pi Imager tool. Download the imager from the official Raspberry Pi website and flash it onto your microSD card.
Once your Pi boots up, open the terminal and update your system:
“`bash
sudo apt update
sudo apt upgrade
“`
Next, we’ll install the essential packages for video processing and AI capabilities:
“`bash
sudo apt install python3-pip
sudo apt install python3-opencv
sudo apt install libatlas-base-dev
“`
For the AI frameworks, we’ll need TensorFlow Lite and OpenCV. Install them using pip:
“`bash
pip3 install tflite-runtime
pip3 install numpy
pip3 install pillow
“`
To enable motion detection and video streaming, install Motion:
“`bash
sudo apt install motion
“`
Configure Motion by editing its configuration file:
“`bash
sudo nano /etc/motion/motion.conf
“`
Set these recommended values:
– daemon on
– stream_localhost off
– webcontrol_localhost off
Finally, enable the camera interface through raspi-config:
“`bash
sudo raspi-config
“`
Navigate to “Interface Options” and enable the camera. Reboot your Pi to apply all changes:
“`bash
sudo reboot
“`
Your Raspberry Pi is now ready for implementing the AI surveillance features.
AI Model Configuration
The heart of our surveillance system lies in its AI-powered detection models, which transform a basic camera setup into an intelligent security solution. We’ll be using TensorFlow Lite, optimized specifically for Raspberry Pi’s limited resources, to implement object detection and motion tracking.
Start by installing TensorFlow Lite on your Raspberry Pi using the terminal command:
“`
pip3 install tflite-runtime
“`
For our surveillance system, we’ll utilize the COCO-SSD model, which offers an excellent balance between performance and accuracy. This pre-trained model can detect up to 90 different object classes, including people, vehicles, and animals, making it perfect for security applications.
Download the model files using:
“`
wget https://storage.googleapis.com/download.tensorflow.org/models/tflite/coco_ssd_mobilenet_v1_1.0_quant_2018_06_29.zip
“`
Extract the files and place them in your project directory. Configure the detection threshold (recommended starting value: 0.5) in your configuration file to balance between sensitivity and false positives. Lower values increase sensitivity but may trigger more false alerts.
To optimize performance, consider implementing frame skipping – processing every third or fourth frame instead of each one. This significantly reduces CPU load while maintaining effective surveillance capabilities. You can adjust this setting based on your Pi’s processing power and specific needs.
For motion detection zones, create a JSON configuration file defining areas of interest:
“`json
{
“zones”: [
{“name”: “front-door”, “coordinates”: [100, 100, 300, 400]},
{“name”: “driveway”, “coordinates”: [400, 200, 600, 500]}
]
}
“`
Remember to periodically update your model and adjust settings based on performance and accuracy requirements. The system will learn and improve its detection capabilities over time through regular use and refinement of these parameters.
Camera Integration
Integrating a camera module with your Raspberry Pi forms the foundation of your AI-powered surveillance system. The official Raspberry Pi Camera Module V2 or V3 is recommended for optimal compatibility and performance, though USB webcams can also work effectively.
Begin by connecting the camera module to your Raspberry Pi’s CSI port while the device is powered off. The ribbon cable should face the Ethernet port, with the blue side facing the USB ports. Once connected, enable the camera interface through the Raspberry Pi Configuration tool:
“`bash
sudo raspi-config
“`
Navigate to “Interface Options” and enable the camera. After a quick reboot, test your camera connection with:
“`bash
libcamera-still -o test.jpg
“`
For AI-powered detection, you’ll need to install OpenCV and additional libraries:
“`bash
sudo apt-get install python3-opencv
pip3 install numpy imutils
“`
Create a basic Python script to capture video and implement motion detection:
“`python
import cv2
import numpy as np
cap = cv2.VideoCapture(0)
while True:
ret, frame = cap.read()
# AI processing goes here
cv2.imshow(‘Frame’, frame)
“`
For enhanced surveillance capabilities, consider implementing face detection using pre-trained Haar cascades or more advanced object detection models like YOLO. These AI models can distinguish between humans, animals, and vehicles, providing intelligent alerts based on specific triggers.
Remember to position your camera strategically, considering factors like lighting, field of view, and weather protection if mounted outdoors. Regular cleaning and maintenance of the camera lens will ensure optimal performance of your AI detection system.
Advanced Features and Customization
Real-time Alerts
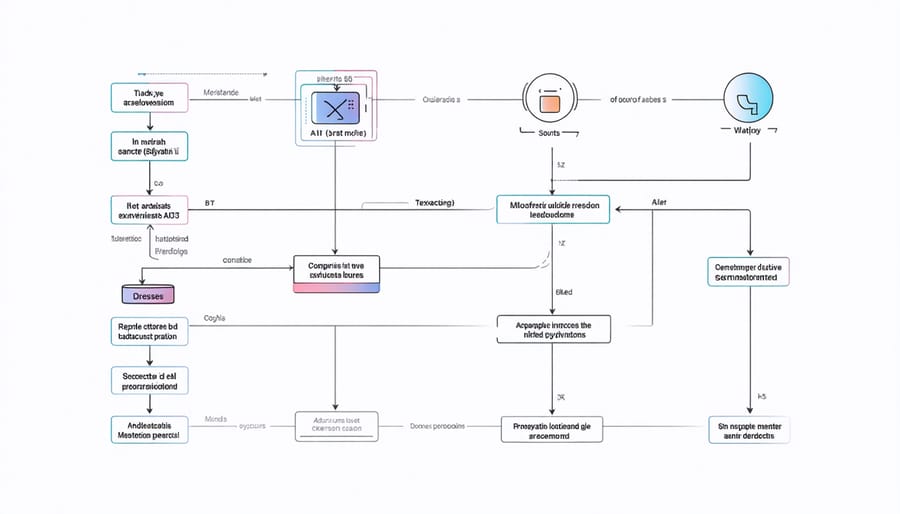
A key advantage of a Raspberry Pi surveillance system is its ability to provide real-time alerts and remote monitoring capabilities. By implementing a smart notification system, you can receive instant alerts when your camera detects motion or specific events.
To set up alerts, you’ll need to configure your system to use various notification channels. Popular options include email notifications, SMS alerts through services like Twilio, or push notifications via platforms such as Pushbullet or Telegram. These can be easily integrated using Python scripts and relevant APIs.
For motion-based alerts, you can utilize the motion detection capabilities of Motion or MotionEye software. When movement is detected, the system can automatically trigger notifications and save snapshots or video clips to your designated storage location.
Remote monitoring is equally important for maintaining surveillance when you’re away. You can access your camera feed through a secure web interface by setting up port forwarding on your router or using a VPN connection. For enhanced security, implement two-factor authentication and strong passwords to prevent unauthorized access.
Consider setting up customized alert conditions based on your needs. You might want notifications only during specific hours, when certain zones show activity, or when particular objects are detected. This reduces false alerts and ensures you receive relevant information when it matters most.
Additionally, integrate your system with home automation platforms like Home Assistant or IFTTT to create more sophisticated alert workflows. This allows your surveillance system to interact with other smart devices, such as turning on lights when motion is detected or recording video when your smart doorbell rings.
Custom Detection Rules
One of the most powerful features of a Raspberry Pi surveillance system is the ability to create custom detection rules tailored to your specific needs. By leveraging motion detection algorithms and computer vision capabilities, you can set up personalized triggers that respond to specific scenarios.
Start by defining your detection zones – areas within the camera’s field of view where you want to monitor activity. You can create multiple zones with different sensitivity levels, perfect for monitoring doorways, windows, or specific areas of your property while ignoring others.
Time-based rules allow you to set different detection parameters for day and night operations. For example, you might want more sensitive detection during nighttime hours or to disable certain alerts during regular delivery times. You can also implement object recognition rules to distinguish between people, vehicles, and animals, reducing false alerts.
Custom triggers can initiate various actions: sending notifications to your phone, recording video clips, activating lights, or even triggering other smart home devices. For more advanced setups, consider implementing counting rules to track how many people enter an area or duration-based alerts that trigger when something remains in view too long.
Remember to test and fine-tune your rules regularly. Start with conservative settings and adjust gradually to find the right balance between reliable detection and minimizing false positives. This iterative process ensures your surveillance system becomes more effective over time.
Performance Optimization
To maintain optimal performance in your Raspberry Pi surveillance system, it’s essential to focus on optimizing camera performance and system resources. Start by adjusting your camera’s resolution and frame rate to balance quality with processing demands. For most home surveillance needs, 720p at 15-20 fps provides excellent results while keeping CPU usage manageable.
Implement motion detection zones to reduce false alerts. Define specific areas within the camera’s view where motion should trigger notifications, ignoring less important regions. This approach significantly decreases processing overhead and unwanted alerts from trees, passing cars, or other irrelevant movement.
Consider using hardware acceleration when available. The Raspberry Pi’s GPU can handle video encoding tasks, reducing CPU load. Enable this feature in your surveillance software settings for better overall system performance.
Memory management is crucial. Set up a rotating log system that automatically deletes older footage when storage reaches a predetermined threshold. Additionally, configure your system to use RAM efficiently by adjusting buffer sizes and implementing proper cleanup routines.
To minimize false positives, incorporate environmental factors into your detection algorithm. Set different sensitivity levels for day and night operations, and adjust threshold values based on lighting conditions. Consider implementing a brief delay (1-2 seconds) before triggering alerts to filter out momentary movements.
Regularly monitor your system’s performance using tools like top or htop. Watch for CPU spikes and memory leaks, and adjust settings accordingly. Schedule automatic system reboots during low-activity periods to maintain optimal performance and prevent potential memory issues.
Maintenance and Troubleshooting
Regular maintenance and proactive troubleshooting are essential for keeping your Raspberry Pi surveillance system running smoothly. Here are some common issues you might encounter and their solutions, along with recommended maintenance procedures.
System Updates
Schedule weekly updates by running ‘sudo apt update’ and ‘sudo apt upgrade’ commands to ensure your system has the latest security patches and bug fixes. It’s best to perform these updates during off-peak hours when surveillance is less critical.
Storage Management
Monitor your storage space regularly using the ‘df -h’ command. Set up automatic deletion of footage older than a specified period to prevent storage overflow. Consider implementing a rotating backup system for important recordings.
Common Issues and Solutions:
– Camera Not Detected: Check physical connections and ensure the camera module is enabled in raspi-config
– System Freezes: Monitor CPU temperature and add cooling if necessary
– Motion Detection False Alerts: Adjust sensitivity settings and detection zones
– Poor Video Quality: Clean camera lens and check network bandwidth
Regular Maintenance Checklist:
1. Clean camera lenses monthly with a microfiber cloth
2. Check all cable connections
3. Verify motion detection zones
4. Test alert notifications
5. Review system logs for potential issues
Performance Optimization:
– Remove unnecessary background processes
– Clean temporary files using ‘sudo apt clean’
– Monitor CPU usage with ‘top’ command
– Adjust video resolution based on available bandwidth
If your system experiences frequent crashes, consider checking the power supply quality and maintaining a stable operating temperature. For optimal performance, keep your Raspberry Pi in a well-ventilated area and protected from dust and moisture.
Emergency Recovery:
Keep a backup of your configuration files and create a system image using tools like ‘dd’ or ‘rpi-clone’. This ensures quick recovery if you need to rebuild the system from scratch.
The integration of AI capabilities with Raspberry Pi surveillance systems represents a significant leap forward in DIY security solutions. By combining affordable hardware with powerful machine learning algorithms, we’ve created a system that not only monitors but actively understands its environment. The ability to distinguish between humans, animals, and vehicles, along with intelligent motion detection and facial recognition, transforms a basic camera setup into a sophisticated security solution.
Looking ahead, the possibilities for AI-powered Raspberry Pi surveillance are boundless. Future developments may include enhanced emotion detection, behavioral analysis, and even predictive security measures. As machine learning models become more efficient and Raspberry Pi hardware continues to evolve, we can expect even more advanced features while maintaining the system’s accessibility and cost-effectiveness.
For hobbyists and tech enthusiasts, this project serves as an excellent introduction to both AI implementation and practical security applications. The scalability of the system means you can start small and gradually expand its capabilities as your needs grow. Whether you’re securing a home office or monitoring a larger property, the combination of Raspberry Pi and AI provides a flexible, powerful foundation for your security needs.
Remember that this field is rapidly evolving, and staying updated with the latest AI models and Raspberry Pi developments will help you maintain and improve your surveillance system over time. The open-source nature of both the hardware and software ensures that you’ll always have options for customization and enhancement.