

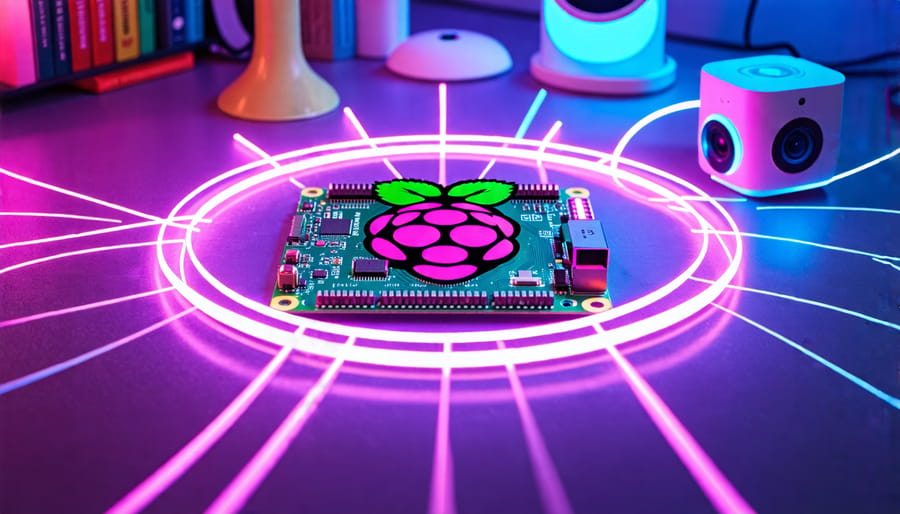
Transform your home into a smart, automated haven with Raspberry Pi. This tiny but mighty computer unlocks endless possibilities for creating custom home automation systems that simplify your life and elevate your living space. From voice-controlled lights to intelligent security setups, Raspberry Pi empowers you to bring your wildest home automation dreams to life. Get ready to dive into a world of exciting projects as we explore how Raspberry Pi can revolutionize the way you interact with your home.
Setting Up Your Raspberry Pi for Home Automation
Before diving into your raspberry pi home automation projects, you’ll need to get your Raspberry Pi properly configured. The setup process has been streamlined in 2026, making it easier than ever to prepare your device for automation work.
Whether you’re using a Raspberry Pi 4 or the newer Raspberry Pi 5, the raspberry pi setup process follows the same essential steps:
- Download and install Raspberry Pi Imager: Visit the official Raspberry Pi website and download the latest version of Raspberry Pi Imager for your operating system (Windows, macOS, or Linux).
- Flash the OS to your SD card: Launch the Imager, select “Raspberry Pi OS (64-bit)” as your operating system, choose your microSD card (at least 16GB recommended), and click “Write” to begin the process.
- Configure initial settings: Before writing, click the gear icon to access advanced options. Enable SSH for remote access, configure your Wi-Fi credentials (SSID and password), set a custom hostname for easy network identification, and create a secure username and password.
- First boot and system updates: Insert the microSD card into your Raspberry Pi, connect power, and wait for the initial boot sequence to complete. Once you’ve accessed the system (either via monitor or SSH), open the terminal and run
sudo apt update && sudo apt upgrade -yto ensure all packages are current. - Review GPIO pin layout: Familiarize yourself with the GPIO pinout documentation for your specific model. The Raspberry Pi 5 maintains the same 40-pin header as previous models, but understanding the layout is crucial for connecting sensors, relays, and other automation hardware.
If you plan to run your Raspberry Pi headless (without a monitor), the SSH option configured in step 3 is essential. You can then connect remotely from another computer on your network. For a graphical interface, consider setting up remote desktop access for easier management.
One helpful tip: after your initial setup, create a snapshot or backup of your fresh installation. This gives you a clean baseline to return to if you need to start over with a new automation project.
The GPIO pins will be your gateway to physical home automation. These 40 pins allow you to control everything from LED indicators to relay boards that switch mains-powered devices. Pin numbering can be referenced either by physical position or BCM (Broadcom) numbering, so always verify which system your code or wiring diagram uses.
With your Raspberry Pi configured and updated, you’re ready to start building automated solutions for your home.
A Raspberry Pi connected to various smart home devices and sensors
Smart Lighting Control
Controlling your home’s lighting system with a Raspberry Pi is an exciting and rewarding project. To get started, you’ll need a Raspberry Pi board, a smart bulb or LED strip that supports Wi-Fi or Bluetooth, and the necessary software libraries.
First, connect your Raspberry Pi to your home network and install the required libraries, such as the Philips Hue API for Hue bulbs or the LIFX Python library for LIFX bulbs. Next, discover the IP address of your smart bulb and authenticate your Raspberry Pi with the bulb’s API.
Once connected, you can use Python scripts to control your smart bulb’s color, brightness, and power state. For example, to turn on a Hue bulb and set it to a warm white color, you’d use commands like `()` and ` = [0.4578, 0.4100]`.
To create a custom lighting system, consider adding sensors or buttons to trigger specific lighting scenes. A PIR motion sensor can turn lights on when someone enters a room, while a push button can cycle through preset color schemes. You can also set up scheduled routines or integrate with voice assistants like Alexa or Google Home.
For a more advanced setup, consider setting up remote access to your Raspberry Pi, allowing you to control your lights from anywhere using a web interface or mobile app. This can be especially handy for setting the perfect ambiance before arriving home or adjusting your lights while away on vacation.
With a little creativity and experimentation, you can create a personalized smart lighting system that enhances your home’s comfort, convenience, and energy efficiency.

Home Security with Raspberry Pi
Home security is one of the most practical applications for Raspberry Pi automation. Whether you’re monitoring your front door, tracking movement around your property, or receiving instant alerts when something’s amiss, a Raspberry Pi security system puts you in control without the recurring fees of commercial services.
The beauty of DIY home security raspberry pi projects lies in their flexibility. You can start with a simple motion-sensing camera and expand over time, adding facial recognition, automated lighting responses, or integration with your existing smart home ecosystem. Below, we’ll explore two powerful security applications: an intelligent surveillance system and a multi-sensor security hub that ties everything together.
Raspberry Pi Security Camera
Setting up a Raspberry Pi security camera is a fun and practical project for monitoring your home. To get started, you’ll need a Raspberry Pi board (3B+ or newer), a compatible camera module, a power supply, and an SD card with the Raspberry Pi OS installed. Begin by connecting the camera module to the Pi’s camera serial interface (CSI) port and ensuring it’s securely fastened.
Next, configure the Raspberry Pi by enabling the camera interface in the Raspberry Pi Configuration tool. Open a terminal and install the required software, such as Motion, a popular open-source motion detection software. Configure Motion by editing its configuration file, specifying parameters like the camera resolution, frame rate, and motion detection settings.
To access the camera feed remotely, set up a dynamic DNS service and configure port forwarding on your router. This allows you to securely view the camera stream from anywhere using a web browser or a mobile app. Consider using SSL/TLS encryption to protect the transmitted data.
For added functionality, you can integrate the security camera with other home automation systems like smart lighting or voice control. For example, configure the camera to trigger lights when motion is detected or use voice commands to activate the camera feed on a smart display.
With a little effort, your Raspberry Pi security camera will be up and running, providing an affordable and customizable solution for home surveillance. Experiment with different camera placements, motion detection settings, and integration options to create a tailored security setup that meets your needs.
Smart Door Lock with Raspberry Pi
Creating a smart door lock with Raspberry Pi is an exciting project that enhances home security and convenience. To get started, you’ll need a Raspberry Pi, a servo motor or electronic strike lock, a door lock mechanism, jumper wires, and a reliable power supply. Begin by connecting the servo motor to the Raspberry Pi’s GPIO pins, ensuring proper wiring for power, ground, and control signals. Pay close attention to voltage requirements, as many servo motors and electronic locks require an external 5V or 12V power source separate from the Raspberry Pi itself to prevent brownouts.
Warning: Modifying your door lock system can create security vulnerabilities and may violate local building codes or insurance policies. Never rely solely on a DIY smart door lock raspberry pi system as your only means of entry and exit, especially in emergency situations. Always maintain a mechanical backup key and test the system thoroughly before daily use.
Mount the servo motor or actuator securely to your door lock mechanism, allowing it to control the lock’s movement reliably. For servo-based installations, a sturdy bracket is essential to prevent slippage under repeated use. Test the range of motion carefully to ensure the lock fully engages and disengages without binding.
Authentication Methods
On the software side, install the necessary libraries such as or gpiozero and write a Python script to control the lock based on authenticated input. You have several authentication options to choose from:
- RFID Card or Fob: Connect an RC522 or PN532 RFID reader to the Pi’s SPI interface. Each authorized card’s UID is stored in your Python script or database, granting access when scanned.
- Keypad Entry: Wire a 4×4 matrix keypad to GPIO pins and prompt users to enter a PIN code. Hash the PIN before comparing it to stored credentials for added security.
- Mobile App Control: Set up a Flask or FastAPI web server on your Raspberry Pi and expose endpoints for lock/unlock commands. Use HTTPS with authentication tokens to prevent unauthorized access. For remote operation, secure remote access is critical.
- Biometric Sensors: Fingerprint scanners compatible with Raspberry Pi add another layer of security, though they require additional calibration and storage for fingerprint templates.
Security Considerations
Raspberry pi door automation introduces unique security challenges. Store credentials securely using encryption or hashing rather than plain text. Implement rate limiting to prevent brute-force attacks on PINs or passwords. Keep your Raspberry Pi OS and libraries updated with the latest security patches. Consider adding tamper detection with magnetic switches or accelerometers to alert you if someone attempts physical interference with the lock.
Network security matters too. If your smart door lock connects to Wi-Fi, use WPA3 encryption and a strong password. Firewall rules should block unnecessary incoming connections, and any web interface should require HTTPS and strong authentication.
Smart Home Integration
Integrate your lock with existing smart home platforms to create unified automation routines. Home Assistant and OpenHAB both support custom components that can interface with your Raspberry Pi via MQTT or REST APIs. You can then combine door lock status with smart lighting to turn on lights when the door unlocks, or link it to voice control systems for hands-free operation. For centralized management of multiple Pi-based projects, tools like Raspberry Pi Commander streamline configuration and monitoring.
Wiring diagrams specific to your chosen lock type and authentication method are widely available in community forums and GitHub repositories. Reference these carefully during installation to avoid damaging components or creating unsafe electrical connections.
Voice-Controlled Home Automation
Integrating your Raspberry Pi with popular voice assistants like Alexa or Google Assistant opens up exciting possibilities for hands-free home control. By setting up your Pi as a smart home hub, you can use voice commands to effortlessly manage various devices and automate tasks.
As of 2026, the setup process relies on the Alexa Skills Kit (ASK) for Amazon devices and Google Assistant Actions for Google Home integration. Note that the older Alexa Voice Service (AVS) for device prototyping has been deprecated in favor of the ASK Custom Skills approach, which provides better reliability and official support. For Google Assistant, the SDK continues to be supported, though Google now emphasizes the Actions Console for creating custom voice control raspberry pi applications.
To implement alexa raspberry pi home automation, start by creating a custom skill in the Alexa Developer Console. You’ll configure your skill to send requests to a web service running on your Raspberry Pi, typically using Flask or to handle incoming commands. The official Alexa Skills Kit documentation provides detailed setup instructions, including account linking and smart home skill API endpoints. For Google Assistant, you’ll use the Actions Console to define intents and responses, then deploy a webhook that communicates with your Pi’s hardware.
Common voice commands you can implement include:
- Turning lights on or off in specific rooms
- Adjusting thermostat temperature settings
- Checking security camera feeds or status
- Locking or unlocking smart door locks
- Activating custom automation routines
- Checking the status of connected devices
With the help of the Raspberry Pi Commander you can streamline the setup process and easily manage your voice-controlled home automation system. As you dive deeper into this project, you’ll discover endless ways to customize and expand your voice-controlled home, making your daily life more convenient and enjoyable.
Energy Monitoring and Management
Energy monitoring and management is a crucial aspect of home automation, and Raspberry Pi offers an affordable and powerful platform for implementing energy-saving solutions. One popular project is creating a smart thermostat using a Raspberry Pi, temperature sensors, and a relay module to control your heating and cooling systems. By programming the Pi to optimize temperature settings based on occupancy, time of day, and weather conditions, you can significantly reduce energy waste and costs.
Another valuable energy management project is building an energy usage dashboard with a Raspberry Pi. By integrating the Pi with smart plugs and energy monitoring sensors, you can track the power consumption of individual appliances and your entire home in real-time. Visualizing this data through a web-based dashboard allows you to identify energy-hungry devices, monitor trends, and make informed decisions to optimize your energy usage. With a Raspberry Pi and a few additional components, you can gain valuable insights into your home’s energy consumption and take steps towards a more efficient and eco-friendly lifestyle.