

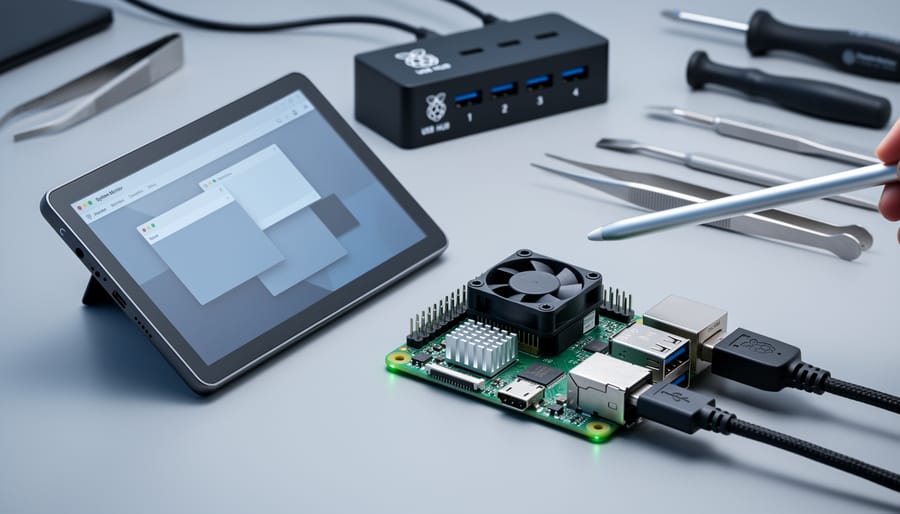
GUI automated testing on Raspberry Pi demands a different approach than conventional desktop testing. The Pi’s ARM architecture, limited processing power, and typical headless deployment create unique challenges that render many standard testing frameworks inefficient or completely unusable.
Choose lightweight frameworks specifically designed for resource-constrained environments. PyAutoGUI works well for basic mouse and keyboard automation on Pi desktop environments, while Dogtail excels at testing GTK-based applications without consuming excessive memory. For web-based kiosk applications running in Chromium, Selenium WebDriver with the –disable-gpu flag prevents crashes and reduces CPU overhead by up to 40%.
Configure your test environment to match real-world deployment conditions. If your production Pi runs headless, test using Xvfb (X Virtual Framebuffer) rather than a physical display. This approach catches display-related issues early and allows automated testing through SSH connections. For touch-screen kiosks, simulate touch events through evdev rather than mouse clicks to ensure accurate testing of gesture controls.
Optimize test execution speed by running tests in parallel only when you have a Pi 4 with 4GB or more RAM. Lower-powered models struggle with concurrent test execution, causing timeouts and false failures. Instead, structure your test suite to run sequentially with shorter, focused test cases that complete in under 30 seconds each.
Monitor system resources during test execution using lightweight tools like htop or custom Python scripts. Raspberry Pi testing failures often stem from memory exhaustion or thermal throttling rather than actual application bugs, making resource monitoring essential for accurate results.
What Makes GUI Testing Different on Raspberry Pi
Hardware Limitations That Impact Testing
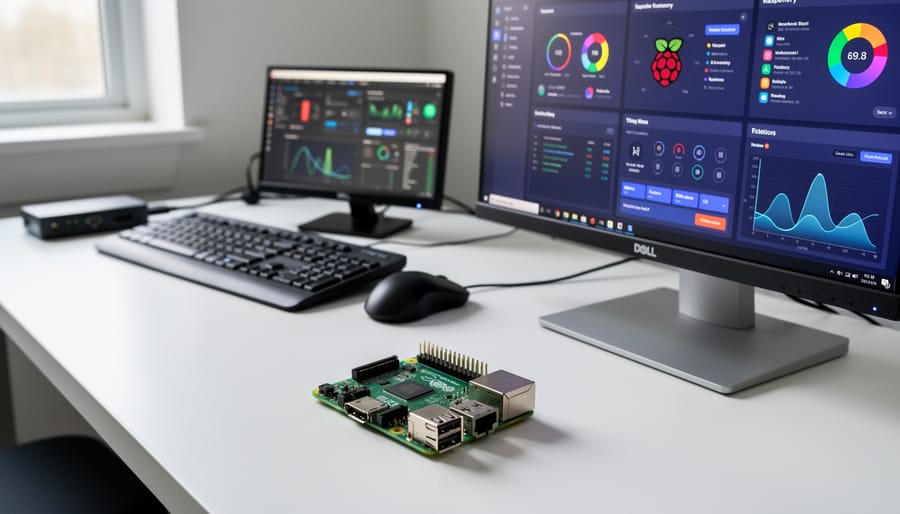
When running GUI automated tests on Raspberry Pi, you’ll quickly encounter hardware bottlenecks that differ from traditional desktop environments. Understanding these limitations helps you design realistic test strategies.
The CPU is your first constraint. Most Pi models use ARM processors with lower clock speeds than typical development machines. This means GUI rendering takes longer, and running headless browsers like Chromium or Firefox for testing can consume 50-70% of available processing power. Tests that run in seconds on your laptop might take minutes on a Pi 3 or Pi 4.
RAM limitations are equally significant. A Raspberry Pi 4 with 4GB RAM sounds adequate, but remember that the operating system, desktop environment, and your application all compete for memory. Running Selenium with Chrome in headed mode can easily consume 1-2GB, leaving little room for your actual application. This forces you to choose between headless testing (faster but less accurate for visual bugs) or headed testing (slower but more representative).
GPU constraints affect graphical rendering speed. The VideoCore GPU handles basic compositing well, but complex animations or video playback during tests may stutter or timeout. Adjust your test timeouts accordingly—what works with 2-second waits on desktop hardware might need 5-10 seconds on Pi to account for rendering delays.
Display and Resolution Challenges
One of the trickiest aspects of GUI automated testing on Raspberry Pi involves managing display configurations. Unlike traditional desktop environments, your Pi might run headless (without a physical monitor), making it challenging to test visual interfaces that require an actual display buffer.
The solution lies in virtual displays using tools like Xvfb (X Virtual Framebuffer). This creates a virtual screen in memory, allowing your GUI applications to run and be tested without physical hardware. You’ll need to install Xvfb and configure your test scripts to launch it before running tests. A typical command looks like: xvfb-run –auto-servernum –server-args=”-screen 0 1920x1080x24″ python your_test.py.
Another complication arises from varying screen resolutions across different Pi models and attached displays. Your Raspberry Pi 4 with a 1080p monitor will render differently than a Pi Zero with a 7-inch touchscreen. This affects element positioning and screenshot-based testing. Always set explicit resolution parameters in your test environment and use responsive design principles in your applications. Consider testing across multiple resolution profiles to ensure your GUI behaves consistently.
For kiosk projects, remember that touch interfaces require different testing approaches than mouse-driven ones, adding another layer of complexity to your automation strategy.
The Best GUI Testing Frameworks That Actually Work on Raspberry Pi
Selenium with Lightweight Browsers
Selenium remains the most popular choice for GUI automated testing, and it runs surprisingly well on Raspberry Pi when configured properly. The key is using lightweight browsers in headless mode, which eliminates the graphical rendering overhead that can bog down the Pi’s limited resources.
To get started, install Selenium using pip: `pip3 install selenium`. Next, you’ll need a WebDriver for your chosen browser. Chromium is often the better choice for Raspberry Pi because it’s typically pre-installed on Raspberry Pi OS. Install the ChromeDriver with `sudo apt-get install chromium-chromedriver`, making sure the ChromeDriver version matches your Chromium browser version.
For headless operation, configure your Selenium script with the appropriate options. With Chromium, create a ChromeOptions object and add the `–headless` argument along with `–disable-gpu` and `–no-sandbox` flags. The no-sandbox flag is particularly important on Raspberry Pi to avoid permission issues. A basic setup looks like this: initialize your options, add your arguments including headless mode, then pass these options when creating your WebDriver instance.
Firefox with geckodriver is an alternative that sometimes performs better on Pi 4 models with 4GB RAM or more. However, Chromium generally offers better compatibility with modern web applications.
Performance tips include limiting concurrent browser instances to one or two maximum, increasing swap space if you’re testing complex web applications, and using the `–disable-dev-shm-usage` flag to prevent shared memory issues. Monitor your Pi’s temperature during extended test runs, as sustained CPU usage can trigger thermal throttling that impacts test reliability.
PyAutoGUI for Simple GUI Automation
PyAutoGUI is an excellent starting point for GUI automation on Raspberry Pi, especially if you’re new to testing. This Python library simulates mouse clicks, keyboard input, and screen captures with minimal resource overhead, making it ideal for Pi’s limited hardware.
The beauty of PyAutoGUI lies in its simplicity. You can automate basic GUI interactions in just a few lines of code. Here’s a practical example for testing a button click:
“`python
import pyautogui
import time
# Wait for application to load
time.sleep(2)
# Click at specific coordinates
pyautogui.click(x=100, y=200)
# Type text input
pyautogui.write(‘Hello Raspberry Pi’)
# Take a screenshot for verification
screenshot = pyautogui.screenshot()
screenshot.save(‘test_result.png’)
“`
For more robust testing, combine PyAutoGUI with image recognition. You can locate UI elements by capturing reference images and using the locateOnScreen function. This works well for simple projects like kiosk applications or educational demos where pixel-perfect precision isn’t critical.
Keep in mind that PyAutoGUI works best for straightforward automation tasks. If your project requires complex workflows or precise element identification, you might need to combine it with other tools or consider more advanced frameworks for comprehensive testing coverage.
Sikuli and OpenCV-Based Solutions
When your Raspberry Pi’s resources are stretched thin, image recognition-based testing offers a practical alternative to traditional GUI automation frameworks. Sikuli and OpenCV provide lightweight solutions that work by identifying visual elements on screen, making them ideal for constrained hardware environments.
Sikuli uses a simple scripting approach where you capture screenshots of UI elements and write test scripts that click, type, or verify based on those images. It’s remarkably beginner-friendly—you literally point at what you want to test. This visual approach works across different GUI frameworks without needing access to the underlying code structure, perfect for testing kiosk applications or touch-screen interfaces on the Pi.
OpenCV takes a more programmatic route, giving you fine-grained control over image matching algorithms. While it requires more coding knowledge, it runs efficiently on Pi hardware and integrates smoothly with Python-based projects. You can combine OpenCV with PyAutoGUI for mouse and keyboard control, creating a powerful testing toolkit.
Both solutions excel when testing applications where traditional accessibility APIs are unavailable or when cross-platform consistency matters. The tradeoff is that image-based testing can be sensitive to screen resolution changes and visual updates, so maintain a well-organized library of reference images and consider implementing fuzzy matching to handle minor UI variations.
DoGTail for Linux GUI Testing
DoGTail stands out as a Linux-native GUI testing framework that works exceptionally well on Raspberry Pi OS and other Debian-based distributions. Unlike browser-focused tools, DoGTail specializes in testing desktop applications by leveraging the AT-SPI (Assistive Technology Service Provider Interface) accessibility layer built into most Linux desktop environments.
What makes DoGTail particularly appealing for Raspberry Pi projects is its lightweight footprint and efficient resource usage. It can interact with any application that exposes accessibility information, making it perfect for testing custom kiosk interfaces, educational applications, or IoT control panels running on Pi hardware.
Getting started is straightforward. Install DoGTail using apt-get, and you can immediately begin writing Python scripts that locate UI elements by name, role, or label. The framework handles mouse clicks, keyboard input, and element verification without requiring special modifications to your application code.
DoGTail shines in scenarios where you’re building full desktop applications rather than web-based interfaces. It integrates seamlessly with Python testing frameworks like pytest, allowing you to create comprehensive test suites that verify your Pi-based GUI applications work correctly across different screen sizes and user interactions.
Setting Up Your Raspberry Pi for GUI Testing Success
Essential Software and Dependencies
Before diving into GUI automated testing on your Raspberry Pi, you’ll need to install several key components to create a functional testing environment. Let’s walk through what you’ll need and why each piece matters.
First, install Xvfb (X Virtual Framebuffer), a virtual display server that lets you run GUI applications without a physical monitor. This is essential for headless testing scenarios. Install it with `sudo apt-get install xvfb`. You’ll also want xvfbwrapper, a Python wrapper that simplifies Xvfb usage: `pip3 install xvfbwrapper`.
Next, choose your testing framework. For Python-based projects, Pytest combined with pytest-qt works excellently for Qt applications, while PyAutoGUI handles cross-platform GUI automation. Install these with `pip3 install pytest pytest-qt pyautogui`. If you’re working with web-based interfaces, Selenium remains the gold standard: `pip3 install selenium`.
For performance monitoring on resource-constrained Pi hardware, install htop (`sudo apt-get install htop`) to watch CPU and memory usage during tests. The psutil Python library (`pip3 install psutil`) lets you programmatically monitor system resources within your test scripts.
Don’t forget screenshot capabilities for debugging failed tests. Scrot (`sudo apt-get install scrot`) captures screen images effectively. Finally, ensure you’ve completed setting up Raspberry Pi OS and proper development environment setup before proceeding with these installations to avoid compatibility issues.
Optimizing Performance for Test Execution
When running GUI automated tests on your Raspberry Pi, performance optimization becomes crucial for keeping test execution times manageable. Even a well-written test suite can become frustratingly slow without proper configuration tweaks.
Start by addressing swap memory management. Raspberry Pi’s default swap configuration can cause slowdowns during test execution. Disable swap entirely if you have sufficient RAM (4GB or more) by running sudo swapoff -a and commenting out the swap line in /etc/fstab. For models with less memory, reduce swappiness to 10 with sudo sysctl vm.swappiness=10 to minimize disk thrashing during tests.
Consider moderate overclocking to boost test execution speed. Edit /boot/config.txt and increase arm_freq to 1800 for Pi 4 models (from the default 1500). Add over_voltage=2 for stability. This modest bump provides noticeable improvements without excessive heat or risk. Monitor temperatures during test runs using vcgencmd measure_temp.
Disable unnecessary services that consume resources during testing. Background services like Bluetooth, Wi-Fi (if using ethernet), and desktop effects eat into your available processing power. Use systemctl disable bluetooth and remove or disable any auto-starting applications. For headless testing environments, consider disabling the desktop manager entirely.
Apply these optimizations alongside general optimizing Raspberry Pi performance practices. Together, these tweaks can reduce test suite execution time by 30-50%, making continuous integration workflows more practical on Pi hardware. Remember to benchmark before and after changes to measure actual improvements for your specific testing workload.
Headless vs. Display-Attached Testing
When testing GUI applications on Raspberry Pi, you’ll need to choose between headless mode (no physical display) and display-attached testing. Headless testing runs faster and uses fewer resources—perfect for continuous integration pipelines or when running multiple tests simultaneously. It works great with virtual framebuffers like Xvfb, allowing your Pi to simulate a display without actually connecting one.
Display-attached testing shows you exactly what’s happening in real-time, making it invaluable for debugging visual issues or developing new test scripts. If you’re building a kiosk application or testing touch interactions, seeing the actual display helps catch UI glitches that might slip through headless tests.
For practical implementation, start with display-attached testing while writing your scripts. Once tests are stable, switch to headless mode for regular automated runs. This hybrid approach gives you debugging visibility when needed while maximizing efficiency during routine testing. Many frameworks like Selenium and PyAutoGUI support both modes, so you can easily switch between them using command-line flags or configuration files without rewriting your test code.
Hands-On Project: Building Your First GUI Test on Raspberry Pi
Project Requirements and Setup
Before diving into GUI automated testing on your Raspberry Pi, let’s gather what you’ll need. First, ensure you have a Raspberry Pi (Model 3B+ or newer recommended) running the latest Raspberry Pi OS with desktop environment installed. You’ll need at least 2GB of RAM for smooth testing operations, though 4GB or more is ideal for running multiple test suites.
For software requirements, update your system with sudo apt update && sudo apt upgrade, then install Python 3.8 or higher, which typically comes pre-installed. You’ll also need pip for package management. Depending on your chosen framework, install additional dependencies like Xvfb for headless testing or VNC server for remote test observation.
Set up a dedicated testing directory on your Pi to keep projects organized. Configure your display settings to match your target resolution, as GUI tests are sensitive to screen dimensions. If testing web applications, install a lightweight browser like Chromium. Finally, allocate sufficient storage space—at least 4GB free—for test screenshots, logs, and video recordings. With these components ready, you’re prepared to implement robust automated testing for your Raspberry Pi GUI applications.
Writing Your Test Script
Let’s walk through creating your first GUI test script for Raspberry Pi. We’ll use PyAutoGUI, which works reliably on Pi’s limited resources.
First, install the necessary library by opening your terminal and typing: pip3 install pyautogui pillow
Now create a new Python file called test_calculator.py. We’ll automate testing the built-in calculator app as our example.
Start with importing the required modules:
import pyautogui
import time
Next, add a safety feature. PyAutoGUI includes a fail-safe that stops your script if you move the mouse to the screen corner:
pyautogui.FAILSAFE = True
Now let’s open the calculator. Add a small delay to give applications time to respond, which is especially important on Raspberry Pi:
time.sleep(2)
pyautogui.press(‘win’)
time.sleep(1)
pyautogui.write(‘calculator’)
pyautogui.press(‘enter’)
time.sleep(3)
The script presses the menu key, types “calculator,” and launches it. Each time.sleep() pause ensures the Pi processes the command before moving forward.
Now automate some button clicks:
pyautogui.click(x=500, y=300)
time.sleep(0.5)
pyautogui.click(x=550, y=300)
To find exact coordinates, run pyautogui.position() in a Python shell while hovering over buttons. This returns the x,y values you need.
Remember to always test scripts in controlled environments first. Start with longer delays between actions, then optimize once everything works smoothly. This methodical approach prevents frustrating debugging sessions later.
Running and Debugging Your Test
Once you’ve set up your test framework, executing your automated GUI test is straightforward. Run your test script using the command line—for example, python test_myapp.py if you’re using Python-based tools. Watch the console output carefully as it provides real-time feedback about which test steps are passing or failing.
Understanding test results is crucial for improving your application. Most frameworks generate detailed reports showing screenshots of failures, execution times, and error messages. Green checkmarks indicate successful tests, while red X marks highlight issues requiring attention. Pay special attention to timeout errors on Raspberry Pi, as they often signal performance bottlenecks rather than actual bugs.
Common troubleshooting scenarios include display connection issues—ensure your DISPLAY environment variable is set correctly, typically DISPLAY=:0 for physical displays or DISPLAY=:1 for virtual ones. If elements aren’t being found, your application might be loading slower than expected due to the Pi’s limited resources. Increase wait times in your test scripts or implement explicit waits that check for element presence before interaction.
Memory constraints can cause tests to fail intermittently. Monitor your Pi’s resource usage with htop during test execution and consider closing unnecessary background processes. For persistent issues, enabling debug logging in your test framework reveals exactly what’s happening behind the scenes, helping you pinpoint problems quickly.
Common Pitfalls and How to Avoid Them
Memory Overflow During Test Runs
Memory constraints on Raspberry Pi can cause test runs to crash unexpectedly. The limited RAM (especially on Pi 3 and earlier models) quickly fills up when running GUI applications alongside testing frameworks.
To prevent out-of-memory errors, close unnecessary background services before testing. Use the command `sudo systemctl stop` to disable services like Bluetooth or printing temporarily. Monitor memory usage during tests with `htop` to identify bottlenecks.
Implement test batching by breaking large test suites into smaller groups that run sequentially. This prevents multiple browser or application instances from competing for resources. Configure your testing framework to run only 2-3 parallel processes maximum on Pi 4, or disable parallelization entirely on older models.
Use headless mode whenever possible, as it significantly reduces memory consumption. For Selenium-based tests, add the `–headless` flag and disable image loading with browser options. This can cut memory usage by 40-50%.
Clear cache and temporary files between test runs using cleanup scripts. Implement proper teardown methods in your tests to ensure resources release completely. Consider adding swap space as a safety buffer, though this will slow performance considerably.
Timing and Synchronization Issues
Raspberry Pi’s limited processing power and memory can create timing challenges that don’t appear on desktop systems. Your automated tests might fail not because the application is broken, but because elements take longer to load or respond. Understanding how to handle these delays is crucial for reliable test execution.
The most common solution is implementing explicit waits rather than hard-coded sleep statements. Most testing frameworks offer wait conditions that poll for element availability. For example, Selenium’s WebDriverWait checks repeatedly until an element becomes interactive, preventing premature interactions that cause test failures. Set reasonable timeout values—while 10 seconds might seem excessive on a desktop, it’s often appropriate for Pi applications.
Monitor your application’s actual response times during manual testing to establish baseline expectations. If a button click consistently takes 2-3 seconds to trigger a response on your Pi 3, configure your wait conditions accordingly. Consider using visual cues in your application that signal when operations complete, making it easier for tests to detect readiness.
Another effective strategy is implementing retry logic for flaky operations. Wrap critical test steps in try-catch blocks that attempt the action multiple times before declaring failure. This approach accommodates occasional slowdowns without compromising test validity, ensuring your automated tests remain stable and trustworthy even on constrained hardware.
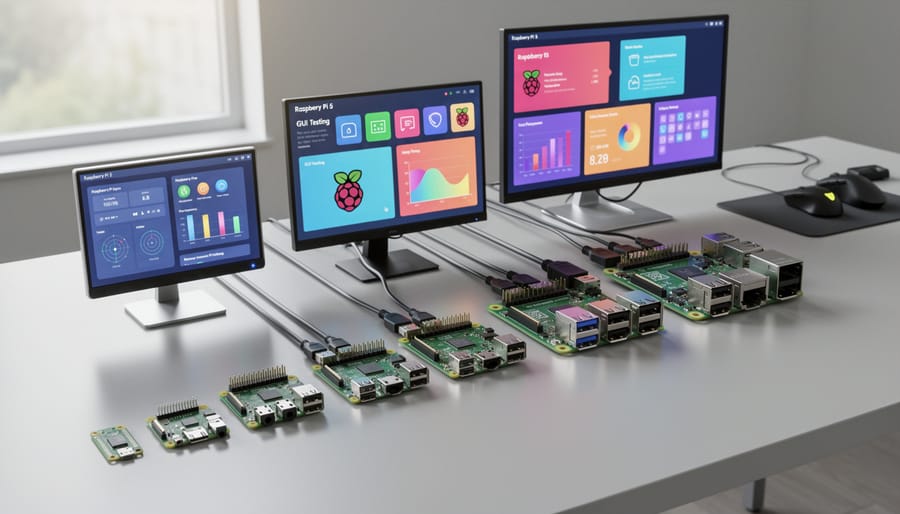
Which Raspberry Pi Model Should You Use for GUI Testing?
Choosing the right Raspberry Pi model for GUI testing depends on your specific requirements, budget, and the complexity of your application. Let’s break down how each model performs in real-world testing scenarios.
The Raspberry Pi 4 (4GB or 8GB) stands out as the sweet spot for most GUI testing projects. With its quad-core processor and ample RAM, it handles modern GUI frameworks like PyQt5 and Tkinter smoothly, even when running headless testing tools like Selenium or Playwright. The 4GB version works well for basic to intermediate testing needs, while the 8GB model excels with complex multi-window applications or parallel test execution. If you’re setting up a dedicated testing station, this model provides the reliability you need without breaking the bank.
The Raspberry Pi 5 represents the cutting edge, offering significant performance improvements with its faster processor and enhanced graphics capabilities. This model shines when testing graphics-intensive applications, running multiple simultaneous test suites, or working with high-resolution displays. If you’re just getting started, check out our Raspberry Pi 5 setup guide to get your testing environment configured quickly. While pricier, the Pi 5 future-proofs your testing infrastructure.
The Raspberry Pi 3 remains a viable option for budget-conscious projects or simpler GUI applications. It handles lightweight frameworks adequately but may struggle with resource-intensive testing frameworks or complex visual applications. Consider this model if you’re testing basic touchscreen interfaces or simple kiosk applications.
The Raspberry Pi Zero, despite its compact size and low cost, isn’t recommended for serious GUI testing work. Its single-core processor and limited RAM create bottlenecks that make automated testing painfully slow. However, it can serve as a test target device when you need to verify your application runs on minimal hardware.
For most users starting their GUI testing journey, invest in a Raspberry Pi 4 with at least 4GB RAM. It offers the best balance of performance, compatibility, and cost-effectiveness.
You’ve now explored the fundamentals of GUI automated testing on Raspberry Pi, from understanding the unique constraints of ARM-based hardware to implementing practical testing frameworks like pytest-qt and Selenium. The key takeaway? While Raspberry Pi presents specific challenges—limited resources, display configurations, and occasional driver quirks—it’s entirely capable of running robust automated test suites with the right approach.
Start small. Pick one simple GUI application on your Pi and write just a few basic tests. Maybe it’s verifying that a button click changes a label, or that your kiosk display loads the correct homepage. These initial successes will build your confidence and help you understand the testing workflow before tackling more complex scenarios. Remember, even professional developers begin with simple assertions and gradually expand their test coverage.
As you progress, focus on optimization techniques specific to Pi hardware. Use headless testing where possible, implement smart waiting strategies instead of arbitrary sleeps, and leverage virtual displays to conserve resources. These practices will make your tests faster and more reliable.
For those ready to dive deeper, the official documentation for pytest, Selenium, and PyAutoGUI offer extensive examples and advanced techniques. The Raspberry Pi forums are invaluable for troubleshooting hardware-specific issues, while GitHub repositories often contain real-world testing projects you can study and adapt. Consider experimenting with CI/CD pipelines on your Pi to automate the entire testing process—it’s an excellent learning opportunity that mirrors professional development workflows.
Your journey into GUI automated testing starts with that first test. Fire up your Raspberry Pi and give it a try.