

Transform your programming dreams into reality with the Raspberry Pi 3, the perfect pocket-sized computer for aspiring makers and tech enthusiasts. Whether you’re a student, educator, or curious hobbyist ready to start your Raspberry Pi journey, this versatile $35 microcomputer opens up a world of possibilities – from building custom smart home devices to learning Python programming.
Setting up your first Raspberry Pi 3 doesn’t require extensive technical knowledge. With just a microSD card, power supply, and HDMI cable, you’ll be ready to explore the user-friendly Raspberry Pi OS (formerly Raspbian) operating system. The quad-core processor and built-in wireless capabilities make it ideal for beginners, while offering enough power for advanced projects as your skills grow.
This guide walks you through essential first steps, common pitfalls to avoid, and exciting starter projects that will build your confidence with physical computing. By following our structured approach, you’ll quickly progress from basic setup to creating your own innovative solutions using the Pi’s GPIO pins, camera module, and vast array of compatible sensors.
Getting Started with Your Raspberry Pi 3
Essential Components and Setup
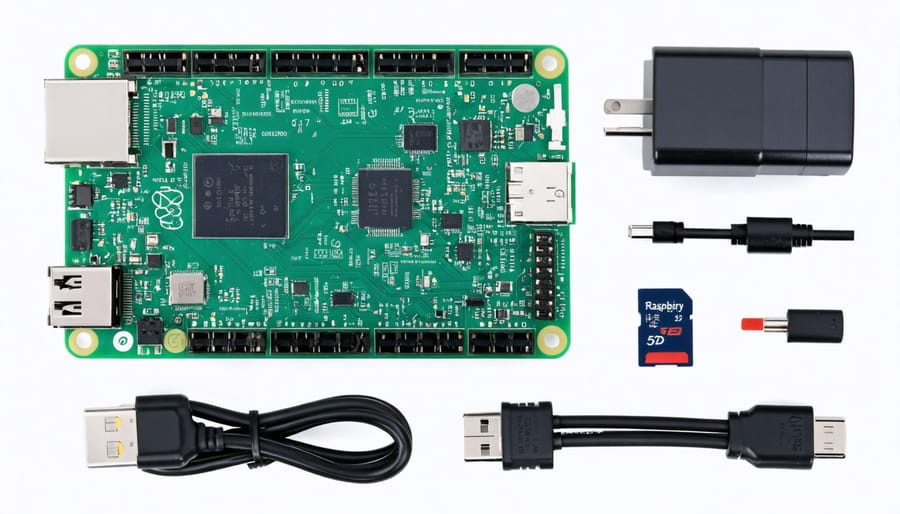
To get started with your Raspberry Pi 3, you’ll need several essential components. First, the Raspberry Pi 3 board itself serves as the core of your system. You’ll also need a power supply (5V 2.5A micro-USB), a microSD card (minimum 8GB, class 10 recommended) for storing the operating system, and a case to protect your Pi.
For display and control, gather an HDMI cable, a monitor or TV with HDMI input, and a USB keyboard and mouse. While optional, a good-quality heat sink can help maintain optimal performance during extended use.
Setting up your Pi is straightforward. Start by inserting the microSD card into the slot on the underside of the board. Place the Pi in its case, then connect the HDMI cable to your display. Plug in your keyboard and mouse to the USB ports. If you’re using a heat sink, attach it to the main processor following the included instructions.
For network connectivity, the Pi 3 features built-in Wi-Fi and Bluetooth, but an Ethernet cable can provide a more stable connection. Finally, connect the power supply last – this will boot up your Pi automatically.
Remember to handle the board carefully, touching only the edges to avoid static damage. Once assembled, you’re ready to install the operating system and begin your Raspberry Pi journey.
Installing Your First Operating System
Installing your first operating system on the Raspberry Pi 3 is straightforward with the official Raspberry Pi Imager tool. Start by downloading the Raspberry Pi Imager from the official website onto your computer. Once installed, insert your microSD card into your computer using a card reader.
Launch the Raspberry Pi Imager and click “Choose OS.” For beginners, we recommend selecting “Raspberry Pi OS (32-bit)” as it’s the most stable and well-supported option. Next, click “Choose Storage” and select your microSD card from the list. Double-check that you’ve selected the correct drive to avoid overwriting other devices.
Before writing the OS, click the settings gear icon to configure your Wi-Fi credentials, hostname, and enable SSH if you plan to set up remote desktop access later. Click “Write” and wait for the process to complete – this typically takes 5-10 minutes.
Once finished, safely eject the microSD card and insert it into your powered-off Raspberry Pi 3. Connect your keyboard, mouse, and display, then plug in the power supply. Your Pi will boot up for the first time and guide you through the initial setup wizard, where you’ll set your language, time zone, and create a user account.
The desktop environment will load, and you’ll be ready to start exploring your new Raspberry Pi system!
Basic Programming Concepts for STEM
Your First Python Program
Let’s start your Python journey with a simple yet engaging program that demonstrates basic mathematical calculations – perfect for STEM learning! First, open the Python IDLE editor on your Raspberry Pi by clicking the Programming menu and selecting “Python 3 (IDLE).”
Type the following code into your new file:
“`python
print(“Welcome to My First Science Calculator!”)
# Get input from the user
radius = float(input(“Enter the radius of a circle: “))
# Calculate area and circumference
pi = 3.14159
area = pi * radius * radius
circumference = 2 * pi * radius
# Display results
print(f”Area of the circle: {area:.2f} square units”)
print(f”Circumference: {circumference:.2f} units”)
“`
This program introduces several fundamental programming concepts while reinforcing mathematical principles. It takes user input, performs calculations, and displays formatted results – all essential skills for future projects.
Try modifying the program to calculate different shapes or add more calculations. For example, you could add volume calculations for spheres or explore temperature conversions between Celsius and Fahrenheit.
Remember to save your program (File > Save As) with a .py extension, like “circle_calculator.py”. To run it, press F5 or select Run > Run Module from the menu.
Don’t worry if you make mistakes – debugging is part of the learning process! Try changing values and observing how the results change. This hands-on experimentation is crucial for understanding both programming and mathematical concepts.
Creating Interactive Science Projects
The Raspberry Pi 3 is perfect for creating engaging science projects that teach real-world data collection and analysis. Let’s explore some beginner-friendly projects that combine sensors with basic programming to create interactive experiments.
A great starting point is building a weather station using the DHT11 temperature and humidity sensor. This simple setup requires just a few connections and basic Python code to collect environmental data. Students can track temperature changes throughout the day and create graphs to visualize their findings.
Motion detection projects using the PIR (Passive Infrared) sensor offer another exciting avenue. You can create a simple wildlife camera that triggers when animals pass by, or build a basic security system that sends notifications when movement is detected. These projects teach both electronics basics and practical programming concepts.
For those interested in environmental science, connecting a soil moisture sensor to your Pi creates an automated plant monitoring system. Students can learn about plant biology while coding their own watering reminder system or tracking optimal growing conditions.
Light sensors (photoresistors) enable fascinating experiments with day/night cycles or light intensity measurements. Create a smart lighting system that responds to ambient light levels, or measure the effectiveness of different sunscreens by detecting UV intensity.
To get started with any of these projects, you’ll need:
– The appropriate sensor
– Jumper wires
– A breadboard
– Basic Python programming knowledge
– The GPIO Zero library
Remember to start with simple projects and gradually increase complexity as you become more comfortable with both the hardware and programming aspects. Document your findings and experiment with different ways to visualize your data using Python’s plotting libraries.
Hands-on STEM Projects
Digital Weather Station
Creating a digital weather station with your Raspberry Pi 3 is an excellent beginner project that combines hardware integration, sensor programming, and data analysis. This project will teach you fundamental skills while building something practical and engaging.
To get started, you’ll need a few basic components: a DHT11 or DHT22 temperature and humidity sensor, a BMP180 barometric pressure sensor, and some jumper wires. These components are affordable and readily available from most electronics suppliers.
First, connect your sensors to the Raspberry Pi’s GPIO pins. The DHT sensor typically requires three connections: power (3.3V), ground, and data. The BMP180 uses I2C communication and needs four connections: power, ground, SDA, and SCL pins.
Once the hardware is connected, you’ll need to install the necessary Python libraries. Open the terminal and run:
“`
sudo apt-get update
sudo apt-get install python3-pip
pip3 install Adafruit_DHT
pip3 install Adafruit_BMP
“`
Create a simple Python script to read data from your sensors. Your program should collect temperature, humidity, and pressure readings at regular intervals. You can store this data in a CSV file or display it on a small LCD screen if you want to expand the project.
This basic setup serves as an excellent foundation to build advanced weather monitoring systems later on. You can add features like wind speed sensors, rain gauges, or even create a web interface to view your weather data remotely.
Remember to house your sensors in a weatherproof container if you plan to place them outdoors. A simple case with ventilation holes works well for indoor use. Consider calibrating your sensors against a known accurate weather station to ensure reliable readings.
This project teaches valuable skills in working with sensors, data collection, and basic Python programming while creating something useful for your home or classroom.
LED Mathematics
LED arrays on the Raspberry Pi 3 offer an engaging way to visualize mathematical concepts, making abstract ideas more tangible for learners. Using an 8×8 LED matrix, you can create interactive displays that demonstrate everything from basic arithmetic to complex mathematical patterns.
To get started, connect an LED matrix to your Pi’s GPIO pins using a breadboard and jumper wires. The most common choice is the MAX7219 LED matrix, which communicates with the Pi through SPI protocol. Once connected, you can use Python libraries like luma.led_matrix to control individual LEDs.
Here’s what you can visualize:
Binary numbers are perfect for LED displays – each light represents a 1 or 0, helping students understand binary counting and operations. Create simple programs that count in binary, with each number represented by lit LEDs.
For multiplication tables, use rows and columns of LEDs to show multiplication grids. When a student enters numbers, the corresponding LEDs light up to display the product, making it easier to understand patterns in multiplication.
Mathematical sequences like Fibonacci numbers can be represented through spiral patterns, where each LED lights up in sequence to show how the numbers grow. This creates a visual connection between numbers and geometric patterns.
For teaching coordinate geometry, the LED matrix becomes a mini coordinate plane. Students can plot points, draw lines, and even animate simple geometric transformations. This hands-on approach helps reinforce concepts like plotting points and understanding slopes.
To make it interactive, add buttons or a keypad that allows students to input numbers and see immediate visual feedback on the LED display. This creates an engaging learning environment where students can experiment with mathematical concepts and see instant results.
Remember to start with simple projects and gradually increase complexity as students become more comfortable with both the programming and mathematical concepts.
Troubleshooting Common Issues
When starting with your Raspberry Pi 3, you might encounter some common issues. Don’t worry – most of these problems have simple solutions! If your Pi won’t boot up, first check that your power supply provides at least 2.5A at 5V. A common symptom of insufficient power is the rainbow square in the top-right corner of your screen.
If you’re seeing no display output, ensure your HDMI cable is firmly connected and try unplugging and reconnecting it while the Pi is powered on. Sometimes, you may need to try different HDMI ports on your display. For blank screens after boot, verify that your SD card is properly inserted and contains a valid operating system image.
Network connectivity issues? First, check if your Wi-Fi password is correct. If using Ethernet, ensure the cable is properly connected. For slow performance, try closing unnecessary background processes and using a Class 10 SD card or better.
If your Pi feels hot, it might be thermal throttling. Ensure proper ventilation and consider adding a small heatsink or fan. For software freezes, safely restart your Pi by disconnecting and reconnecting the power supply.
Remember, the Raspberry Pi community is very supportive. If you encounter issues not covered here, the official Raspberry Pi forums are an excellent resource for troubleshooting help.
Getting started with the Raspberry Pi 3 opens up a world of possibilities for tech enthusiasts and learners alike. From setting up your first operating system to creating exciting projects, you’ve now gained the foundational knowledge needed to explore this versatile platform. The Pi 3’s ability to enhance STEM education makes it an invaluable tool for both personal and educational projects. As you continue your journey, consider exploring more advanced projects like home automation, building a retro gaming console, or creating your own web server. Remember to join the vibrant Raspberry Pi community for support, inspiration, and project ideas. With practice and patience, you’ll soon be tackling more complex projects and discovering new ways to use your Raspberry Pi 3.