


Unlock the full potential of your Raspberry Pi with IO expansion boards – the essential hardware bridges that transform basic GPIO capabilities into advanced control systems for sophisticated IoT projects. These versatile add-ons expand your Pi’s IoT hub capabilities, enabling seamless integration of multiple sensors, actuators, and industrial-grade components. Whether you’re building an automated home system, developing industrial monitoring solutions, or creating an educational platform, IO expansion boards provide the crucial interface between your Pi and the physical world. Modern expansion boards offer features like additional GPIO pins, analog inputs, PWM outputs, and specialized protocols such as I2C and SPI, making them indispensable tools for makers and developers pushing the boundaries of what’s possible with Raspberry Pi hardware.
Understanding I/O Expansion Board Basics
Types of I/O Expansion Interfaces
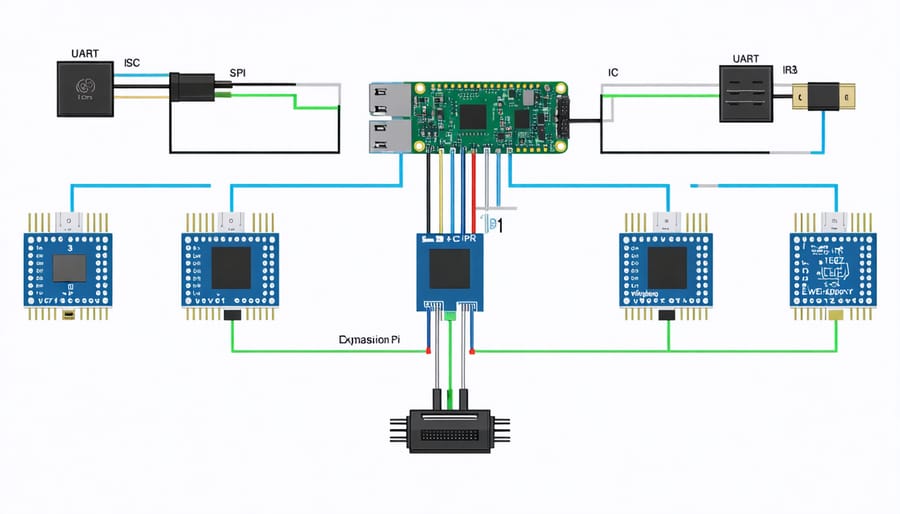
Raspberry Pi expansion boards typically utilize three main interfaces for connecting various sensors and additional components: I2C, SPI, and UART. I2C (Inter-Integrated Circuit) is a two-wire interface that allows multiple devices to communicate with the Pi simultaneously, making it ideal for simple sensors and displays. Operating at moderate speeds, I2C is perfect for projects requiring multiple peripherals.
SPI (Serial Peripheral Interface) offers faster data transfer rates than I2C and uses a four-wire interface. While it requires more pins, SPI excels in applications demanding high-speed communication, such as LED matrices or high-resolution displays. One limitation is that each device needs its own chip select line.
UART (Universal Asynchronous Receiver/Transmitter) provides simple two-way communication using just two pins (TX and RX). Though slower than SPI, UART is straightforward to implement and excellent for debugging or connecting to devices like GPS modules and wireless modems. Understanding these interfaces helps makers choose the right expansion board for their specific project requirements.
Key Features to Consider
When selecting a Raspberry Pi I/O expansion board, several key features demand careful consideration. First, ensure compatibility with your specific Raspberry Pi model, as different boards support various versions. The number and type of I/O ports available are crucial – look for boards offering a mix of digital and analog inputs/outputs that match your project requirements.
GPIO pin count and arrangement should align with your needs, with some boards offering up to 32 additional GPIO pins. Consider the communication protocols supported, such as I2C, SPI, and UART, which are essential for connecting various sensors and peripherals.
Power requirements are another vital factor. Check whether the board needs external power or can run directly from the Pi. Form factor and mounting options matter too – ensure the board fits within your project’s physical constraints and offers secure mounting solutions.
ADC (Analog-to-Digital Converter) resolution is important for projects requiring precise measurements, with options ranging from 10-bit to 16-bit conversion. Finally, consider the board’s documentation quality and community support, as these resources prove invaluable during implementation and troubleshooting.
Popular I/O Expansion Boards for IoT Applications
MCP23017-Based Solutions
The MCP23017 is one of the most versatile and widely-used I/O expanders for Raspberry Pi projects, offering 16 additional GPIO ports through a simple I2C interface. This popular solution allows you to add multiple expander boards, potentially providing up to 128 additional I/O pins (using 8 MCP23017 chips with different I2C addresses).
What makes MCP23017-based boards particularly attractive is their compatibility with both 3.3V and 5V logic levels, making them ideal for interfacing with various sensors and actuators. The chips feature built-in pull-up resistors, interrupt capabilities, and can be configured for either 8-bit or 16-bit operation.
Popular expansion boards utilizing the MCP23017 include the Pi-IO from AB Electronics and the IOPi Plus from Pi-Supply. These boards typically come with protective features like voltage level shifting and ESD protection, making them robust choices for production environments.
Setting up an MCP23017 expander is straightforward – enable I2C on your Raspberry Pi, connect the board via the I2C pins (SDA and SCL), and use readily available Python libraries like python-smbus or adafruit-circuitpython-mcp230xx for control. The chips can handle speeds up to 1.7MHz in I2C fast mode, ensuring responsive performance for most applications.
A single MCP23017 board typically draws less than 1mA during normal operation, making it an energy-efficient choice for battery-powered projects.
Industrial-Grade Expansion Options
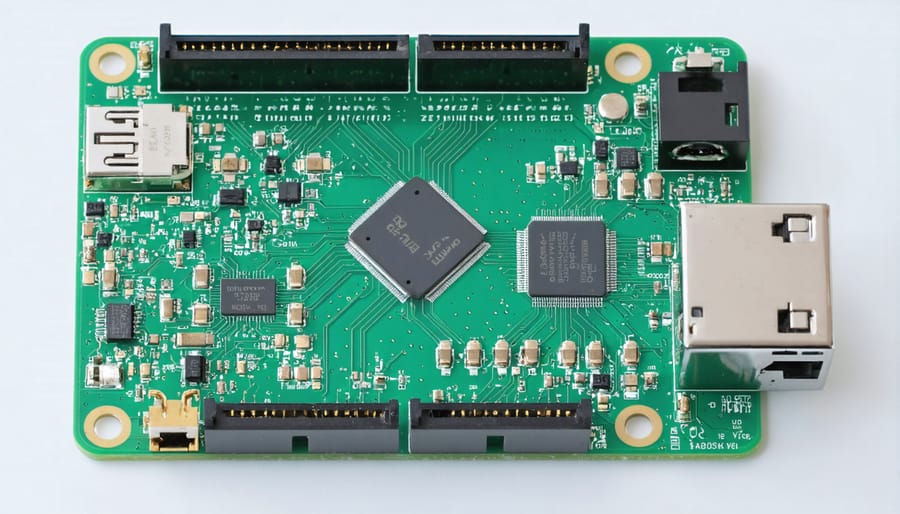
For demanding industrial environments, specialized IO expansion boards offer enhanced durability and reliability that standard consumer-grade options can’t match. These robust solutions are specifically designed for industrial automation applications, featuring reinforced components and protective measures against electromagnetic interference, extreme temperatures, and vibration.
Key features of industrial-grade expansion boards include galvanic isolation to protect sensitive components, surge protection circuits, and wide operating temperature ranges typically from -40°C to 85°C. Many boards also offer DIN rail mounting options and industrial-standard terminal blocks for secure wire connections.
Popular industrial expansion options include the PiXtend series, which provides real-time control capabilities and compatibility with industrial protocols like Modbus TCP. The Revolution Pi series offers modular expansion possibilities with IP20 protection rating, making it suitable for harsh industrial environments.
These boards typically include features essential for industrial IoT deployment:
– 24V DC power input compatibility
– Industrial communication protocols (RS-485, CAN bus)
– High-precision analog inputs with 16-bit resolution
– Relay outputs rated for industrial loads
– Status LEDs for quick diagnostics
– Watchdog timers for system reliability
While industrial-grade boards command higher prices, their robust construction and reliability make them invaluable for mission-critical applications where downtime isn’t an option.
Specialized IoT Expansion Boards
When it comes to IoT applications, specialized expansion boards offer unique features tailored for connecting various sensors and actuators to your Raspberry Pi. These boards are designed with IoT-specific requirements in mind, including multiple analog inputs, sensor-ready interfaces, and robust communication protocols.
Popular IoT expansion boards like the GrovePi+ provide standardized connectors that make it easy to attach dozens of different sensors without any soldering. The board includes built-in analog-to-digital converters (ADC) and supports I2C, allowing you to connect multiple sensors simultaneously.
Another noteworthy option is the Sense HAT, which comes packed with an array of environmental sensors, including temperature, humidity, pressure, and motion detection. This all-in-one solution is perfect for weather stations and environmental monitoring projects.
For industrial IoT applications, the PiXtend offers professional-grade features like 24V-compatible digital inputs/outputs and robust protection circuits. This makes it suitable for automation and control systems in more demanding environments.
The IoT-specific boards often include additional features like real-time clocks for accurate timestamping, wireless connectivity options, and power management circuits to ensure reliable operation in remote deployments. Many also come with dedicated libraries and code examples, making it easier for beginners to get started with their IoT projects.
Remember to consider factors like power requirements, communication protocols, and environmental protection when selecting an IoT expansion board for your specific application.
Implementation Strategies
Software Configuration
Setting up your Raspberry Pi IO expansion board requires proper software configuration to ensure smooth operation. Begin by enabling I2C and SPI interfaces through the Raspberry Pi Configuration tool. Access this by running ‘sudo raspi-config’ in the terminal, navigating to “Interfacing Options,” and enabling both protocols.
Install necessary libraries by executing:
“`
sudo apt-get update
sudo apt-get install python3-smbus
sudo apt-get install i2c-tools
“`
To verify your expansion board’s connection, use the command:
“`
sudo i2cdetect -y 1
“`
This will display a grid showing the I2C addresses of connected devices.
For Python programming, import required modules:
“`python
import smbus
import RPi.GPIO as GPIO
“`
Create a basic template for controlling your expansion board:
“`python
# Initialize I2C bus
bus = smbus.SMBus(1)
# Set up GPIO mode
GPIO.setmode(GPIO.BCM)
# Configure pins
GPIO.setup(channel, GPIO.OUT)
“`
Remember to implement error handling in your code to manage connection issues:
“`python
try:
bus.write_byte_data(address, register, value)
except IOError:
print(“Error: Device not found”)
“`
Always clean up GPIO resources when your program exits:
“`python
GPIO.cleanup()
“`
Test your configuration with simple commands before implementing complex functionality. Start with basic operations like LED control or reading input pins to ensure everything works correctly.
Best Practices and Common Pitfalls
When working with Raspberry Pi IO expansion boards, following best practices can significantly improve your project’s success rate. First, always double-check pin compatibility between your expansion board and Raspberry Pi model before purchase. Many users encounter issues by assuming all boards are universally compatible.
Power management is crucial. Ensure your power supply can handle the combined load of your Pi and expansion board. A common pitfall is using an inadequate power supply, leading to voltage drops and system instability. For complex setups working towards a professional IoT network setup, consider using a dedicated power supply for the expansion board.
Always enable required interfaces (I2C, SPI, etc.) through raspi-config before connecting your expansion board. Failing to do so is a frequent source of connectivity issues. Keep your GPIO pins clean and avoid touching them directly to prevent static discharge damage.
Documentation is essential – maintain a clear record of your pin assignments and connections. This becomes particularly important when troubleshooting or modifying your setup later. Watch out for pin conflicts when using multiple expansion boards simultaneously.
Heat management can be overlooked. Some expansion boards generate significant heat, so ensure proper ventilation and consider adding heat sinks if necessary. Finally, always shut down your Raspberry Pi properly before connecting or disconnecting expansion boards to prevent damage to both devices.
Regular firmware updates are vital but verify compatibility with your expansion board before updating. Some older boards may require specific firmware versions to function correctly.
Security Considerations
When implementing I/O expansion boards in Raspberry Pi IoT projects, security should be a top priority. These boards often interface with various sensors and actuators, potentially creating vulnerabilities if not properly secured. Always ensure that your expansion board’s firmware is up to date, as manufacturers regularly release patches to address security issues.
Physical security is equally important. Mount your expansion board in an enclosure that prevents unauthorized access to pins and connections. This is particularly crucial in industrial or public installations where tampering could occur. Consider using tamper-evident seals or specialized enclosures for additional protection.
Pay attention to the communication protocols used between your Raspberry Pi and the expansion board. If using I2C or SPI, implement proper authentication mechanisms and encrypt sensitive data transmission when possible. For boards with network capabilities, change default passwords, disable unnecessary services, and use secure protocols like HTTPS or SSH for remote access.
Regular monitoring of I/O activity can help detect unusual patterns that might indicate security breaches. Implement logging systems to track board interactions and set up alerts for suspicious activities. Additionally, isolate your IoT devices on a separate network segment to minimize potential exposure to other systems in case of a security compromise.
Remember that security measures should be proportional to your project’s requirements – while a home automation project might need basic protection, industrial applications require more robust security implementations.
Expanding your Raspberry Pi’s I/O capabilities through expansion boards opens up a world of possibilities for your IoT projects and hardware innovations. Throughout this guide, we’ve explored the essential aspects of selecting, implementing, and maximizing the potential of I/O expansion boards. From understanding the basic functionality and types of expansion boards to considering crucial factors like pin compatibility, power requirements, and communication protocols, you now have the knowledge to make informed decisions for your projects.
To get started with your I/O expansion board implementation, begin by carefully reviewing your project requirements and selecting a board that best matches your needs. Remember to double-check voltage compatibility and power supply specifications before making any connections. Start with simple test projects to familiarize yourself with the board’s functionality before moving on to more complex implementations.
For optimal results, maintain proper documentation of your pin assignments and regularly backup your configuration files. Consider joining online Raspberry Pi communities to share experiences and learn from others who have implemented similar solutions. As you progress, remember to prioritize proper cooling and protection for your setup, especially in industrial or outdoor applications.
Whether you’re building a home automation system, developing a sensor network, or creating an educational platform, I/O expansion boards can significantly enhance your Raspberry Pi’s capabilities while maintaining reliable and efficient operation.