


Mastering power management on the Raspberry Pi Pico unlocks a world of portable, energy-efficient projects that can run for weeks or even months on a single battery charge. Whether you’re building an autonomous sensor network, a wearable device, or a remote monitoring system, understanding how to optimize your Pico’s power consumption is crucial for project success.
The Pico’s versatile power management capabilities, built around its RP2040 microcontroller, offer multiple sleep modes and flexible voltage requirements (1.8V to 5.5V). Through strategic use of these features, makers can achieve power consumption as low as 1μA in deep sleep mode – a game-changing efficiency that rivals commercial IoT devices.
This guide explores practical power optimization techniques, from basic battery connections to advanced sleep mode implementations. We’ll dive into real-world examples showing how to extend battery life by up to 100x using sleep modes, voltage regulation, and intelligent power management code. Whether you’re a hobbyist or professional developer, these strategies will help you create more sustainable and reliable Pico-powered solutions.
Get ready to transform your Raspberry Pi Pico projects from power-hungry prototypes into energy-efficient, production-ready devices.
Understanding Pico’s Power Architecture
Power Input Options
The Raspberry Pi Pico offers several convenient power input options to suit different project needs. The most common method is powering through the micro-USB port, which accepts 5V input and provides a stable power source for most applications. This method is particularly useful during development as it allows simultaneous programming and power supply.
For portable projects, you can power the Pico using a battery pack. The board accepts 3.3V directly through the VBUS pin or can be powered using batteries ranging from 2.0V to 5.5V connected to the VSYS pin. LiPo and standard AA batteries are popular choices, with LiPo offering a better power-to-size ratio.
The Pico also features a 3.3V output pin that can power external components, though it’s important to note this is limited to 300mA. For projects requiring more power, consider using an external voltage regulator or dedicated power supply module.
Ground connections are available through multiple GPIO pins, offering flexibility in circuit design. When using battery power, remember to implement proper voltage monitoring to prevent damage from over-discharge.

Power Consumption States
The Raspberry Pi Pico offers several power consumption states that can significantly impact your project’s energy efficiency. Understanding these power consumption patterns is crucial for optimizing battery life and performance.
In normal running mode, the Pico typically draws around 18mA at 3.3V. However, you can reduce this significantly by utilizing sleep modes. The “sleep” state drops consumption to approximately 0.7mA, while “dormant” mode further reduces it to about 0.1mA.
The most power-efficient state is “shutdown” mode, drawing only 0.03mA, perfect for long-term battery operations. To maximize efficiency, consider implementing:
– Clock speed adjustment (multiple frequencies available)
– Strategic use of sleep modes between operations
– Selective peripheral power management
– Voltage regulation optimization
You can transition between these states using simple code commands. For instance, implementing sleep mode requires just a few lines:
“`python
machine.lightsleep(1000) # Sleep for 1 second
machine.deepsleep(5000) # Deep sleep for 5 seconds
“`
Remember that wake-up time varies between states, so balance power savings with your project’s responsiveness requirements.
Optimizing Battery Life

Sleep Mode Implementation
The Raspberry Pi Pico offers several sleep modes that can help you optimize power consumption in your projects. The two main sleep modes are dormant and sleep, with dormant offering the lowest power consumption.
Here’s a basic example of implementing sleep mode:
“`python
import machine
import time
# Configure LED pin
led = machine.Pin(25, machine.Pin.OUT)
# Flash LED before sleeping
led.value(1)
time.sleep(0.5)
led.value(0)
# Enter sleep mode for 5 seconds
machine.lightsleep(5000)
“`
For deeper power savings, you can use dormant mode:
“`python
import machine
from machine import Pin
import time
# Setup wake pin
wake_pin = Pin(15, Pin.IN, Pin.PULL_DOWN)
# Configure real-time clock
rtc = machine.RTC()
# Enter dormant mode until pin trigger
def go_to_dormant():
led.value(0)
machine.deepsleep()
# Wake on pin 15 going high
machine.lightsleep(0, wake_on_pin=wake_pin)
“`
Remember to disable unnecessary peripherals before entering sleep mode for maximum power savings. The Pico will maintain its GPIO states during sleep, so ensure pins are in their desired states before sleeping.
Voltage Regulation Techniques
Efficient voltage regulation is crucial for the Raspberry Pi Pico’s reliable operation and protection. The most common approach is using a linear voltage regulator like the LM1117 or AMS1117, which can step down higher voltages to the required 3.3V. While these regulators are simple to implement, they do generate some heat during voltage conversion.
For battery-powered projects, switching regulators offer better efficiency. Buck converters like the MP2307 or TPS563231 can maintain stable 3.3V output while drawing minimal power, extending battery life significantly. When implementing these solutions, always include decoupling capacitors (typically 10µF and 100nF) to filter noise and ensure clean power delivery.
The Pico’s built-in voltage regulator can handle input voltages up to 5.5V, but external regulation becomes necessary for higher voltages or when powering additional components. For enhanced protection, consider adding a Schottky diode to prevent reverse polarity damage and a resettable fuse (PTC) for overcurrent protection.
For ultra-low power applications, consider using load switches or power multiplexers to completely cut power to unused peripherals. The TPL5110 timer or similar power management ICs can be employed to implement deep sleep modes, waking the Pico only when needed, resulting in significant power savings.
Remember to monitor the voltage levels during development using the Pico’s built-in ADC to ensure your regulation system maintains stable power under various load conditions.
Advanced Power Solutions
Solar Power Integration
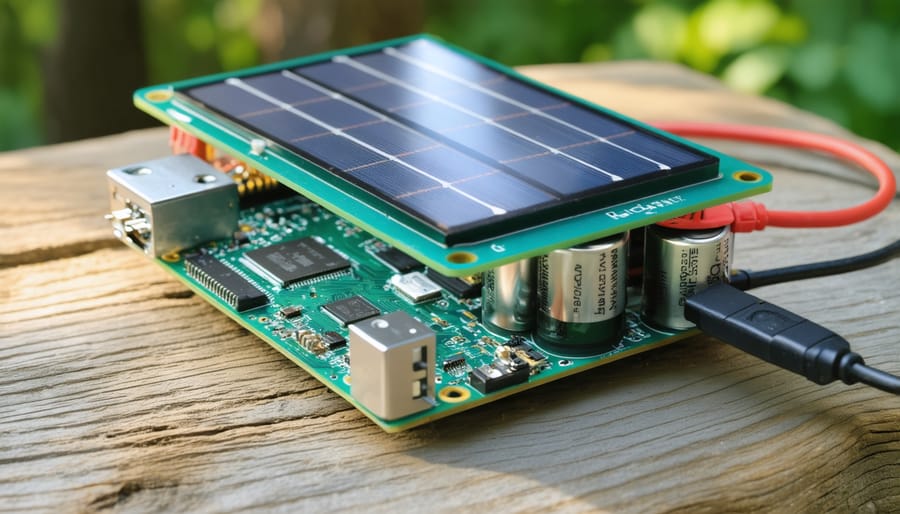
Solar power integration offers an eco-friendly and sustainable way to power your Raspberry Pi Pico projects, especially for outdoor applications or remote installations. To get started, you’ll need a solar panel (5V-6V recommended), a charging circuit, and a suitable battery storage system. Follow our comprehensive solar power setup guide for detailed instructions.
The key to successful solar integration lies in proper voltage regulation and power management. Use a solar charge controller with MPPT (Maximum Power Point Tracking) to optimize charging efficiency, and incorporate a step-down converter to maintain stable 3.3V output for the Pico. For reliable operation, choose a battery with adequate capacity – a 3.7V lithium-ion battery with 2000mAh or higher is recommended.
Consider implementing sleep modes in your code to reduce power consumption during inactive periods. The Pico’s built-in RTC (Real-Time Clock) can be programmed to wake the device only when needed. Here’s a basic power-saving approach:
1. Use deep sleep mode during extended inactive periods
2. Monitor battery voltage through ADC pins
3. Implement voltage thresholds for safe operation
4. Schedule tasks during peak sunlight hours
Remember to protect your solar setup from environmental factors using weatherproof enclosures and ensure proper ventilation to prevent overheating. Regular maintenance checks will help maintain optimal performance and extend the system’s lifespan.
Battery Monitoring Systems
Implementing a battery monitoring system for your Raspberry Pi Pico is crucial for projects requiring portable power. Here’s a simple implementation using the Pico’s ADC capabilities to monitor battery voltage:
“`python
from machine import ADC, Pin
import time
# Configure ADC on GPIO 26
battery_monitor = ADC(26)
def get_battery_voltage():
# Read raw value and convert to voltage
raw_value = battery_monitor.read_u16()
voltage = (raw_value * 3.3) / 65535
# Voltage divider calculation (if used)
actual_voltage = voltage * 2
return actual_voltage
def check_battery_status():
voltage = get_battery_voltage()
if voltage < 3.3:
print("Low battery warning!")
return voltage
while True:
voltage = check_battery_status()
print(f"Battery voltage: {voltage:.2f}V")
time.sleep(60) # Check every minute
```
This code monitors battery voltage through a voltage divider connected to GPIO 26. For accurate readings, ensure proper voltage division to protect the Pico's 3.3V maximum input. You can adjust the warning threshold and monitoring frequency based on your project's needs. Consider adding LED indicators or deep sleep functionality to extend battery life further.
Power-Efficient Coding Practices
To maximize your Raspberry Pi Pico’s battery life, implementing power-efficient coding practices is essential. Start by utilizing the Pico’s sleep modes effectively in your code. The deepest sleep mode can reduce power consumption to just 1µA, making it ideal for battery-powered projects.
Here’s a fundamental approach: configure your code to wake the Pico only when necessary. Use the sleep_ms() function for short delays instead of busy-waiting loops, and implement deep sleep for longer inactive periods. For instance, in sensor monitoring applications, you can put the Pico to sleep between readings rather than continuously polling.
Consider these key programming techniques:
– Disable unused peripherals when not in use
– Reduce CPU clock speed for less demanding tasks
– Use event-driven programming instead of continuous polling
– Implement efficient interrupt handling
– Minimize I/O operations
For ADC readings, batch your measurements instead of taking individual readings. When using wireless modules, implement burst transmissions rather than maintaining constant communication. If your project includes displays or LEDs, reduce their duty cycle or brightness when full power isn’t necessary.
Remember to test your power-optimized code thoroughly. Use a multimeter or power analyzer to measure the actual current draw and verify that your power-saving techniques are working as intended. This empirical testing helps identify which optimizations provide the most significant benefits for your specific application.
Troubleshooting Power Issues
Power-Related Boot Problems
When your Raspberry Pi Pico fails to power up properly, several common issues might be at play. The most frequent problem is insufficient power supply – the Pico requires a stable 5V input with at least 100mA current capacity. Check your power source using a multimeter if possible, as voltage drops can prevent proper bootup.
Another common issue is faulty USB connections. Try using different USB cables, as some cables may only support charging but not data transfer. Ensure the cable makes good contact with both the Pico and your power source. If using battery power, verify that your batteries are fresh and properly connected.
If your Pico shows no signs of life, perform a quick reset by pressing and holding the BOOTSEL button while connecting power. This forces the board into USB mass storage mode and can often resolve startup issues. Watch for the onboard LED – it should flash briefly during normal power-up.
For projects using external power supplies, double-check your wiring connections. Reversed polarity can prevent startup and potentially damage your board. Always connect the VSYS pin to your positive voltage source and ensure proper grounding.
If problems persist, examine the board for any visible damage, particularly around the voltage regulator and USB connector. In some cases, a corrupted flash memory can cause boot failures – try reflashing your Pico with the latest firmware using the recovery mode.
Battery Life Optimization
To maximize your Raspberry Pi Pico’s battery life, several optimization techniques can be implemented. First, utilize the Pico’s built-in sleep modes effectively. Deep sleep mode can reduce power consumption to mere microamps, making it ideal for battery-powered projects. Implement sleep mode by adding a few lines of code:
machine.lightsleep(5000) # Sleep for 5 seconds
machine.deepsleep() # Enter deep sleep until external wake
Disable unused peripherals when not in use. This includes ADC, USB, and LED components. The onboard LED alone can consume significant power over time. Add these lines to your startup code:
led = machine.Pin(25, machine.Pin.OUT)
led.value(0) # Turn off LED
Consider using a voltage regulator with a low quiescent current for better power efficiency. The Pico’s internal regulator works well but might not be optimal for battery-powered applications. External regulators like the MCP1700 or HT7333 offer better efficiency for battery operation.
Monitor your code’s power consumption using strategic delays instead of continuous polling. Replace while True loops with timed interventions:
time.sleep_ms(100) # More efficient than continuous checking
For wireless projects, implement proper sleep cycles for WiFi or Bluetooth modules, as these components are often major power consumers. Additionally, use appropriate battery chemistry – Li-ion or LiFePO4 batteries typically offer better performance than alkaline batteries for long-term operation.
Mastering power management for your Raspberry Pi Pico is essential for creating efficient and reliable projects. By implementing sleep modes effectively and choosing the right power source, you can significantly extend your device’s battery life while maintaining optimal performance. Remember to always consider your project’s specific power requirements when selecting between USB, battery, or external power supplies. Regular monitoring of voltage levels and implementing proper shutdown procedures will protect your Pico from potential damage. For battery-powered projects, utilizing deep sleep mode and optimizing your code for power efficiency can help achieve longer running times. Keep your connections clean and secure, use appropriate voltage regulators when needed, and always include power filtering capacitors in your circuit design. With these best practices in mind, you’ll be well-equipped to create energy-efficient Pico projects that perform reliably in any setting.