


Transform your Raspberry Pi into a personalized powerhouse by diving deep into OS customization. From sleek desktop themes to performance-tuned configurations, the ability to optimize your Raspberry Pi OS unlocks endless possibilities for both beginners and advanced users alike.
Start with desktop environment customization through the built-in appearance settings, where you can modify everything from window behaviors to system fonts. Progress to system-level tweaks by adjusting CPU governor settings and memory allocation for enhanced performance. Then explore advanced customization through configuration files in /boot/ and /etc/ directories, enabling precise control over hardware acceleration, boot parameters, and network settings.
This comprehensive guide walks you through essential customization techniques that balance aesthetic appeal with system efficiency. Whether you’re building a home media center, developing IoT projects, or creating an educational platform, these modifications ensure your Raspberry Pi perfectly aligns with your specific needs while maintaining stability and security.
Preparing Your Raspberry Pi for Customization
Backing Up Your Current System
Before diving into customization, it’s crucial to create a backup of your current Raspberry Pi system as part of the essential system preparation steps. The simplest method is to create an image of your SD card using tools like Win32 Disk Imager for Windows or ‘dd’ command for Linux and macOS users.
For Windows users:
1. Insert your SD card into your computer
2. Launch Win32 Disk Imager
3. Select a destination file for your backup
4. Choose your SD card from the device dropdown
5. Click ‘Read’ to create the backup image
For Linux/macOS users:
1. Open Terminal
2. Identify your SD card using ‘sudo fdisk -l’
3. Run: sudo dd if=/dev/sdX of=backup.img bs=4M
(Replace sdX with your actual device name)
Store your backup in a safe location, preferably on an external drive. This ensures you can always restore your system if something goes wrong during customization. Remember to compress the backup file to save space, as these images can be quite large.
Required Tools and Packages
Before diving into customization, you’ll need to gather several essential tools and packages. Start with a Raspberry Pi running the latest Raspberry Pi OS (formerly Raspbian) and ensure you have a stable internet connection for downloading packages.
Essential software packages include:
– lxappearance: The primary GUI tool for customizing themes and icons
– qt5ct: For customizing Qt-based applications
– nitrogen: A lightweight background browser and setter
– pimp-my-pi: A collection of customization scripts
– arc-theme: A popular modern theme package
– papirus-icon-theme: A comprehensive icon set
Additionally, you’ll need:
– A text editor (nano or vim)
– Terminal access
– At least 1GB of free storage space
– Basic command-line knowledge
Optional but recommended tools:
– Synaptic Package Manager for easier software management
– GIMP or Inkscape for creating custom icons
– Conky for system monitoring and desktop widgets
– Plank dock for a macOS-like experience
Make sure to back up your system before making significant changes. All these tools can be installed through the terminal using apt package manager or the Pi’s Software Center.

Desktop Environment Customization
Changing Themes and Icons
Customizing the visual appearance of your Raspberry Pi OS can make your desktop environment more appealing and personalized. To change themes and icons, start by opening the Terminal and installing the required packages:
“`
sudo apt update
sudo apt install arc-theme papirus-icon-theme
“`
For a wider selection of themes, you can add the following PPA:
“`
sudo add-apt-repository ppa:numix/ppa
sudo apt update
sudo apt install numix-gtk-theme numix-icon-theme
“`
To apply your new theme, click on the main menu and navigate to Preferences > Appearance Settings. In the Style tab, you’ll find a dropdown menu where you can select your newly installed themes. The changes will take effect immediately, but you might need to log out and back in for all elements to update properly.
For icon sets, stay in the Appearance Settings but switch to the Icon tab. Select your preferred icon pack from the dropdown menu. The Papirus icon set offers a modern, flat design that works well with most themes.
To further customize your desktop, you can also modify individual elements:
1. Right-click on the desktop and select Desktop Preferences
2. Adjust background settings, font sizes, and window behaviors
3. Configure panel appearance through Panel Settings
Remember that some themes might affect system performance, especially on older Raspberry Pi models. If you notice any slowdown, consider switching to a lighter theme or reducing transparency effects.

Customizing the Panel and Dock
The Raspberry Pi OS taskbar (panel) and dock are highly customizable elements that can enhance both the aesthetics and functionality of your desktop environment. To modify the panel, right-click on any empty space and select “Panel Settings.” Here you can adjust the panel’s appearance, including its size, position, and transparency level.
To add new items to the panel, right-click and choose “Add/Remove Panel Items.” You’ll find useful widgets like system monitors, weather displays, and quick-launch shortcuts. The panel’s background color and style can be customized through the “Appearance” tab in Panel Settings.
For a more modern look, consider installing a dock application like Plank. Open Terminal and type:
sudo apt install plank
Once installed, launch Plank from the main menu. The dock will appear at the bottom of your screen with a sleek, minimalist design. To customize Plank, hold Ctrl and right-click on the dock to access its preference menu. Here you can adjust the icon size, position, and theme.
You can also hide the default panel and rely solely on Plank for application launching. To auto-start Plank at boot, go to Main Menu > Preferences > Default Applications for LXSession. Under “Autostart,” add “plank” to ensure it launches automatically with your system.
Remember to maintain a balance between visual appeal and system resources, especially if you’re using an older Raspberry Pi model.
Window Decorations and Effects
The window decorations and effects in Raspberry Pi OS can dramatically enhance your desktop experience. To begin customizing, open the “Appearance Settings” from the main menu and navigate to the “Window Manager” tab. Here you can modify window borders, titlebar buttons, and overall window behavior.
For a more modern look, enable window shadows by checking the “Enable compositor” option. This adds subtle depth to your desktop environment, making windows appear to float above the background. You can adjust shadow opacity and offset to suit your preferences.
Window animations can be enabled to add smooth transitions when minimizing, maximizing, or switching between windows. While these effects look attractive, consider your Pi’s hardware capabilities – older models might perform better with minimal animations.
Customize your window titlebar buttons by rearranging or removing elements like close, minimize, and maximize buttons. You can also modify the window border thickness and choose from various pre-installed themes for window decorations.
For advanced users, the window snapping feature helps with workspace organization. Enable “Snap windows to screen borders” to automatically resize windows when dragged to screen edges. This feature is particularly useful when multitasking on smaller displays.
Remember that excessive visual effects might impact system performance. Strike a balance between aesthetics and functionality based on your Raspberry Pi’s specifications and your usage requirements.
Performance Optimization
Resource Management
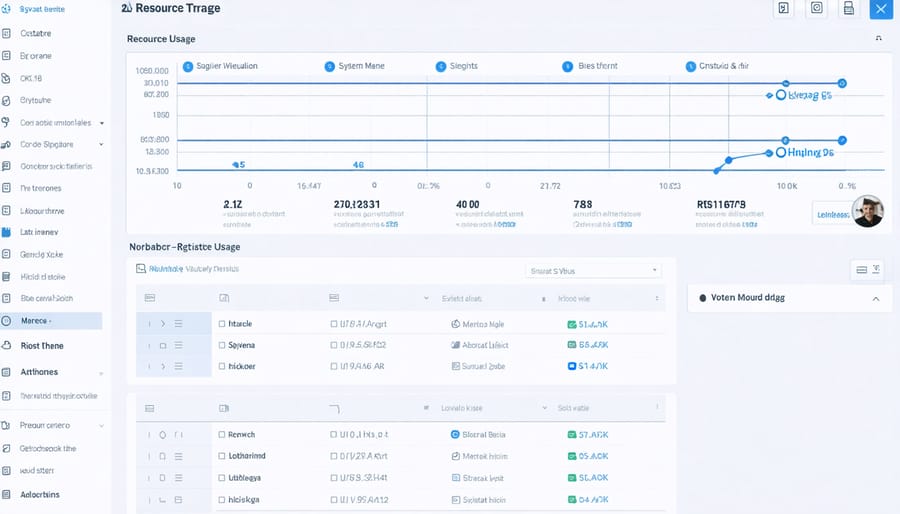
Customizing your Raspberry Pi OS isn’t just about aesthetics; it’s also crucial to maximize system performance through efficient resource management. Start by monitoring your system resources using tools like htop or the built-in Task Manager to understand your baseline usage.
For optimal performance, consider implementing a lightweight desktop theme that reduces GPU and CPU overhead. The LXDE desktop environment, which comes pre-installed with Raspberry Pi OS, offers various optimization options. You can disable unnecessary visual effects, remove unused applications, and adjust window animations to free up valuable system resources.
Configure your swap file size based on your specific needs – a larger swap file can help prevent system crashes when RAM is limited, but it may slow down overall performance if overused. For most users, a swap size equal to your RAM capacity works well.
Consider using lightweight alternatives for common applications. For instance, replace LibreOffice with AbiWord for word processing, or use PCManFM instead of heavier file managers. Enable automatic cleanup scripts to remove temporary files and cache, preventing unnecessary storage consumption.
Monitor background processes and disable non-essential services during startup. This can be done through the “rc.local” configuration or by using the systemctl command to manage services. Remember to maintain a balance between functionality and resource efficiency when customizing your system.
Troubleshooting Common Issues
When customizing your Raspberry Pi OS, you might encounter several common issues. Here’s how to resolve them effectively:
If your desktop environment becomes unresponsive after theme changes, try pressing Alt+F2 to open the run dialog and enter “lxpanelctl restart” to refresh the interface. If that doesn’t work, reboot your system while holding Shift to enter safe mode.
For missing icons or broken themes, verify that you’ve installed all required dependencies. Sometimes, theme packages need additional icon sets or fonts. Run “sudo apt update && sudo apt install -f” to fix broken dependencies.
If custom wallpapers aren’t displaying correctly, check the image file permissions and format. Ensure the image is in a supported format (JPG, PNG) and that the pi user has read permissions. Use “chmod 644” on the image file to set correct permissions.
Performance issues after customization usually stem from heavy desktop effects or widgets. Try disabling compositing or reducing visual effects through the Desktop Preferences menu. For RAM-related slowdowns, adjust or disable unnecessary startup applications.
Configuration files not saving changes? Make sure you’re editing them with sudo privileges when required, and always create backups before modifications. Use “sudo nano” instead of regular text editors for system files.
If your customizations disappear after updates, store your personal settings in the home directory and maintain backup copies of your configuration files.
Advanced Customization Tips
Custom Scripts and Autostart
Automating tasks on your Raspberry Pi can significantly enhance your workflow and ensure your customizations persist across reboots. To create custom scripts, start by making a new directory in your home folder called “scripts” using the command mkdir ~/scripts. This will be your central location for all automation files.
To create an autostart script, open a new file using nano ~/.config/autostart/custom-startup.sh and add your desired commands. Don’t forget to make the script executable with chmod +x ~/.config/autostart/custom-startup.sh. Common automation tasks include setting custom screen resolution, launching specific applications, or mounting network drives.
Here’s a simple example of an autostart script:
“`bash
#!/bin/bash
# Set display brightness
echo 75 > /sys/class/backlight/rpi_backlight/brightness
# Launch your favorite browser
chromium-browser &
“`
To ensure your scripts run at startup, you can either add them to /etc/rc.local or create a systemd service. For desktop-specific automations, add your script to ~/.config/lxsession/LXDE-pi/autostart with the following format:
@/home/pi/scripts/custom-startup.sh
Remember to test your scripts thoroughly before adding them to autostart to avoid boot issues. It’s also good practice to include error handling and logging in your scripts for easier troubleshooting.
Creating Your Own Themes
Creating your own themes for Raspberry Pi OS allows you to achieve a truly unique and personalized desktop experience. Start by navigating to the ~/.themes directory, creating it if it doesn’t exist using the command ‘mkdir ~/.themes’. This is where your custom theme files will live.
To build a theme from scratch, you’ll need to create several key components: a GTK theme for application windows and controls, an icon theme, and a window manager theme. Create a new directory with your theme name, then add subdirectories for each component: gtk-2.0, gtk-3.0, and xfwm4 (for window decorations).
The GTK theme files control elements like buttons, menus, and scrollbars. Start with a basic gtkrc file for GTK-2.0 and a gtk.css file for GTK-3.0. These files define colors, borders, and widget styles. You can use existing themes as references – examine popular themes in /usr/share/themes to understand their structure.
For icons, create an index.theme file that defines your icon theme’s properties, then organize your custom icons in appropriate subdirectories based on size and category. Tools like GIMP or Inkscape are perfect for creating custom icons.
Remember to test your theme regularly during development. Apply it using the Appearance Settings tool to check for any visual inconsistencies. If you’re new to theme creation, consider modifying an existing theme first to learn the basics before creating one from scratch.
Customizing your Raspberry Pi OS opens up a world of possibilities for creating a personalized computing experience. From tweaking the desktop environment to optimizing system performance, these modifications can significantly enhance your daily interaction with the device. Remember to always back up your system before making major changes and stick to trusted sources for themes, plugins, and software packages. Start with basic customizations and gradually explore more advanced options as your confidence grows. The beauty of Raspberry Pi lies in its flexibility and the amazing community that continues to develop new customization options. Don’t be afraid to experiment – just maintain good security practices and keep track of your modifications. With these tools and knowledge at your disposal, you can transform your Raspberry Pi into a truly unique and efficient system that perfectly suits your needs.