

Start your open source journey by identifying beginner-friendly projects tagged with “good-first-issue” on GitHub. These curated issues provide clear requirements and mentorship opportunities for newcomers. Understanding the impact of contributing to open source extends beyond code—it builds your professional network, enhances your technical skills, and strengthens the global developer community.
Clone your chosen repository, create a dedicated branch, and make small, focused changes that solve one specific problem. Documentation improvements, bug fixes, and test additions offer excellent starting points. Join project Discord servers or mailing lists to connect with maintainers who can guide your first pull request.
Master the basics of Git workflows: committing changes, pushing to your fork, and creating pull requests with clear descriptions. Study the project’s contribution guidelines carefully—proper formatting and adherence to coding standards significantly increase your chances of acceptance.
Remember: successful open source contribution begins with observation. Spend time reading issues, reviewing other pull requests, and understanding the project’s architecture before diving in. This preparation ensures your contributions align with the project’s goals and quality standards.
Why Raspberry Pi Projects Are Perfect for New Contributors
Project Diversity and Skill Levels
Open source projects come in all shapes and sizes, making them perfect for contributors of varying skill levels. For beginners, documentation projects offer an excellent starting point – you can help improve guides, fix typos, or translate content without diving deep into code. Bug reporting and testing are also great entry-level contributions that help projects immensely.
If you’re comfortable with coding, many projects tag issues as “good first issue” or “beginner-friendly.” These typically involve simple bug fixes, minor feature enhancements, or UI improvements. As you gain confidence, you can tackle more complex tasks like implementing new features or optimizing performance.
For those interested in Raspberry Pi specifically, you might start with projects involving basic GPIO programming, simple web interfaces, or educational tools. Hardware-focused projects often need help with testing on different Pi models, making them perfect for contributors who own various boards but aren’t yet confident with complex programming.
Community Support and Resources
The open source community is renowned for its supportive nature, offering numerous resources for newcomers. GitHub’s extensive documentation and help guides provide step-by-step assistance for common tasks and troubleshooting. Online platforms like Stack Overflow and Reddit’s r/opensource community are excellent places to ask questions and learn from experienced contributors. Many projects also maintain dedicated Discord servers or IRC channels where you can interact with maintainers and fellow contributors in real-time. Taking advantage of community mentorship resources can significantly accelerate your learning journey. Additionally, many open source projects tag issues specifically for newcomers with labels like “good-first-issue” or “beginner-friendly,” making it easier to find suitable starting points. Don’t hesitate to reach out for help – remember that every experienced contributor was once a beginner too.
Setting Up Your Development Environment
Essential Tools and Software
Before diving into open source contributions, you’ll need to set up a few essential tools on your computer. Start by installing Git, the industry-standard version control system that helps track changes in your code. Download it from git-scm.com and follow the installation wizard for your operating system.
Next, you’ll need a code editor. Visual Studio Code (VS Code) is highly recommended for beginners due to its user-friendly interface and extensive plugin support. It offers excellent Git integration and syntax highlighting for various programming languages commonly used in Raspberry Pi projects.
For remote development, setting up SSH access is crucial when working with Raspberry Pi projects. You’ll also want to create a GitHub account, as most open source projects are hosted there. GitHub Desktop can be helpful for beginners who prefer a graphical interface over command-line Git operations.
Don’t forget to install Python and pip (Python’s package manager), as many Raspberry Pi projects are Python-based. Depending on your project’s requirements, you might also need specific development tools or libraries, but these core tools will get you started with most contributions.
Remember to configure Git with your email and username after installation, as this information will be attached to your contributions. Keep your tools updated regularly to ensure compatibility and security.
Configuration and Testing
Before diving into your first contribution, it’s essential to ensure your development environment is properly configured and tested. Start by verifying that Git is installed on your system by running ‘git –version’ in your terminal. If it’s not installed, download and install the latest version from the official Git website.
Next, set up your GitHub account if you haven’t already, and configure your local Git environment with your name and email using the commands ‘git config –global user.name “Your Name”‘ and ‘git config –global user.email “your.email@example.com”‘.
To test your setup, create a sample repository locally using ‘git init’, add a simple text file, and practice basic Git commands like add, commit, and push. This helps you become familiar with the workflow before working on actual project contributions.
Many open source projects have specific testing requirements. Look for a ‘CONTRIBUTING.md’ file in the project repository, which usually contains information about testing procedures. Some projects might require you to run tests using commands like ‘npm test’ for JavaScript projects or ‘pytest’ for Python projects.
Before submitting any changes, always test your code locally. This includes running the project’s test suite, checking for linting errors, and ensuring your changes don’t break existing functionality. It’s also good practice to create a new branch for your changes and test them there before merging with the main branch.
Finding Your First Project
Good First Issues
Finding beginner-friendly issues in open source projects is easier than you might think. Many Raspberry Pi repositories use labels like “good first issue,” “beginner-friendly,” or “help wanted” to identify tasks suitable for newcomers. These issues typically involve simple bug fixes, documentation updates, or minor feature enhancements that don’t require extensive knowledge of the codebase.
GitHub’s advanced search features can help you discover projects that need contributors. Try filtering issues by labels and language to find tasks matching your skill level. Popular Raspberry Pi projects often maintain a list of starter tasks specifically for new contributors.
When selecting your first issue, look for:
– Clear issue descriptions with defined requirements
– Active maintainers who respond to questions
– Recent project activity
– Documentation explaining the contribution process
– Issues marked as unassigned
Don’t hesitate to ask questions in the issue comments if something isn’t clear. Most maintainers are happy to guide newcomers through their first contribution. Remember, even small contributions like fixing typos in documentation or improving code comments are valuable to the project’s overall quality.
Project Selection Criteria
Choosing the right project for your first open source contribution is crucial for a positive experience. Start by looking for projects with clear “good first issue” or “beginner-friendly” labels in their issue tracker. These tags indicate that maintainers are willing to mentor newcomers and have prepared manageable tasks.
Consider the project’s activity level and community health. Look for repositories that show recent commits, active discussions, and prompt responses to pull requests. A vibrant community means you’re more likely to receive helpful feedback and guidance when needed.
The project’s documentation quality is another important factor. Well-documented projects make it easier to understand the codebase and contribution guidelines. Check if the repository has a clear README file, contribution guide, and code of conduct.
Choose projects that align with your current skills and interests. While it’s good to challenge yourself, starting with familiar technologies will help build confidence. For Raspberry Pi enthusiasts, consider projects related to GPIO programming, sensor integration, or home automation.
Finally, evaluate the project’s complexity. Small to medium-sized projects often provide better learning opportunities than large, complex codebases. Look for projects where you can understand the basic functionality within a few hours of review.
Making Your First Contribution
Understanding the Workflow
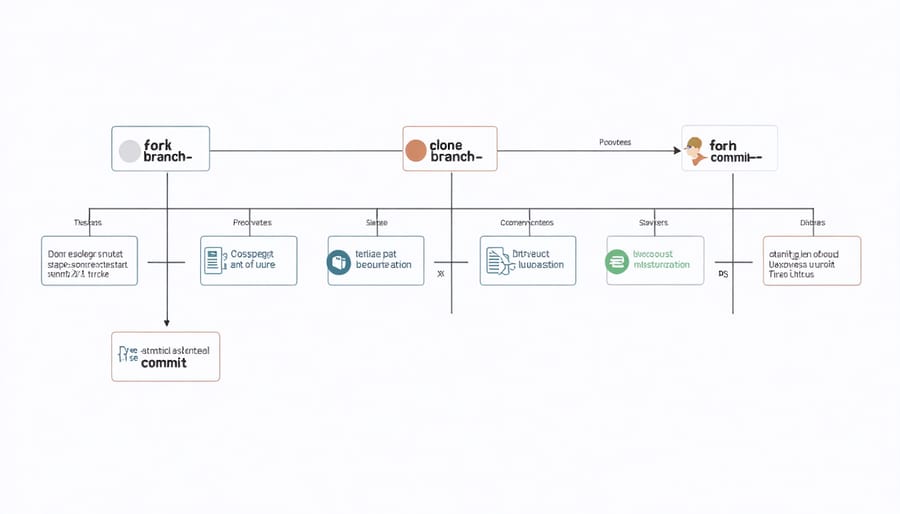
Contributing to open source projects follows a well-defined workflow that might seem complex at first but becomes second nature with practice. Let’s break down this process into digestible steps.
First, you’ll need to fork the original repository. This creates your own copy of the project on your GitHub account, allowing you to make changes without affecting the original code. Think of it as creating your personal sandbox to play in.
After forking, you’ll clone the repository to your local machine. This step downloads all the project files to your computer, where you can work on them using your preferred code editor. The command is typically as simple as ‘git clone’ followed by your fork’s URL.
Before making any changes, create a new branch. This is like creating a separate timeline where you can safely experiment with your modifications. It’s good practice to give your branch a descriptive name that reflects the changes you plan to make, such as ‘fix-login-button’ or ‘add-dark-mode’.
As you work on your changes, commit them in small, logical chunks. Each commit should represent a single complete change and include a clear message explaining what you did and why. This makes it easier for project maintainers to review your work.
Once you’re satisfied with your changes, push your branch to your forked repository and create a pull request. This is your formal proposal to the project maintainers, asking them to review and potentially merge your changes into the main project.
Remember, this workflow is designed to keep things organized and maintain code quality while allowing multiple contributors to work simultaneously.
Submitting Your Pull Request
Once you’ve made your changes and tested them locally, it’s time to submit your pull request (PR). First, push your changes to your forked repository using the command ‘git push origin your-branch-name’. Then, navigate to your fork on GitHub and click the “Pull Request” button that appears near the top of the page.
When creating your PR, provide a clear, descriptive title that summarizes your contribution. In the description field, explain what changes you’ve made and why they’re valuable. Reference any related issues by including their number (e.g., “Fixes #123”). This helps maintainers understand the context of your contribution.
A good PR description should include:
– The purpose of your changes
– How you tested your modifications
– Any potential impacts on existing functionality
– Screenshots if you made visual changes
After submitting your PR, project maintainers will review your code. They might request changes or ask questions. Don’t be discouraged if this happens – it’s a normal part of the process and helps maintain code quality. Respond promptly and professionally to any feedback.
If changes are requested, make them in your local branch, commit them, and push again. The PR will automatically update. Once the maintainers are satisfied, they’ll merge your contribution into the main project.
Remember to be patient during the review process. While waiting, you can start exploring other issues to work on or help review other contributors’ PRs. This keeps you engaged in the community and helps you learn from others’ code.
Best Practices and Common Pitfalls
Making your first open source contribution can be smoother when you follow established best practices. Start by reading the project’s contribution guidelines thoroughly – this simple step helps you avoid common mistakes and shows respect for the community’s processes.
Always begin with small, manageable changes. Look for issues labeled “good first issue” or “beginner-friendly” in the project’s issue tracker. These are specifically designed for newcomers and have a higher chance of acceptance.
Before diving into code, engage with the community. Join project discussions, introduce yourself, and ask questions when unclear. Most maintainers appreciate contributors who communicate proactively rather than submitting unexpected large changes.
Common pitfalls to avoid include:
– Working on an issue without first claiming it
– Submitting changes without testing
– Making multiple unrelated changes in a single pull request
– Ignoring code style guidelines
– Not updating documentation alongside code changes
Remember to keep your commits clean and well-documented. Write clear, descriptive commit messages that explain both what changed and why. This helps maintainers review your contribution more effectively.
If your contribution isn’t accepted immediately, don’t get discouraged. Feedback from maintainers is valuable learning opportunity. Make requested changes promptly and maintain a positive attitude throughout the process.
Getting started with open source contributions doesn’t have to be intimidating. Remember that every expert contributor was once a beginner, and the Raspberry Pi community is known for being welcoming and supportive. Start small by fixing documentation, reporting bugs, or making simple code improvements. Don’t be afraid to ask questions – maintainers appreciate enthusiastic newcomers who show genuine interest in learning and helping.
Take that first step today by exploring beginner-friendly projects, setting up your development environment, and making your first pull request. The skills and connections you’ll gain from contributing to open source projects are invaluable for your technical growth. Join the vibrant Raspberry Pi community, share your knowledge, and help make technology more accessible for everyone.