


Transform your Raspberry Pi into a voice-activated AI assistant reminiscent of Tony Stark’s JARVIS by installing lightweight voice recognition software, connecting a USB microphone and speaker, and programming custom Python scripts to control smart home devices, answer questions, and execute system commands.
**Start with the right hardware foundation.** A Raspberry Pi 3 or newer provides sufficient processing power for real-time speech recognition, while a quality USB microphone ensures accurate voice detection. Pair these with a decent speaker or connect to existing audio systems via the 3.5mm jack or HDMI output for clear responses.
**Choose between established frameworks or build from scratch.** Mycroft AI offers an open-source, privacy-focused platform with pre-built skills and wake word detection. Google Assistant SDK integrates seamlessly with Google’s ecosystem for natural language processing. For complete customization, combine SpeechRecognition and pyttsx3 Python libraries with ChatGPT’s API to craft personality and functionality that matches your vision.
**Configure wake word detection to mirror the authentic JARVIS experience.** Programs like Porcupine or Snowboy let you train custom activation phrases—use “Hey JARVIS” or “Jarvis” itself rather than generic triggers. This personalization creates the immersive feeling of commanding your own AI butler.
**Expand capabilities through API integrations and GPIO control.** Connect weather services, calendar management, news feeds, and music streaming while using GPIO pins to trigger relay modules that control lights, locks, and appliances. The result? A genuinely functional AI assistant that responds to voice commands and manages your environment intelligently.
What Makes a Raspberry Pi Voice Assistant “JARVIS-Like”?
When people think of building a “JARVIS-like” assistant on Raspberry Pi, they’re dreaming of the sophisticated AI companion from Iron Man—an intelligent system that understands natural language, executes commands, and responds conversationally. But what does this actually mean for your DIY project?
At its core, a JARVIS-style voice assistant needs four fundamental capabilities. First, **wake word detection** allows your system to spring into action when you say a trigger phrase like “Hey JARVIS” or “OK Pi.” This keeps your assistant in standby mode until needed, just like commercial smart speakers.
Second, **natural language processing (NLP)** enables your assistant to understand what you’re actually asking, not just recognize keywords. Whether you say “What’s the weather?” or “How’s it looking outside today?”, your assistant should grasp the intent behind different phrasings.
Third, **task execution** means your assistant can actually do things—control smart home devices, fetch information from the internet, play music, or trigger custom scripts you’ve created. This is where the magic happens and your assistant becomes genuinely useful.
Finally, **conversational responses** give your assistant personality. Rather than robotic acknowledgments, it should provide contextual, natural-sounding replies that make interactions feel more human.
Now for the reality check: A Raspberry Pi won’t match the computational power of cloud-based assistants like Alexa or Google Assistant. Response times may be slower, especially for complex queries, and voice recognition accuracy depends heavily on your microphone quality and environmental noise. However, what you sacrifice in raw power, you gain in **complete customization and privacy**. Your JARVIS runs locally, processes commands offline (with the right setup), and does exactly what you program it to do—no corporate data collection involved.

Essential Hardware You’ll Need
Raspberry Pi Models: Which One Works Best?
Choosing the right Raspberry Pi model significantly impacts your Jarvis voice assistant’s performance. Let’s compare the top contenders.
The **Raspberry Pi 3** features a 1.2GHz quad-core processor and 1GB RAM. While it can run basic voice recognition, you’ll experience noticeable lag during speech processing and limited multitasking capabilities. It’s best suited for simple commands only.
The **Raspberry Pi 4** offers substantial improvements with options for 2GB, 4GB, or 8GB RAM and a 1.5GHz quad-core processor. The 4GB model strikes an excellent balance for most Jarvis projects, handling voice recognition smoothly while running additional services. This is our recommended choice for hobbyists building their first voice assistant.
The **Raspberry Pi 5** delivers the best performance with its 2.4GHz quad-core processor and up to 8GB RAM. It processes voice commands almost instantaneously and handles complex natural language processing effortlessly. However, it’s pricier and might be overkill for beginners.
**Bottom line**: Start with the Raspberry Pi 4 (4GB model) for optimal price-to-performance ratio. Upgrade to Pi 5 only if you plan advanced features like real-time language translation or simultaneous multi-user support.
Microphone Selection: The Make-or-Break Component
Your microphone choice can determine whether your JARVIS responds instantly or constantly misunderstands you. Let’s break down your options.
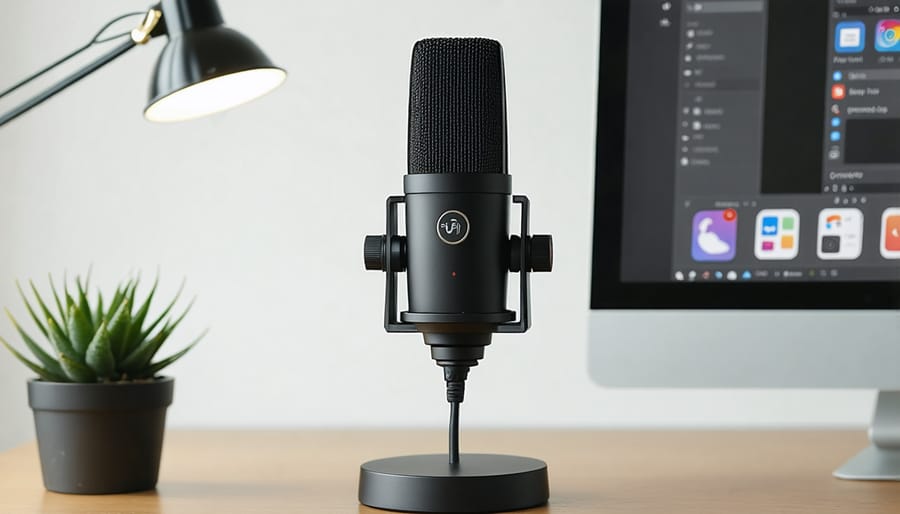
**USB Microphones** offer plug-and-play simplicity and typically deliver superior audio quality. Popular choices include the Blue Snowball ($50-70) for desktop setups and the PlayStation Eye Camera ($10-15) for budget-conscious builders. These work immediately with most Raspberry Pi voice recognition software without additional configuration.
**HAT-Based Solutions** like the ReSpeaker 2-Mic HAT ($15-25) sit directly on your Pi’s GPIO pins, saving desk space and enabling compact builds. They often include built-in noise cancellation and LED indicators, though they require some software setup.
For noise cancellation, prioritize microphones with cardioid or directional pickup patterns—they focus on your voice while ignoring background noise. The ReSpeaker series excels here with programmable DSP algorithms.
**Budget recommendation**: Start with a PlayStation Eye (great microphone array, unbeatable price). **Mid-range**: ReSpeaker 2-Mic HAT balances quality and compactness. **Premium**: Blue Snowball for crystal-clear recognition in quiet environments.
Test your microphone with `arecord -l` to verify Raspberry Pi detection before diving into software configuration.
Optional Add-Ons for Enhanced Functionality
To elevate your JARVIS experience beyond basic voice commands, consider these enhancement peripherals. A quality USB speaker or Bluetooth speaker significantly improves audio output clarity, making JARVIS’s responses more immersive and easier to hear across rooms. For visual feedback, add a small HDMI touchscreen display (3.5″ to 7″) to show status information, weather widgets, or command confirmations—perfect for countertop or desk placement.
RGB LED strips create ambient lighting effects that respond to voice interactions, mimicking the arc reactor aesthetic from Iron Man. A high-quality USB microphone array improves voice recognition accuracy, especially in noisy environments. For mobile applications, attach a compact battery pack and portable speaker to transform your setup into a handheld assistant. Camera modules enable future expansions like facial recognition or gesture controls. These add-ons aren’t essential for basic functionality, but they transform your Raspberry Pi from a simple voice assistant into a truly interactive JARVIS experience that feels straight out of Tony Stark’s lab.
Top Voice Recognition Software Options for Your JARVIS Build
Mycroft AI: The Open-Source Powerhouse
Mycroft AI stands out as the leading open-source voice assistant platform, making it a favorite among privacy-conscious makers and developers. Unlike commercial alternatives, Mycroft processes voice commands locally on your Raspberry Pi, ensuring your conversations never leave your device unless you explicitly choose cloud services.
The platform shines with its extensive skill ecosystem, offering over 1,000 community-developed skills ranging from smart home control to news updates and custom automations. You can easily create your own skills using Python, giving you complete control over your JARVIS’s capabilities. The active community constantly contributes new features and provides support through forums and documentation.
Installation requires moderate technical knowledge—you’ll need familiarity with Linux commands and terminal navigation. The setup process typically takes 1-2 hours on a Raspberry Pi 4, though comprehensive documentation guides you through each step. Be prepared for occasional troubleshooting as open-source projects can have rough edges.
Mycroft excels for educational projects, home automation enthusiasts, and anyone serious about data privacy. It’s ideal if you want a truly customizable assistant that grows with your skills. While the initial learning curve is steeper than plug-and-play alternatives, the payoff is unmatched flexibility and community support.
Google Assistant SDK: Cloud-Powered Intelligence
Google Assistant SDK brings powerful cloud-based natural language processing to your Raspberry Pi Jarvis project. Unlike offline alternatives, it leverages Google’s massive language models to understand complex commands, context, and conversational nuances with impressive accuracy.
The main advantage is its robust speech recognition that works across accents and handles follow-up questions naturally. You can ask “What’s the weather?” then follow with “How about tomorrow?” without repeating context. Google Assistant also integrates seamlessly with smart home devices, calendars, and countless third-party services out of the box.
Setting up requires a Google account, API credentials from the Google Cloud Console, and configuring OAuth permissions. You’ll need an internet connection for processing, as commands are sent to Google’s servers for interpretation. Our detailed Google Assistant setup guide walks you through the entire process.
Privacy considerations are important: your voice data is transmitted to Google’s servers, though you can review and delete recordings through your Google account settings. For privacy-conscious users, this cloud dependency may be a drawback compared to local alternatives. However, the trade-off delivers significantly superior natural language understanding and continuous improvements as Google updates its models.
Amazon Alexa Voice Service: Familiar and Feature-Rich
Amazon Alexa brings instant familiarity to your Raspberry Pi voice assistant project. If you’ve used an Echo device before, you’ll feel right at home—Alexa on Raspberry Pi supports the same wake word, natural language processing, and access to over 100,000 skills including smart home control, music streaming, weather updates, and timers.
Setting up Alexa requires registering your Pi as an AVS (Alexa Voice Service) device through Amazon’s developer portal. While this involves more initial configuration than some alternatives, the payoff is substantial: you get a proven voice assistant with robust cloud infrastructure handling the heavy computational lifting.
The main difference from dedicated Echo devices? Your Pi lacks optimized far-field microphone arrays, so voice recognition works best within a few feet. You’ll also need to handle audio output and input hardware yourself. However, the trade-off gives you complete control over the physical design—perfect for creating a custom enclosure or integrating Alexa into larger projects.
For those seeking the “Jarvis experience” with minimal learning curve, Alexa delivers immediate functionality while allowing customization through custom skills you can develop yourself.
Offline Alternatives: Pocketsphinx and Vosk
If privacy and internet independence matter to you, offline speech recognition engines are worth considering. **Pocketsphinx** and **Vosk** are two excellent open-source options that run entirely on your Raspberry Pi without sending data to external servers.
**Pocketsphinx**, developed by CMU, is lightweight and works well on Raspberry Pi 3 and 4 models. It’s highly customizable and perfect for simple voice commands, though accuracy isn’t quite as polished as cloud alternatives. Setup involves installing the Python library and training it with your preferred wake word and commands.
**Vosk** offers noticeably better accuracy than Pocketsphinx while remaining offline. It supports multiple languages and provides pre-trained models in various sizes—smaller models work on Pi 3, while larger, more accurate models perform best on Pi 4 with 4GB+ RAM.
The trade-off? Both require more initial configuration than cloud services, and recognition accuracy won’t match Google or Alexa. However, you gain complete privacy control, zero latency from internet delays, and independence from service outages. For a true “Jarvis” experience where your assistant stays entirely under your roof, these offline solutions deliver impressive results with a bit of patience during setup.
Step-by-Step: Building Your JARVIS System
Preparing Your Raspberry Pi and Operating System
Getting your Raspberry Pi ready for voice assistant duties starts with choosing the right operating system. We recommend **Raspberry Pi OS (64-bit)** for optimal performance with voice recognition software. Download it from the official Raspberry Pi website and flash it to your microSD card using Raspberry Pi Imager.
During initial setup, ensure you enable SSH for remote access setup, which makes configuration much easier. Connect your Pi to the internet via Ethernet or Wi-Fi, then open the terminal to run essential updates:
“`
sudo apt update
sudo apt upgrade -y
“`
Install Python 3 and pip if they’re not already present, as most voice assistant frameworks rely on them. You’ll also want to configure your audio settings now—use `alsamixer` to adjust volume levels and test your microphone with `arecord` to ensure it’s capturing audio properly.
Finally, expand your filesystem using `sudo raspi-config` to maximize available storage space. These foundational steps create a stable environment for building your Jarvis-inspired assistant.
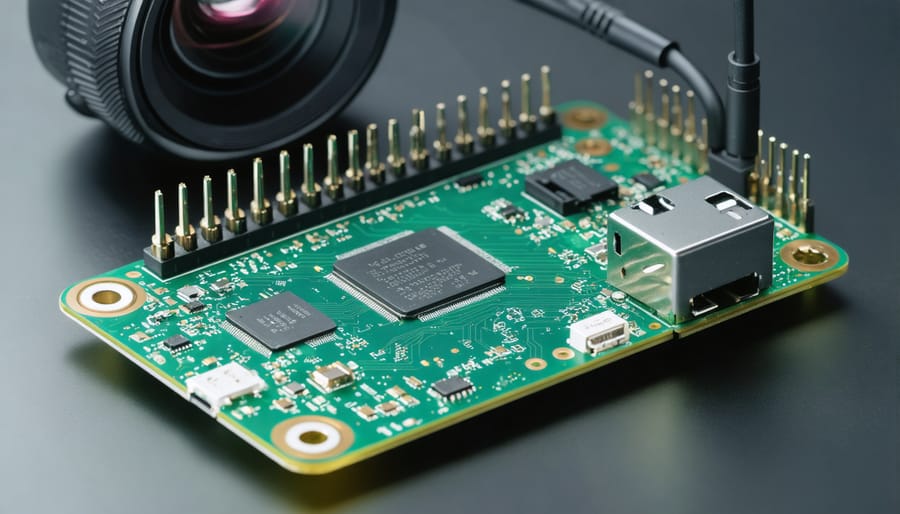
Installing and Configuring Voice Recognition Software
Now that you’ve selected Mycroft as your voice recognition platform, let’s get it installed on your Raspberry Pi. This process is straightforward, and I’ll walk you through each step with clear explanations.
First, ensure your Raspberry Pi is updated. Open a terminal and run:
“`
sudo apt-get update && sudo apt-get upgrade -y
“`
This ensures all your system packages are current, preventing compatibility issues during installation.
Next, download the Mycroft installer script. Mycroft provides an automated setup that handles dependencies:
“`
cd ~
git clone https://github.com/MycroftAI/mycroft-core.git
cd mycroft-core
bash dev_setup.sh
“`
The `dev_setup.sh` script will take 30-60 minutes to complete. It installs Python dependencies, configures audio settings, and sets up the Mycroft services. Don’t worry if you see scrolling text—that’s normal!
During installation, you’ll be prompted to select audio output and input devices. Choose your connected microphone and speaker when asked. If you’re unsure which device to select, the defaults usually work well for USB microphones.
Once installation completes, start Mycroft with:
“`
./start-mycroft.sh all
“`
This command launches all Mycroft services including voice recognition, text-to-speech, and the skills framework.
For your Jarvis assistant to function properly, you’ll need to pair your device. Visit home.mycroft.ai and create a free account. Mycroft will speak a pairing code—enter this on the website to link your Pi.
To configure startup settings, edit the configuration file:
“`
nano ~/.mycroft/mycroft.conf
“`
Here you can customize wake words, adjust microphone sensitivity, and set your preferred voice. The JSON format is beginner-friendly, with clear parameter names like `”listener”` and `”tts”` guiding your customization journey.
Setting Up Your Wake Word and Testing Audio
Before your Jarvis can respond to voice commands, you’ll need to verify your microphone is working properly. Start by recording a test clip using `arecord -d 5 test.wav` and play it back with `aplay test.wav`. If you hear clear audio, you’re good to go! If not, check your USB microphone connection and adjust input levels using `alsamixer`.
Most voice assistant frameworks like Mycroft or Jasper use customizable wake words—that’s the phrase that activates your assistant. The default “Hey Jarvis” works great, but you can change it to match your preference. Adjusting sensitivity is crucial: too high and Jarvis triggers accidentally from background noise; too low and you’ll be repeating yourself constantly.
To fine-tune sensitivity, test in your typical environment with ambient noise present. Access your assistant’s configuration file (location varies by software) and modify the threshold value. Start at the default setting, then increase by small increments (usually 0.1-0.2) if you experience false activations. Record several test phrases from different distances to find your sweet spot.
Pro tip: Position your microphone away from speakers to prevent feedback loops during Jarvis’s responses!
Adding Your First Voice Commands and Skills
Now it’s time to bring your Jarvis to life! Most voice assistant platforms come with pre-built skills that you can enable immediately. Start by testing basic commands to verify everything’s working properly.
For weather updates, try asking “What’s the weather today?” or “Will it rain tomorrow?” Time-related queries like “What time is it?” help confirm your assistant is responding correctly. These simple tests ensure your microphone and speaker setup is functioning as expected.
To install additional skills, access your platform’s skill library through the command line or web interface. Popular options include news briefings, music playback, and timer functions. If you’re using Mycroft, browse the Skills Marketplace and install with simple commands like `mycroft-msm install skill-name`.
For smart home enthusiasts, integration with devices like Philips Hue lights or smart plugs is straightforward. Connect them through your assistant’s configuration file, then control them with commands like “Turn on the living room lights.” Start with one or two skills before expanding your Jarvis’s capabilities—this helps you troubleshoot any issues without becoming overwhelmed.
Customizing Your JARVIS: Advanced Features and Integrations
Smart Home Integration (Home Assistant, MQTT, IoT Devices)
Transform your Jarvis setup into a true smart home commander by integrating Home Assistant, the open-source automation platform that runs beautifully on Raspberry Pi. Home Assistant supports thousands of devices and services, making it the perfect bridge between your voice assistant and your smart home ecosystem.
Start by installing Home Assistant on your Pi (or a separate device if resources are limited). Once running, you’ll access its web interface to add integrations for popular platforms like Philips Hue, Nest, or generic smart plugs. The real magic happens when you combine this with MQTT (Message Queuing Telemetry Transport), a lightweight messaging protocol perfect for connecting IoT devices.
Configure your Jarvis voice assistant to send commands via MQTT topics or Home Assistant’s REST API. For example, saying “Jarvis, lights on” triggers a Python script that publishes an MQTT message to your smart bulbs. You can also integrate sensors—temperature, motion, or door contacts—allowing Jarvis to provide contextual information or trigger automations.
The combination of voice control, Home Assistant’s powerful automation engine, and MQTT’s flexibility creates an incredibly responsive smart home experience worthy of Tony Stark himself.
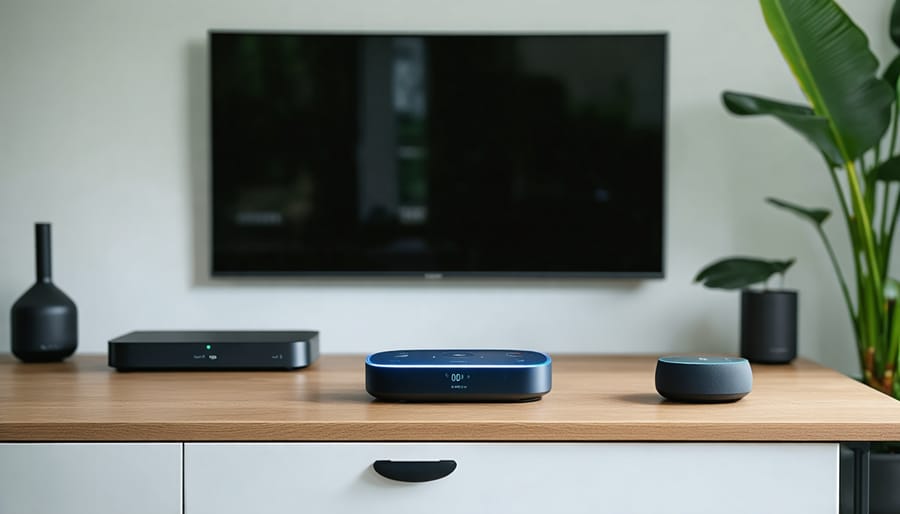
Creating Custom Voice Commands and Responses
Now that you have the basics working, it’s time to make your Jarvis truly yours by adding custom voice commands. This is where your assistant becomes genuinely personalized to your daily needs.
Start with simple command-response pairs. If you’re using Python with speech recognition libraries, create a function that maps your spoken words to specific actions. Here’s a straightforward example:
“`python
def custom_commands(command):
if “what’s my schedule” in command:
speak(“You have a team meeting at 2 PM”)
elif “turn on bedroom light” in command:
# Add your smart home integration here
speak(“Turning on bedroom light”)
elif “system status” in command:
speak(f”CPU temperature is {get_cpu_temp()} degrees”)
“`
The beauty of this approach is its flexibility. You can add commands for checking weather, controlling IoT devices, reading RSS feeds, or launching applications. For more sophisticated responses, integrate APIs like OpenWeatherMap or control GPIO pins for hardware interactions.
Consider creating command categories—home automation, information queries, system controls—to keep your code organized. As you explore more possibilities, check out other voice synthesis projects for inspiration on natural-sounding responses.
Start simple with 5-10 commands you’d use daily, then gradually expand. Remember to include error handling for unrecognized commands, so Jarvis responds gracefully when confused. This iterative approach keeps the project manageable while building something genuinely useful.
Troubleshooting Common Voice Recognition Issues
Even with careful setup, voice recognition systems can encounter hiccups. Let’s tackle the most common issues you might face with your Jarvis assistant and get you back on track quickly.
**Poor Recognition Accuracy**
If Jarvis frequently misunderstands your commands, start by checking your microphone positioning. Place it 1-3 feet away from your mouth at a slight angle to reduce plosive sounds. Background noise is often the culprit—run your assistant in a quieter environment or add noise cancellation in your software settings. Most voice recognition engines allow you to adjust sensitivity thresholds; lowering this value typically improves accuracy but may increase false positives. Consider retraining your acoustic model with your specific voice patterns if your software supports it.
**Microphone Not Working**
First, verify your microphone is properly connected and recognized by running `arecordtest -l` in the terminal. If it doesn’t appear, check USB connections or try a different port. Test audio input with `arecord -D plughw:1,0 -d 5 test.wav` to capture a 5-second sample. If you hear nothing on playback, adjust input levels using `alsamixer` and unmute the capture channel. For USB microphones, ensure your Raspberry Pi’s power supply provides adequate amperage—underpowered systems often cause peripheral failures.
**Wake Word Not Triggering**
Wake word detection requires fine-tuning. If Jarvis ignores you, increase the sensitivity setting in your wake word engine configuration. Conversely, if it triggers randomly, decrease sensitivity or add more negative training examples. Record yourself saying the wake word multiple times and verify the audio quality—clipping or distortion will cause detection failures. Some engines perform better with certain wake words; experiment with different phrases if problems persist.
**Performance Bottlenecks**
Sluggish response times usually indicate CPU limitations. Monitor system resources with `htop` while running commands. Consider offloading processing to cloud-based APIs for complex requests, or optimize your code by removing unnecessary background processes. Overclocking your Raspberry Pi (with proper cooling) can provide a performance boost for local processing tasks.
Performance Optimization Tips
Getting your Jarvis assistant running smoothly on a Raspberry Pi requires attention to both hardware and software optimization. Here’s how to maximize performance and reliability.
**Cooling is Critical**
Voice recognition and natural language processing are CPU-intensive tasks. A Raspberry Pi 4 can quickly throttle performance when overheated, causing sluggish responses and lag. Install a heatsink kit at minimum, but for best results, add an active cooling fan. This simple upgrade can prevent thermal throttling and maintain consistent response times during extended conversations with your assistant.
**Optimize Memory Usage**
Monitor your RAM consumption regularly using the `htop` command. If you’re running multiple services, consider disabling unnecessary background processes and startup programs. Use a lightweight operating system like Raspberry Pi OS Lite (without desktop environment) if you’re accessing Jarvis remotely or through voice only. This frees up valuable resources for processing your commands.
**Improve Audio Quality**
A quality USB microphone significantly improves voice recognition accuracy over built-in audio inputs. Position your microphone away from the Raspberry Pi’s fan to minimize background noise. Use voice activity detection (VAD) thresholds in your speech recognition settings to reduce false triggers and unnecessary processing.
**Storage Optimization**
Use a high-quality, fast microSD card (Class 10 or UHS-1 rated minimum) or better yet, boot from a USB 3.0 SSD for dramatically faster load times and response speeds. This reduces latency when accessing wake words, processing commands, and loading skills or actions.
**Network Stability**
For cloud-based processing, use a wired Ethernet connection instead of Wi-Fi whenever possible. This ensures consistent response times and prevents dropped connections during critical voice interactions.
Congratulations! You’ve successfully transformed your Raspberry Pi into a JARVIS-like voice assistant that responds to your commands and makes your daily tasks more convenient. This project demonstrates how accessible and rewarding DIY technology can be, even if you’re just starting your journey into maker projects and programming.
The beauty of building your own AI assistant lies in its endless possibilities for expansion. Now that you have the foundation in place, consider adding features like home automation control, weather updates, calendar integration, or even connecting it to your smart devices. Each enhancement you make deepens your understanding of Python programming, API integration, and hardware interaction.
Don’t let your project stop here—experiment with different wake words, train it to recognize specific voice patterns, or integrate machine learning capabilities to make your assistant truly intelligent. The Raspberry Pi community thrives on innovation and shared knowledge, so we encourage you to document your journey and share your unique customizations.
Have you added interesting features to your JARVIS assistant? We’d love to hear about your project! Share your experiences, challenges, and creative solutions in the comments below or on community forums. Your insights might inspire someone else’s breakthrough, and you’ll discover new ideas from fellow makers. Keep building, keep learning, and remember—every expert was once a beginner who refused to give up.