


Transform your home security system with a Raspberry Pi to create a powerful, customizable surveillance solution at a fraction of traditional costs. While getting started with Raspberry Pi might seem daunting, this affordable single-board computer can power multiple security cameras, motion sensors, and automated alerts – all controlled through your smartphone.
Modern security systems often cost thousands, yet a Raspberry Pi setup delivers comparable features for under $100: real-time video streaming, motion detection, cloud storage, and instant notifications. By combining off-the-shelf components with open-source software, you’ll build a fully autonomous security hub that matches commercial systems in functionality while offering unlimited customization potential.
This guide walks through creating a professional-grade security system using readily available hardware and free software tools. Whether you’re securing a small apartment or a large home, you’ll learn to implement essential features like:
– Multi-camera monitoring with night vision capability
– AI-powered motion detection that distinguishes between people and animals
– Secure remote access from any device
– Automated emergency notifications
– Local and cloud-based video storage
Ready to take control of your home security? Let’s transform that Raspberry Pi into your personal security command center.
Essential Hardware Components
Core Components
Building a reliable home security system with Raspberry Pi starts with selecting the right core components. At the heart of the system is the Raspberry Pi 4 Model B, which offers excellent processing power and connectivity options essential for security applications. This model’s quad-core processor and multiple USB ports make it perfect for handling multiple camera feeds and sensors simultaneously.
For visual monitoring, the Raspberry Pi High-Quality Camera is recommended for its superior image quality and low-light performance. This camera module captures clear footage both day and night, making it ideal for security purposes. If you need wider coverage, you can also use the more affordable Pi Camera Module V2.
Essential sensors for a basic setup include:
– PIR (Passive Infrared) motion sensors
– Door/window magnetic contact sensors
– Sound detection modules
– Light sensors for automatic night mode activation
Additional hardware components you’ll need:
– MicroSD card (32GB minimum recommended)
– Power supply (3A recommended)
– Ethernet cable or Wi-Fi adapter
– Weather-resistant case for outdoor installations
– GPIO breakout board for connecting multiple sensors
These components form the foundation of your DIY security system, allowing for future expansions and customizations based on your specific needs and preferences.

Optional Upgrades
While the basic Raspberry Pi security system is functional on its own, several optional upgrades can significantly enhance its capabilities. A PIR (Passive Infrared) motion sensor is an excellent addition, detecting movement through heat signatures and triggering alerts or recordings. These sensors are inexpensive, typically costing under $10, and can be easily connected to the Pi’s GPIO pins.
For improved nighttime surveillance, consider adding an infrared camera module or upgrading to a camera with night vision capabilities. The Raspberry Pi NoIR Camera, which lacks an infrared filter, works exceptionally well with infrared LED illuminators for clear night vision monitoring.
Environmental sensors can add another layer of security. Temperature and humidity sensors can alert you to potential fire hazards or water leaks, while door and window contact sensors can notify you when entry points are breached. These components typically connect via the GPIO pins and require minimal additional coding.
For enhanced audio capabilities, adding a microphone module enables sound detection and two-way communication. This feature is particularly useful for deterring intruders or communicating with visitors remotely.
Consider implementing a backup power supply using a UPS (Uninterruptible Power Supply) to keep your system running during power outages. Additionally, expanding storage with an external hard drive ensures you have ample space for recorded footage and logs.
Setting Up Your Security System
Initial Software Setup
The first step in setting up your Raspberry Pi security system is installing the operating system. Download the latest version of Raspberry Pi OS (formerly Raspbian) from the official Raspberry Pi website and use the Raspberry Pi Imager tool to flash it onto your microSD card. This user-friendly tool makes the process straightforward even for beginners.
Once your Pi boots up, open the terminal and update your system by running:
“`
sudo apt update
sudo apt upgrade
“`
Next, install the essential software packages for your security system. The primary package you’ll need is Motion, a versatile software that handles video streaming and motion detection:
“`
sudo apt install motion
“`
You’ll also want to install Python packages for additional functionality:
“`
sudo apt install python3-pip
sudo pip3 install opencv-python
sudo pip3 install numpy
“`
To enable camera support, run the raspi-config utility:
“`
sudo raspi-config
“`
Navigate to “Interface Options” and enable the camera interface. You’ll need to reboot your Pi afterward.
Configure Motion by editing its configuration file:
“`
sudo nano /etc/motion/motion.conf
“`
Key settings to adjust include:
– daemon on
– stream_localhost off
– width 640
– height 480
– framerate 30
Remember to start the Motion service and enable it to run at boot:
“`
sudo systemctl start motion
sudo systemctl enable motion
“`
These foundational steps prepare your Raspberry Pi for implementing security features and connecting cameras.
Camera Configuration
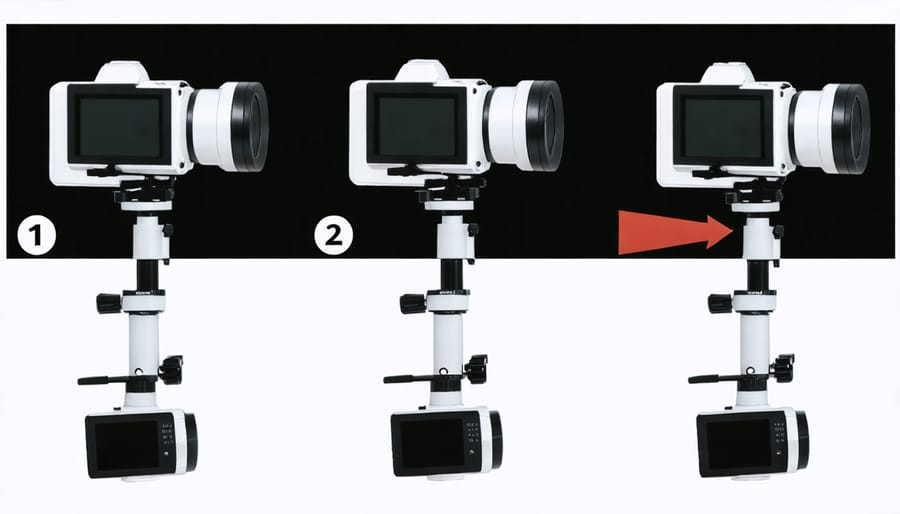
The success of your Raspberry Pi security system heavily depends on proper camera configuration and placement. Start by connecting your camera module to the dedicated CSI port on your Raspberry Pi board, ensuring the ribbon cable is properly seated and the connectors are clean.
For optimal coverage, position your camera at a height of 6-8 feet, angling it slightly downward to capture the maximum viewing area. Consider mounting locations that provide both a clear line of sight and protection from weather elements if installed outdoors. Key areas to monitor include entry points like doors and windows, driveways, and any vulnerable spots around your property.
When configuring your camera settings, begin with the basic parameters in the raspistill or raspivid commands. For security purposes, recommended settings include:
Resolution: 1920×1080 (Full HD) for clear identification
Framerate: 15-30 fps for smooth motion capture
Quality: 75-85% compression ratio for balanced storage usage
Rotation: Adjust based on your mounting position (0, 90, 180, or 270 degrees)
To enhance low-light performance, experiment with the exposure settings. The auto-exposure mode works well in most situations, but you might want to adjust the ISO settings (100-800) for different lighting conditions. Enable the night mode feature if your camera module supports it.
For motion detection efficiency, configure the frame difference threshold carefully. Start with a middle value (around 50) and adjust based on your environment to minimize false triggers while ensuring reliable detection of actual movement.
Remember to regularly clean your camera lens and check the focus. If using the camera outdoors, consider adding an IR filter for better nighttime visibility, and ensure your camera housing provides adequate protection against moisture and dust.
Motion Detection Setup
Motion detection is a crucial component of your Raspberry Pi security system, serving as the primary trigger for capturing suspicious activity. Using the Python picamera library along with OpenCV, we can implement reliable motion detection that balances sensitivity with accuracy.
Start by installing the required dependencies through your terminal:
“`bash
sudo apt-get update
sudo apt-get install python3-opencv
pip3 install picamera
“`
The basic motion detection algorithm works by comparing consecutive frames from the camera feed. When significant differences are detected between frames, it indicates movement. Here’s how to fine-tune your motion detection settings:
First, adjust the threshold value, which determines how much change between frames is required to trigger an alert. A lower threshold increases sensitivity but may lead to false positives, while a higher threshold reduces sensitivity but might miss subtle movements.
Consider implementing a minimum motion area setting to ignore small movements like insects or leaves. This can be configured by setting a pixel count threshold – movements affecting fewer pixels than this threshold will be ignored.
To reduce false alarms, add a delay between detection events. This prevents multiple triggers from the same movement and conserves storage space:
“`python
motion_timeout = 60 # Seconds between detection events
minimum_area = 500 # Minimum pixel area for motion detection
threshold = 25 # Difference threshold between frames
“`
For optimal performance, position your camera in a stable location with good lighting and minimal environmental interference. Test different angles and heights to find the best coverage while minimizing false triggers from regular household activities or outdoor movement.
Remember to regularly review and adjust these settings based on your specific environment and security needs. What works in one setting might need modification in another.
Advanced Features Implementation
Remote Monitoring
Remote monitoring is a crucial component of any modern home security system, allowing you to keep an eye on your property from anywhere in the world. To get started, you’ll need to configure your Raspberry Pi for remote access through a remote desktop setup, which enables you to control your system and view camera feeds from any device.
Begin by setting up port forwarding on your router to allow secure external access to your Pi. For enhanced security, configure SSH access with key-based authentication rather than password login. Install the Motion web interface to stream your camera feeds securely over the internet, and consider using a dynamic DNS service to maintain consistent access to your system even when your home IP address changes.
To receive real-time notifications, implement a notification system using services like Pushbullet or Telegram. These can be configured to send instant alerts to your mobile device when motion is detected or when specific security events occur. You can also set up email notifications as a backup alert system.
For mobile access, create a dedicated app using Python frameworks like Flask or Django, or utilize existing mobile apps that support RTSP streaming. Remember to encrypt all communication channels and regularly update your security certificates to maintain a secure connection.
Consider implementing a VPN server on your Pi for an additional layer of security when accessing your system remotely. This ensures all traffic between your devices and home security system remains private and protected from potential threats.
Cloud Storage Integration
Cloud storage integration is essential for a robust Raspberry Pi security system, providing secure off-site backup of your surveillance footage and enabling remote access to your recordings. There are several reliable cloud storage options that work seamlessly with your Pi setup.
One popular solution is to use Rclone, a command-line program that connects your Pi to various cloud storage services like Google Drive, Dropbox, or OneDrive. After installing Rclone, you can set up automated scripts to periodically upload your security footage, ensuring your recordings are safely stored even if something happens to your local storage.
Another effective approach is using ownCloud or Nextcloud, self-hosted cloud storage solutions that give you complete control over your data. These platforms can be installed directly on your Raspberry Pi or on a separate server, offering secure access to your footage from anywhere while maintaining privacy.
For those preferring mainstream services, you can configure your Pi to automatically upload footage to Amazon S3 or Google Cloud Storage. These services offer generous storage quotas and reliable uptime, though they may incur monthly costs depending on your usage.
To optimize cloud storage usage, consider implementing motion-based recording and scheduled cleanup of old footage. You can also set up compression before upload to reduce storage requirements and transfer times. Remember to encrypt sensitive data before uploading to maintain security.
Automation Scripts
Automation scripts are the backbone of a responsive home security system, allowing your Raspberry Pi to act as an intelligent network security command center. Let’s explore some essential scripts that can enhance your security setup.
First, create a motion detection response script using Python. This script can trigger actions when your camera detects movement:
“`python
if motion_detected:
capture_image()
send_notification()
activate_alarm()
“`
Implement an automated backup script to regularly save security footage to a secure location:
“`python
schedule.every(24).hours.do(backup_footage)
“`
For enhanced protection, develop a script that monitors network connections and alerts you to unauthorized devices:
“`python
def monitor_network():
scan_network()
if unknown_device_detected:
send_alert()
“`
Create time-based automation for your security system:
“`python
def schedule_system():
if time_between(“23:00”, “06:00”):
activate_night_mode()
“`
These scripts can work together to create a comprehensive security response system. Remember to include error handling and logging in your scripts to maintain system reliability. You can expand these basic scripts by adding custom notifications through email, SMS, or messaging apps, and implementing machine learning for more accurate motion detection and facial recognition.
Store your scripts in a dedicated directory and use a main controller script to manage all automation components. This modular approach makes it easier to update and maintain your security system over time.
Troubleshooting and Maintenance
To keep your Raspberry Pi security system running smoothly, it’s essential to address common issues and perform regular maintenance. One frequent problem is the camera feed freezing or becoming unresponsive. This can usually be resolved by rebooting the Raspberry Pi or checking for loose connections in the camera module.
If you experience motion detection false alerts, adjust the sensitivity settings in your detection software and ensure proper lighting conditions. Additionally, regularly clean your camera lens to maintain clear image quality and reliable motion detection.
Storage management is crucial for systems that record footage. Set up automatic cleanup scripts to delete old recordings and maintain sufficient free space. Monitor your SD card’s health using tools like S.M.A.R.T. monitoring to prevent data corruption and system failures.
For systems running 24/7, heat management is vital. Install a small cooling fan if necessary, and regularly clean dust from your Raspberry Pi and its components. Check the CPU temperature using the command ‘vcgencmd measure_temp’ and ensure it stays within safe operating ranges.
Network connectivity issues can disrupt remote monitoring. Keep your system’s software updated, including the operating system and security applications. If you experience connection drops, consider using a static IP address and checking your router’s settings.
Maintain a backup of your configuration files and scripts. This makes system recovery much easier if you need to replace the SD card or restore settings. Schedule monthly checks of all sensors, cameras, and automation rules to ensure everything works as intended.
Remember to periodically update your passwords and review system logs for any suspicious activities or performance issues. This proactive approach helps maintain a reliable and secure system.
Building a Raspberry Pi home security system offers an affordable and customizable solution for protecting your home. Throughout this guide, we’ve covered essential components, basic setup procedures, and advanced features that transform your Pi into a comprehensive security hub. By following these steps, you’ve created a foundation for a robust security system that can be expanded based on your needs.
Consider enhancing your system by adding more cameras, implementing facial recognition, or integrating with smart home devices. The possibilities are virtually limitless, thanks to the Pi’s versatility and strong community support. Remember to regularly update your software, back up your configurations, and test your system to ensure reliable operation.
Whether you’re securing a small apartment or a large home, this DIY approach provides both security and the satisfaction of building something yourself. Start small, experiment with different features, and gradually expand your system as your confidence and needs grow.