


Transform a collection of Raspberry Pi units into a powerful distributed computing network with a DIY cluster setup that maximizes processing capabilities across multiple nodes. Harness the combined power of these affordable single-board computers to tackle complex computational tasks, from parallel processing to distributed machine learning applications. The rising popularity of Raspberry Pi clusters has revolutionized home-based distributed computing, offering an accessible entry point into high-performance computing architectures without breaking the bank.
Modern distributed computing frameworks like Docker Swarm and Kubernetes have made it easier than ever to orchestrate multi-node Pi clusters, enabling everything from web hosting to scientific calculations. By connecting multiple Raspberry Pi units through a dedicated network switch and implementing proper load balancing, even modest setups can achieve impressive processing power for distributed workloads. This practical approach to distributed computing not only serves as an excellent learning platform but also provides a scalable solution for real-world applications in data processing, edge computing, and educational environments.
Why Build a Raspberry Pi Cluster?
Cost-Effective Computing Power
When comparing costs, a Raspberry Pi cluster offers remarkable value for distributed computing projects. While a single enterprise-grade server can cost thousands of dollars, you can build a 4-node Pi cluster for under $300, including all necessary hardware. Despite the lower processing power of individual Pis, their combined parallel processing capabilities make them cost-effective for many computing tasks.
The power consumption is equally impressive, with a typical 4-node Pi cluster drawing only 10-15 watts under load, compared to 200-500 watts for a traditional server. This translates to significant savings on electricity bills over time. Additionally, the modular nature of Pi clusters allows for gradual scaling, letting you invest incrementally rather than requiring a large upfront investment in expensive server hardware.
While not suitable for all enterprise applications, Pi clusters offer an excellent price-to-performance ratio for learning environments, development testing, and small to medium-scale distributed computing projects.
Learning Platform
Building a Raspberry Pi distributed computing cluster offers excellent learning opportunities for both beginners and advanced users. The hands-on experience helps develop crucial skills in Linux system administration, networking fundamentals, and parallel programming concepts. Students and enthusiasts can learn about load balancing, task distribution, and real-time system monitoring while working with practical, affordable hardware.
The project-based nature of Raspberry Pi clusters makes them ideal for understanding distributed computing principles in action. Users gain experience with SSH connections, network configuration, and cluster management tools. This knowledge is directly transferable to enterprise-level distributed systems, making it valuable for career development in cloud computing and DevOps roles.
Additionally, the community surrounding Raspberry Pi distributed computing is highly collaborative, with numerous online resources, forums, and documentation available. Learners can participate in open-source projects, share their experiences, and contribute to the growing knowledge base. This collaborative environment helps develop both technical expertise and essential soft skills like problem-solving and teamwork.
The low cost of entry and scalable nature of Raspberry Pi clusters make them perfect for educational institutions and self-directed learning, allowing students to experiment with different configurations and applications without significant financial investment.

Essential Hardware Components
Raspberry Pi Selection
When building a Raspberry Pi cluster for distributed computing, selecting the right models is crucial for optimal performance. The Raspberry Pi 4 Model B is currently the best choice, offering up to 8GB of RAM and significantly improved processing power compared to previous generations. For most clustering projects, the 4GB or 8GB variants provide the best balance of performance and cost.
While it’s possible to mix different Pi models in your cluster, using identical models ensures consistent performance and simplifies configuration. If budget is a concern, the Raspberry Pi 3 Model B+ remains a viable option, especially for learning and testing purposes. However, its limited RAM and processing power may restrict more demanding applications.
For power efficiency, consider the Pi Zero W only for specialized edge computing nodes within your cluster. The standard Pi 4 consumes more power but delivers substantially better performance for distributed computing tasks. When purchasing, factor in the availability of spare units for future expansion or replacement, and ensure all nodes in your cluster have adequate cooling solutions to maintain stable performance under load.
Networking Equipment
To build a reliable Raspberry Pi cluster, you’ll need networking equipment that ensures stable communication between nodes. A managed Gigabit Ethernet switch with at least 8 ports is recommended, as it provides the necessary bandwidth for efficient data transfer between Pi nodes. Popular options include the TP-Link TL-SG108E or the Netgear GS308E, which offer good performance at reasonable prices.
For cabling, use Cat 6 Ethernet cables, which support Gigabit speeds and provide better shielding against interference than Cat 5e. Keep cable lengths as short as practical to minimize latency, ideally under 2 meters between each Pi and the switch.
Power supply considerations are crucial for network stability. A powered USB hub or dedicated power supply unit capable of delivering 2.5A per Pi is essential. Some builders opt for a single high-capacity power supply unit with multiple outputs, which can simplify cable management and reduce the number of power outlets needed.
Remember to include a few spare Ethernet cables and a UPS (Uninterruptible Power Supply) to protect your cluster from sudden power outages, especially if you’ll be running important computational tasks.
Cluster Case Options
Housing your Raspberry Pi cluster properly is crucial for both protection and efficient cooling. While basic setups can use simple stackable cases, more advanced projects benefit from custom cluster case designs that incorporate proper airflow management. Popular cooling solutions include both passive options, like aluminum heatsinks and well-ventilated cases, and active solutions such as small fans mounted directly on the Pis or case-integrated cooling systems. For optimal performance, consider using a combination of both methods, ensuring each Pi maintains proper operating temperatures even under heavy computational loads. Network cable management is also essential, so look for cases that offer integrated cable routing options.
Software Configuration
Operating System Setup
Setting up the operating system for your Raspberry Pi cluster is a crucial step that requires careful attention to detail. Start by downloading the official Raspberry Pi OS (formerly Raspbian) from the Raspberry Pi website. While the Lite version is recommended for clustering due to its minimal resource usage, you can also use the desktop version if you prefer a graphical interface.
Using the Raspberry Pi Imager tool, flash the OS onto your microSD cards – you’ll need one for each Pi in your cluster. Before ejecting the cards, create an empty file named ‘ssh’ in the boot partition to enable SSH access, which is essential for remote management of your cluster nodes.
For the main node (master), boot up the Pi and perform the initial configuration using ‘raspi-config’. Set a unique hostname (like ‘master-node’), change the default password, and enable SSH if you haven’t already. Configure your network settings and ensure you have a static IP address for reliable cluster communication.
Repeat this process for each worker node, giving each Pi a unique hostname (like ‘worker1’, ‘worker2’, etc.) and static IP address. This prevents network conflicts and makes node management easier. Remember to update and upgrade your system packages using:
“`
sudo apt update
sudo apt upgrade -y
“`
Once all nodes are configured, test the connectivity between them using the ping command. This foundation will prepare your Pis for the clustering software installation in the next steps.
Cluster Management Software
Managing a Raspberry Pi cluster effectively requires robust orchestration software, and several excellent options are available for different skill levels and needs. Docker Swarm stands out as an excellent starting point for beginners, offering a straightforward setup process and intuitive management interface. It allows you to deploy containerized applications across your Pi cluster with basic load balancing and scaling capabilities.
For more advanced users, Kubernetes (K3s or K8s) provides a powerful alternative with enterprise-grade features. K3s, a lightweight Kubernetes distribution, is particularly well-suited for Raspberry Pi clusters due to its minimal resource requirements while maintaining core functionality. It enables sophisticated container orchestration, automated deployment, and scaling of applications.
Other notable management tools include Apache Mesos, which excels at managing diverse workloads, and HashiCorp’s Nomad, offering a simpler alternative to Kubernetes while maintaining robust features. For monitoring and visualization, tools like Portainer provide a user-friendly web interface to manage your container infrastructure.
When choosing cluster management software, consider your specific needs:
– Docker Swarm: Best for beginners and small clusters
– Kubernetes (K3s): Ideal for learning enterprise-grade orchestration
– Apache Mesos: Suitable for mixed workload environments
– Nomad: Good middle ground between simplicity and functionality
Remember that each tool has its learning curve, so it’s recommended to start with Docker Swarm before progressing to more complex solutions.

Network Configuration
Network configuration is a crucial step in creating a functional Raspberry Pi cluster. Start by assigning static IP addresses to each Pi node to ensure consistent communication. You can do this by editing the /etc/dhcpcd.conf file on each Pi, adding the following configuration:
interface eth0
static ip_address=192.168.1.X/24
static routers=192.168.1.1
static domain_name_servers=192.168.1.1
Replace ‘X’ with a unique number for each Pi (e.g., 101, 102, 103). This ensures each node has a distinct address on your network.
Next, set up SSH keys between nodes to enable password-less communication. On your master node, generate SSH keys using:
ssh-keygen -t rsa
Then copy the public key to each worker node:
ssh-copy-id pi@192.168.1.X
To verify connectivity, try pinging between nodes. A successful ping confirms proper network configuration.
For optimal performance, consider using a dedicated network switch for your cluster. A gigabit switch will provide faster data transfer rates between nodes compared to a standard router.
Finally, create a hosts file on each Pi listing all node IP addresses and hostnames. This helps with node identification and simplifies communication within the cluster. Test the configuration by running simple commands like hostname -I across nodes to ensure everything is working correctly.
Real-World Applications
Web Hosting
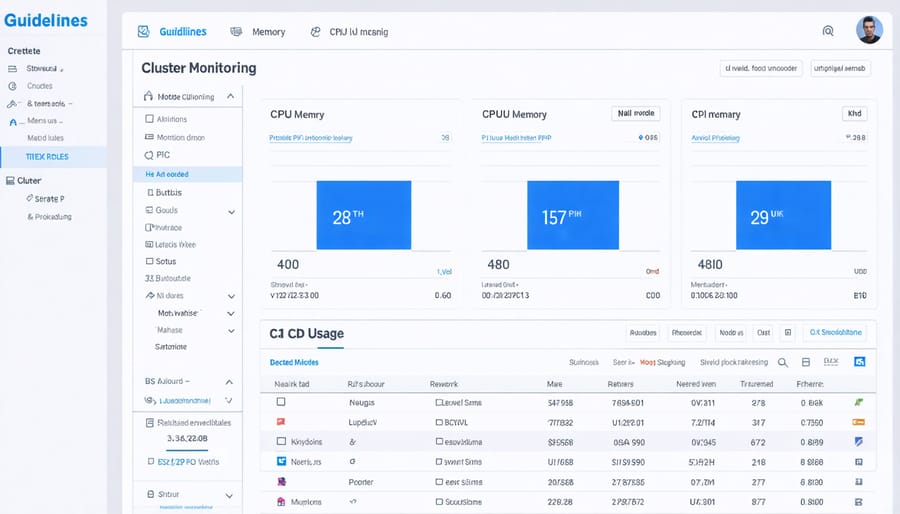
A Raspberry Pi cluster can serve as an excellent platform for hosting web applications and services. By distributing the workload across multiple nodes, you can create a robust and scalable web hosting environment. The cluster can handle multiple websites simultaneously, making it perfect for testing environments or hosting small to medium-sized web applications.
To set up web hosting on your cluster, you can use popular web servers like Apache or Nginx with load balancing capabilities. Docker containers are particularly effective here, allowing you to deploy and manage multiple web services efficiently across your nodes. Each Pi can host different components of your web infrastructure, such as the database server, application server, and reverse proxy.
For optimal performance, configure your master node to act as the load balancer, directing incoming traffic to worker nodes based on their current load and availability. This setup provides redundancy – if one node fails, others can take over, ensuring your websites remain accessible. While not suitable for high-traffic commercial sites, this configuration is perfect for personal projects, development environments, or educational purposes.
Remember to implement proper monitoring and backup solutions to maintain service reliability. Consider using tools like Prometheus for monitoring and regular backup scripts to protect your data.
Parallel Computing Projects
Raspberry Pi clusters excel at handling scientific computing and data processing tasks, making them ideal for various research projects. With their parallel processing capabilities, these clusters can tackle complex calculations and data analysis efficiently. Popular applications include climate modeling, genetic sequence analysis, and machine learning projects.
Scientists and researchers often use Pi clusters for distributed data processing tasks like analyzing large datasets from sensors or running multiple simultaneous experiments. The BOINC (Berkeley Open Infrastructure for Network Computing) platform enables Pi clusters to contribute to global research projects, including SETI@home and Folding@home.
Educational institutions frequently implement Pi clusters to teach parallel programming concepts and distributed computing principles. Students can learn hands-on by developing applications that leverage multiple nodes for tasks like image processing, weather prediction models, or cryptocurrency mining simulations. These practical experiences help bridge the gap between theoretical knowledge and real-world applications in distributed computing environments.
Home Lab Applications
A Raspberry Pi cluster offers numerous practical applications for home experimentation and learning. For students and educators, it provides an excellent platform to understand parallel processing, load balancing, and distributed systems concepts through hands-on experience. You can create a personal cloud storage solution, run a local web hosting environment, or build a powerful platform for IoT applications. Home media streaming becomes more efficient when distributed across multiple nodes, and computational tasks like 3D rendering or data analysis can be split among the cluster for improved performance. The setup also serves as an ideal testing ground for containerization and orchestration tools, making it perfect for DevOps practice and experimentation with technologies like Docker and Kubernetes at a fraction of the cost of commercial solutions.
Building a Raspberry Pi distributed computing cluster is an exciting journey that opens up countless possibilities for learning and experimentation. We’ve explored how to set up the hardware, configure the software, and implement various distributed computing applications using these affordable yet powerful devices. By following the steps outlined in this guide, you can create your own mini supercomputer for tasks ranging from parallel processing to distributed web hosting.
Remember that the key to success lies in careful planning, proper network configuration, and understanding the basics of distributed computing concepts. Start small with a two or three-node cluster before expanding to larger configurations. This approach will help you grasp the fundamentals while minimizing potential troubleshooting challenges.
As you continue your distributed computing journey, consider exploring advanced topics like load balancing, fault tolerance, and custom applications. The Raspberry Pi community is vast and supportive, offering numerous resources and project ideas to build upon your initial setup. Whether you’re using your cluster for educational purposes, home automation, or complex computational tasks, the skills you’ve gained will prove invaluable in understanding modern distributed systems.
Take the next step by implementing your first cluster project, and don’t hesitate to experiment with different configurations and applications to find what works best for your needs.