

Running OpenAI’s conversational AI on a Raspberry Pi in 2026 is entirely practical through API integration, but hosting the full model locally remains out of reach for consumer hardware. The Pi works beautifully as a client device that sends requests to OpenAI’s cloud infrastructure, letting you build voice assistants, chatbots, educational tools, and home automation projects at a fraction of what dedicated AI hardware costs. With a stable internet connection and a subscription starting at $8/month for Go or $20/month for Plus, you can integrate advanced AI capabilities into projects using Python and straightforward API calls.
The most common misconception among makers exploring OpenAI on Pi is that they need to run the entire neural network on the device itself. That isn’t necessary or even advisable. Modern conversational AI models contain billions of parameters and require enterprise-grade GPUs with hundreds of gigabytes of memory. Instead, your Raspberry Pi acts as the interface: capturing user input through a microphone or touchscreen, sending it to OpenAI’s servers via their API, receiving the response, and delivering it through speakers or a display. This approach keeps costs manageable, delivers professional-grade AI performance, and works reliably on everything from a Raspberry Pi 3 to the latest Pi 5.
This guide walks through the technical requirements for each Pi model, demonstrates working code examples you can deploy immediately, explores real-world project ideas from smart mirrors to educational robots, and clarifies exactly what you can expect in terms of performance and monthly costs. Whether you’re building your first AI-powered device or expanding an existing project, you’ll find honest, tested advice that respects both your technical curiosity and your budget.
Why Tech Enthusiasts Want AI Assistants on Raspberry Pi
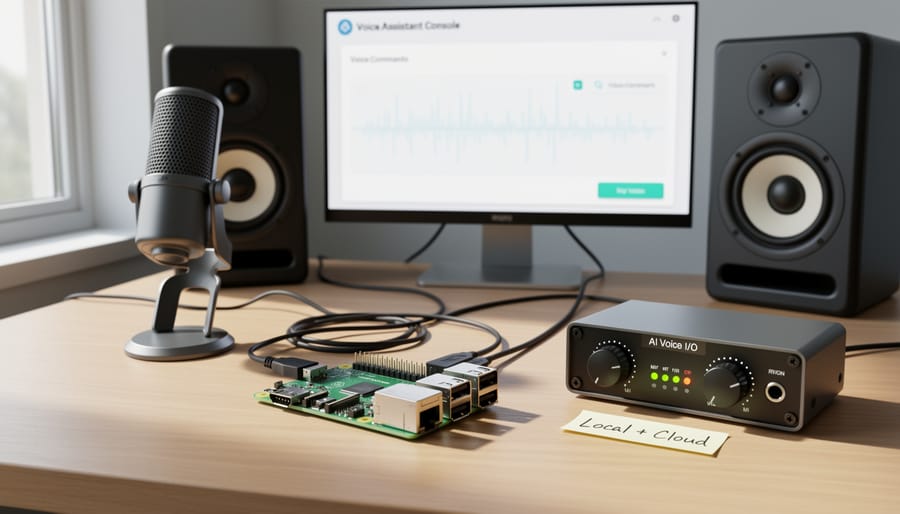
The Raspberry Pi has always attracted tinkerers who refuse to accept technology as a black box. Now, with advanced AI language models accessible via cloud APIs, makers see an opportunity to build something genuinely personal, systems that respond to their exact needs rather than a corporation’s vision of what a smart home or assistant should be.
Privacy sits at the top of many enthusiasts’ lists. Unlike commercial smart speakers that pipe every command through distant servers with opaque data policies, a Pi-based AI assistant can be designed with privacy boundaries you control. You decide which requests travel to the cloud, which data stays local, and how long conversation logs persist. For makers who value data sovereignty, this level of control is non-negotiable.
Educational projects represent another compelling draw. Parents and teachers use Raspberry Pi boards to introduce kids to programming, electronics, and now conversational AI. Building a custom voice interface teaches young learners about API integration, natural language processing, and the real-world applications of artificial intelligence, far more engaging than abstract coding exercises.
Custom voice assistants offer freedom from the limitations of commercial products. Want an assistant that reads your RSS feeds aloud during breakfast? One that queries your home weather station and adjusts the greenhouse vents? Maybe you need specialized responses for a workshop environment or accessibility features tailored to specific needs. The Pi platform enables these niche solutions that would never justify a commercial product.
The cost factor cannot be ignored. A Raspberry Pi 4 runs about $55, and with the $8 monthly Go tier or the $20 Plus subscription, hobbyists can experiment with powerful AI capabilities for a fraction of what dedicated hardware costs. This accessible price point lowers the barrier for learning, prototyping, and iterating on ideas.
The maker ethos thrives on transformation: taking available components and bending them toward unexpected purposes. Combining Raspberry Pi’s flexibility with cloud-based AI services represents exactly this kind of creative repurposing, building tomorrow’s smart tools with today’s affordable hardware.
Understanding the Technical Requirements
Cloud-Based API Integration
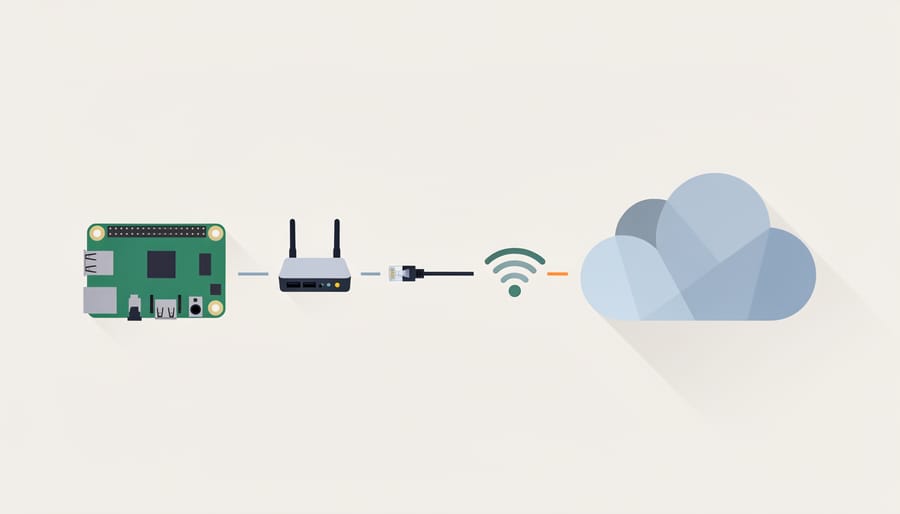
Cloud-based API integration is the most practical approach for using OpenAI’s conversational AI on Raspberry Pi hardware. Your Pi sends text requests over the internet to OpenAI’s servers, which process the query and return a response, typically in under two seconds. This method works on any Pi model with network connectivity because the heavy computational lifting happens remotely.
The technical requirements are modest: a stable internet connection and basic Python libraries. Each API call consumes minimal bandwidth, usually less than 10KB for a simple exchange, making even slower residential connections perfectly adequate. Latency depends more on your network quality and geographic distance to OpenAI’s servers than on your Pi’s specifications.
Subscription costs matter for sustained use. OpenAI offers pay-per-use pricing starting around a few cents per thousand tokens (roughly 750 words), with monthly subscription tiers providing bundled access. As of early 2026, individual plans range from $8/month for basic access to $20/month for enhanced capabilities and higher usage limits. Power users can access the $200/month tier for professional-grade throughput and priority access.
The API approach scales beautifully with your project’s needs. Simple voice assistants might cost under a dollar monthly, while intensive applications requiring constant interaction will consume more tokens. You control costs by monitoring usage through OpenAI’s dashboard and implementing rate limiting in your code. This flexibility makes API integration ideal for hobbyists experimenting without massive upfront investment.
Local Language Model Alternatives
While cloud API integration offers the full power of advanced conversational AI, Raspberry Pi owners curious about on-device processing do have options, though they require managing expectations. Lightweight open-source models like TinyLlama (1.1B parameters), Phi-2 (2.7B parameters), and quantized versions of smaller LLaMA variants can run on Pi 4 and Pi 5 hardware with 4GB or 8GB RAM. These models handle basic question-answering, simple text generation, and conversational exchanges, but their capabilities pale compared to cloud-based services.
Performance varies significantly: response generation takes several seconds to minutes depending on prompt complexity and model size, making real-time conversation impractical. You’ll need to quantize models to 4-bit or 8-bit precision to fit within memory constraints, which further reduces output quality. The results often include repetitive phrasing, factual inaccuracies, and struggle with nuanced requests that cloud services handle effortlessly.
The trade-off is complete privacy and no ongoing subscription costs, making local models worthwhile for offline projects, educational experiments where students learn about AI limitations, or scenarios where data cannot leave your network. For production-quality interactions, cloud APIs remain the practical choice.
Which Raspberry Pi Models Can Handle AI Assistant Tasks
Not every Raspberry Pi board is equally suited to running AI assistant integrations. Your choice of hardware will determine whether you’re limited to simple API calls or can handle more demanding tasks like streaming responses and processing audio inputs.
The Raspberry Pi 4 remains a capable option for cloud-based API integration. With 4GB or 8GB RAM variants, it handles Python scripts that send text prompts and receive responses without breaking a sweat. Expect API calls to complete in one to three seconds over a stable broadband connection. The quad-core Cortex-A72 processor won’t bottleneck simple request-response cycles, but if you’re planning voice integration with real-time audio processing, you’ll notice lag with the 2GB model.
Raspberry Pi 5 represents a significant leap for AI projects. The faster CPU (Cortex-A76 cores) and improved I/O throughput cut response times noticeably when handling JSON parsing and concurrent requests. If you’re building a voice assistant that needs to capture audio, process it locally before sending to the API, and play back synthesized speech, the Pi 5 handles these parallel tasks more smoothly. The Pi 5 vs Pi 4 comparison becomes stark when you add USB peripherals like microphones and speakers, the newer board’s USB 3.0 and PCIe support eliminates bottlenecks that plague multi-device setups.
| Model | RAM Options | Best AI Use Case | Performance Expectation |
|---|---|---|---|
| Raspberry Pi 4 | 2GB, 4GB, 8GB | Basic API calls, text-only projects | 2-3 sec response time, adequate for simple bots |
| Raspberry Pi 5 | 4GB, 8GB | Voice assistants, real-time interactions | 1-2 sec response, handles audio processing smoothly |
| Compute Module 4 | 1GB to 8GB | Embedded systems, custom carrier boards | Matches Pi 4 performance, better for space-constrained builds |
The Compute Module 4 shares the Pi 4’s silicon but fits into custom carrier boards, making it ideal for permanent installations like smart mirrors or embedded home automation controllers. Performance mirrors the Pi 4, so you’re choosing form factor and integration flexibility rather than raw power.
For local model experiments with lightweight alternatives, 8GB RAM becomes essential. Even trimmed-down language models need 4-6GB just to load, leaving little headroom on smaller boards. Realistically, local inference on any current Pi will feel sluggish compared to cloud API calls, think 15-30 seconds per response for basic queries.
If your budget allows, the 8GB Pi 5 offers the best balance for 2026 projects: responsive enough for real-world voice applications, powerful enough to experiment with hybrid approaches that preprocess data locally before API calls, and future-proof as new features roll out.
Setting Up API Access: A Practical Walkthrough
Installing Required Libraries
Before you start coding, you’ll need to install the Python packages that enable your Raspberry Pi to communicate with OpenAI’s API. The most essential library is the official `openai` Python package, which simplifies authentication and request handling.
First, ensure your Pi can connect to WiFi so you can download packages. Open a terminal and create a dedicated virtual environment to keep your project dependencies isolated from system packages:
“`
python3 -m venv ~/ai_assistant_env
source ~/ai_assistant_env/bin/activate
“`
Once activated (you’ll see the environment name in your prompt), install the required packages:
“`
pip install openai python-dotenv
“`
The `openai` library handles API communication, while `python-dotenv` lets you securely store your API key in a configuration file rather than hardcoding it into scripts. On Raspberry Pi OS, this installation typically takes two to three minutes depending on your Pi model and internet speed.
If you’re working with audio for voice projects, you might also need `pyaudio` and `sounddevice`, though these require additional system dependencies. For now, stick with the core packages to get your first integration running.
Writing Your First Integration Script
Here’s your Python script for connecting your Pi to OpenAI’s API:
import openai
import os

# Set your API key (store securely in environment variable)
openai.api_key = os.getenv("OPENAI_API_KEY")

# Define your prompt
prompt = "Explain quantum computing in simple terms"

# Make the API call
response = openai.ChatCompletion.create(
    model="gpt-3.5-turbo",
    messages=[{"role": "user", "content": prompt}],
    max_tokens=150,
    temperature=0.7
)

# Extract and print the response
answer = response.choices[0].message.content
print(answer)
This script handles the core interaction. The `openai` library manages the HTTPS connection and authentication automatically. Your API key authenticates each request, never hardcode it directly in your script. Instead, store it as an environment variable using `export OPENAI_API_KEY=’your-key-here’` in your terminal before running the code.
The `messages` parameter structures your conversation. Each dictionary represents a turn, with “role” indicating whether it’s from the user or assistant. The `max_tokens` parameter limits response length (useful for controlling API costs), while `temperature` controls creativity, lower values produce more focused answers, higher values add variation.
When you run this script, it sends your prompt to OpenAI’s servers and prints the response in your terminal. Response time typically ranges from one to three seconds on a stable connection. If authentication fails, double-check your API key and verify your OpenAI account has available credits.
Real-World Project Ideas and Applications
Once you’ve mastered the API basics, your Raspberry Pi becomes a gateway to genuinely useful projects. A voice assistant powered by conversational AI lets you control smart lights, check the weather, or manage your calendar through natural speech. Connect a USB microphone and speaker to your Pi, use speech recognition to capture commands, send them to the API, and have the response read aloud. You get a customizable alternative to commercial products without recurring hardware costs.
Smart mirrors gain practical depth when paired with AI capabilities. Beyond displaying time and weather, your mirror can answer questions, provide news summaries, or offer cooking advice while you’re getting ready in the morning. The Pi runs the display logic while API calls handle the conversational intelligence, creating an interactive dashboard that responds to your voice or touch input.
For students and researchers, a personal research assistant automates tedious tasks. Set up your Pi to monitor RSS feeds, summarize articles on specific topics, or maintain a running knowledge base from your queries. Schedule daily briefings that compile industry news or academic papers matching your interests. The system runs continuously on minimal power, building a searchable archive of insights over time.
Educational applications shine brightest. Build a homework helper that explains math concepts step-by-step, run a storytelling device that generates custom bedtime tales based on kids’ input, or create an interactive science tutor that answers “why” questions with age-appropriate depth. Parents appreciate the privacy of local hardware and controlled API access compared to giving children unrestricted internet devices.
The practical sweet spot combines simple hardware interfacing with cloud AI intelligence. A Pi monitors sensors (temperature, motion, soil moisture) and uses natural language processing to interpret readings, send alerts, or answer questions about trends. Total hardware investment stays under $100, while API costs scale with actual usage rather than flat subscription fees. Start small, prove the concept works for your needs, then expand functionality as you discover what genuinely improves your daily routine.
Cost Considerations for 2026

Running AI assistant projects on Raspberry Pi demands a clear-eyed look at costs. The beauty of this approach is that you control most variables, so budgeting becomes a planning exercise rather than a surprise.
Hardware represents your primary upfront expense. A Raspberry Pi 5 with 8GB RAM runs around $80, while the Pi 4 (4GB) costs roughly $55. Add a quality microSD card ($15-25), power supply ($10-15), and optional case ($8-12), and you’re looking at $90-130 to get started. These are one-time purchases that serve multiple projects beyond AI integration.
Power consumption barely registers on your electricity bill. A Raspberry Pi 5 under typical AI workload draws about 8-10 watts. Running continuously for a month at average North American rates costs around $1. Even power users won’t notice the impact.
Internet bandwidth matters primarily for API calls. Each interaction sends roughly 1-5KB of text data, with responses ranging from 2-20KB depending on complexity. A typical conversation averaging 20 exchanges consumes under 500KB. Unless you’re running commercial-scale applications, bandwidth costs nothing beyond your existing connection.
API subscription tiers represent the real ongoing expense and offer clear trade-offs:
| Plan | Monthly Cost | Best For | Limitations |
|---|---|---|---|
| Free Tier | $0 | Testing, learning, light experiments | Rate limits, slower responses, limited features |
| Go | $8 | Regular hobbyist projects | Moderate usage caps, basic models |
| Plus | $20 | Advanced home automation, frequent use | Higher limits, premium features |
| Pro | $200 | Commercial or intensive development | Enterprise-grade access |
Most hobbyists find the Go tier hits the sweet spot, providing enough headroom for daily tinkering without breaking the bank. A voice-activated assistant handling 50-100 queries daily operates comfortably within these limits.
Calculate your monthly budget by adding hardware amortized over two years ($4-6), electricity ($1), and your chosen subscription tier. A typical enthusiast setup runs $13-27 monthly after initial investment, with hardware costs dropping to zero once you’ve recovered the outlay through extended use.
Troubleshooting Common Integration Issues
When you’re connecting OpenAI’s conversational AI assistant to your Raspberry Pi, you’ll inevitably hit a few bumps. Here’s how to identify and fix the most common problems without pulling your hair out.
API timeout errors are frustrating but usually stem from slow network connections or the Pi’s limited processing power struggling to handle response parsing. First, increase your timeout value in the API call, try setting it to 30 or even 60 seconds instead of the default 10. If timeouts persist, check your internet connection speed and consider switching to a wired Ethernet connection rather than Wi-Fi. On older Pi models, response parsing can bottleneck your script, so process responses in smaller chunks rather than loading everything into memory at once.
Authentication failures typically mean your API key isn’t being read correctly. Double-check that you’ve copied the entire key without extra spaces, and verify that the key hasn’t expired in your OpenAI dashboard. Store your key in a separate config file or environment variable rather than hardcoding it, this prevents weird character encoding issues. If you’re still getting 401 errors, regenerate a fresh API key and test with a simple curl command before running your Python script.
Rate limiting will block your requests if you exceed your plan’s quota. The error message usually tells you exactly what limit you’ve hit, tokens per minute, requests per day, or concurrent connections. Space out your requests with time delays between calls, and implement exponential backoff when you get rate limit errors. For heavy usage, you might need to upgrade from the $8/month tier to something more robust.
Memory issues on Pi 3 or older models manifest as script crashes or frozen processes. Monitor RAM usage with htop while your script runs. If you’re hitting memory limits, reduce the maximum token count in your API requests, close unnecessary background processes, or add a swap file. The Pi 4 with 4GB or 8GB RAM handles these tasks far more comfortably.
Network connectivity problems, especially dropped connections mid-request, require retry logic in your code. Wrap API calls in try-except blocks that catch connection errors and automatically retry up to three times before giving up. Keep your Raspberry Pi OS and Python libraries updated, as older versions sometimes have compatibility issues with current API endpoints.
Privacy and Security Best Practices
When you integrate cloud-based AI services with your Raspberry Pi, you introduce potential security vulnerabilities that deserve careful attention. Understanding what data leaves your device and how to protect your credentials ensures you can experiment with AI safely.
Store your API credentials in environment variables or a separate configuration file that lives outside your main script directory. The standard approach uses a `.env` file combined with the `python-dotenv` package, which loads sensitive values at runtime without embedding them in your code. Add this configuration file to your `.gitignore` immediately so it never reaches public repositories. For projects you plan to share, include a `.env.example` file with placeholder values that shows others what variables they need to set.
Every API request you make sends data to remote servers, where it may be logged, analyzed, or used for service improvement depending on the provider’s terms. Read the data usage policies carefully before building projects that handle personal information, voice recordings, or sensitive queries. Most commercial AI services in 2026 offer enterprise tiers with enhanced privacy guarantees, but the consumer plans that hobbyists typically use often include broader data retention and training permissions.
If privacy ranks as your top concern, consider local alternatives even if they sacrifice some capability. Lightweight language models designed for edge devices won’t match the sophistication of cloud services, but they keep all data on your hardware. You can run smaller quantized models that process simpler tasks entirely offline, creating a reasonable middle ground for projects where data sovereignty matters more than cutting-edge performance.
The broader security measures that secure your Pi remain essential: change default passwords, disable unnecessary services, keep your OS updated, and use firewall rules to restrict network access. An API-connected Pi becomes a network endpoint that deserves the same hardening attention you would give any internet-facing device. Regular security audits of your credential storage, network configurations, and access logs help catch problems before they escalate.
Running conversational AI on Raspberry Pi in 2026 comes down to choosing the right approach for your goals and constraints. Full local deployment of advanced language models remains impractical for most Pi hardware due to memory and processing limitations. However, cloud-based API integration has matured into a genuinely accessible path for makers, offering reliable performance without requiring enterprise-grade equipment.
For hobbyists working with limited budgets, the $8/month Go tier provides enough API access for most experimental projects, while Plus subscribers at $20/month gain access to enhanced features that launched throughout the year. The key is matching your subscription level to actual usage patterns rather than overcommitting upfront.
Start small with simple projects. A basic command-line interface that sends text prompts and displays responses teaches you the fundamentals without overwhelming complexity. Once you’re comfortable with API calls and error handling, expand to voice-controlled applications, automated research tools, or educational assistants. Each incremental step builds confidence and reveals what’s genuinely useful versus what sounded good on paper.
The Raspberry Pi community thrives on experimentation and practical problem-solving. Your first integration script might feel clunky, and you’ll definitely encounter rate limits or timeout errors. That’s normal. The advantage of cloud-based integration is that you can prototype quickly, iterate based on real feedback, and pivot to different applications without hardware upgrades.
The combination of affordable Pi models and mature AI APIs creates genuine opportunities for creative makers in 2026. Focus on solving specific problems you care about rather than chasing theoretical capabilities. The most successful projects emerge from clear needs and iterative refinement, not ambitious first attempts.