


Transform your Raspberry Pi into a powerful environmental monitoring station with precision sensors that track temperature, humidity, air quality, and atmospheric pressure in real-time. Whether you’re monitoring your home environment, conducting scientific research, or building an automated greenhouse system, this comprehensive guide will walk you through creating a professional-grade sensor network using affordable, readily available components.
The combination of a Raspberry Pi with environmental sensors opens up endless possibilities – from basic weather monitoring to sophisticated IoT applications that can trigger automated responses based on environmental conditions. Modern sensors like the BME680 and DHT22 connect directly to your Pi’s GPIO pins, providing laboratory-grade accuracy at a fraction of the cost of commercial systems.
By following this guide, you’ll learn how to select appropriate sensors, set up the hardware connections, write Python code for data collection, and create a web-based dashboard to visualize your environmental data. We’ll also explore practical applications, from smart home automation to citizen science projects, demonstrating how this powerful combination of hardware and software can solve real-world monitoring challenges.
Essential Hardware Components
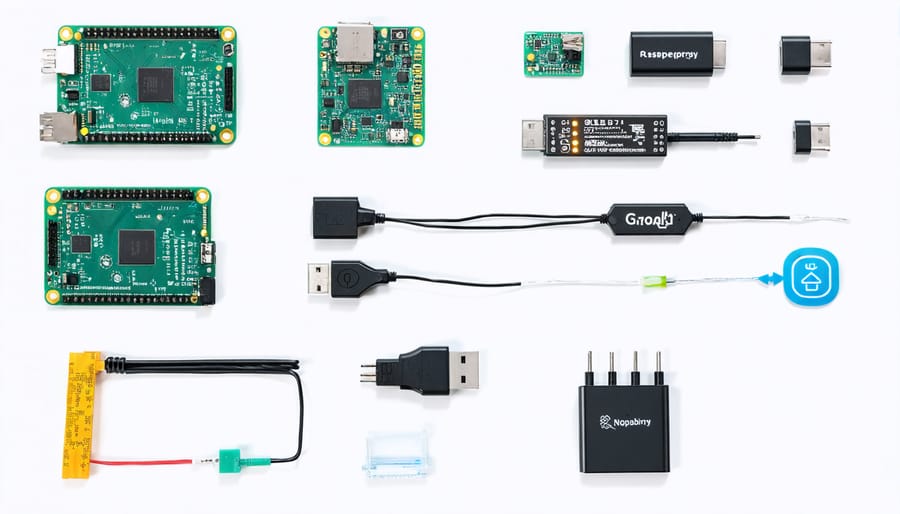
Core Sensor Options
Several reliable sensors work seamlessly with the Raspberry Pi 4 Model B and other Pi models for environmental monitoring. The DHT11 and DHT22 sensors are popular choices for measuring temperature and humidity, with the DHT22 offering higher precision and a broader measurement range. For more accurate temperature readings, the DS18B20 digital temperature sensor provides excellent reliability and supports multiple sensors on a single pin.
The BME280 and BMP280 are sophisticated options that combine temperature and barometric pressure sensing, with the BME280 also including humidity monitoring. These I2C-based sensors deliver professional-grade accuracy and are ideal for weather stations. For those seeking an all-in-one solution, the SHT31-D offers high accuracy and long-term stability for both temperature and humidity measurements.
Budget-conscious makers can start with the basic DHT11, while those requiring precision should consider the BME280 or SHT31-D. All these sensors communicate easily through GPIO pins and have extensive library support in Python, making them perfect for environmental monitoring projects.
Additional Monitoring Equipment
Enhance your environmental monitoring capabilities by incorporating additional sensors to track a wider range of parameters. The MQ-135 air quality sensor is excellent for detecting harmful gases and monitoring indoor air pollution levels. For light measurement, the TSL2561 luminosity sensor provides precise readings of ambient light conditions, which is particularly useful for greenhouse applications.
Consider adding a UV sensor like the VEML6075 to measure ultraviolet radiation levels, or a particulate matter sensor such as the PMS5003 to monitor dust and fine particles in the air. For soil monitoring in gardening applications, you can integrate a capacitive soil moisture sensor along with a pH sensor to maintain optimal growing conditions.
The BMP388 pressure sensor offers highly accurate atmospheric pressure readings, while the SGP30 can detect volatile organic compounds (VOCs) and calculate CO2 equivalent measurements. These additional sensors connect to your Raspberry Pi through either I2C or GPIO pins, and most have readily available Python libraries for easy integration into your existing monitoring system.
Choose sensors based on your specific monitoring needs and budget, as each additional component will provide valuable data points for a more comprehensive environmental analysis.
Setting Up Your Sensor Hub
Physical Assembly
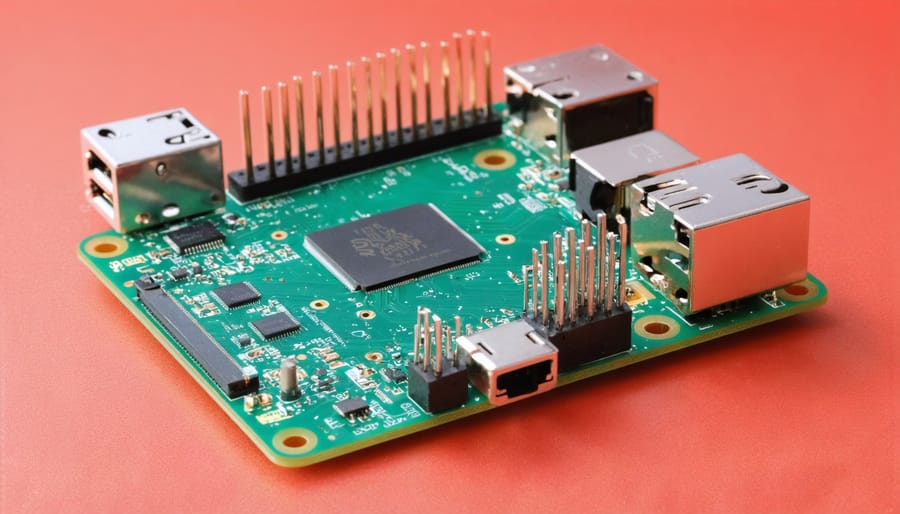
Begin by gathering your Raspberry Pi, the BME280 or DHT22 sensor, and jumper wires. For optimal readings, mount your sensor away from any direct heat sources, including the Raspberry Pi itself. Connect the sensor to your Raspberry Pi using the GPIO pins as follows:
For BME280 sensor:
– Connect VCC to 3.3V (Pin 1)
– Connect GND to Ground (Pin 6)
– Connect SDA to GPIO2 (Pin 3)
– Connect SCL to GPIO3 (Pin 5)
For DHT22 sensor:
– Connect VCC to 3.3V (Pin 1)
– Connect GND to Ground (Pin 6)
– Connect DATA to GPIO4 (Pin 7)
Once connected, secure the sensor in your chosen location using mounting tape or a small bracket. For indoor monitoring, position the sensor at breathing height (approximately 1.5 meters from the floor) and away from windows or air vents that might affect readings.
Consider using a short ribbon cable or extension wires if you need to place the sensor farther from the Raspberry Pi. This allows for more flexible positioning while maintaining accurate readings. Double-check all connections before powering up your Raspberry Pi to avoid any potential short circuits or incorrect wiring.
Initial Software Setup
Before diving into sensor setup, let’s prepare your Raspberry Pi with the necessary software. Start by installing the latest version of Raspberry Pi OS (formerly Raspbian) using the Raspberry Pi Imager tool. After completing the basic OS installation, ensure you have remote desktop access configured for convenient management of your sensor system.
Open the terminal and update your system packages:
“`
sudo apt update
sudo apt upgrade
“`
Next, install the required Python libraries for sensor communication:
“`
sudo apt install python3-pip
pip3 install adafruit-circuitpython-dht
pip3 install smbus2
“`
For data storage and visualization, you’ll need additional packages:
“`
pip3 install influxdb
pip3 install pandas
pip3 install matplotlib
“`
Enable I2C and SPI interfaces through the Raspberry Pi Configuration tool (raspi-config) as many environmental sensors rely on these protocols. Navigate to “Interface Options” and enable both services. After enabling these interfaces, reboot your Raspberry Pi to apply the changes.
Create a new project directory to keep your sensor code organized:
“`
mkdir ~/environment_sensor
cd ~/environment_sensor
“`
These preparations will ensure smooth communication with your sensors and proper data handling in subsequent steps.
Programming Your Environmental Monitor
Sensor Data Collection
Here’s a simple Python script to get you started with collecting data from your environmental sensors. We’ll use the popular BME280 sensor as an example, though you can adapt this code for other sensors:
“`python
import smbus2
import bme280
import time
# Initialize the I2C bus
port = 1
address = 0x76
bus = smbus2.SMBus(port)
# Load calibration parameters
calibration_params = bme280.load_calibration_params(bus, address)
while True:
# Read sensor data
data = bme280.sample(bus, address, calibration_params)
# Extract values
temperature = data.temperature
pressure = data.pressure
humidity = data.humidity
# Print readings
print(f”Temperature: {temperature:.2f}°C”)
print(f”Pressure: {pressure:.2f}hPa”)
print(f”Humidity: {humidity:.2f}%”)
# Wait for 5 seconds before next reading
time.sleep(5)
“`
To store your sensor readings in a database for later analysis, you can modify the script to include SQLite integration:
“`python
import sqlite3
from datetime import datetime
# Create database connection
conn = sqlite3.connect(‘sensor_data.db’)
cursor = conn.cursor()
# Create table if it doesn’t exist
cursor.execute(”’CREATE TABLE IF NOT EXISTS readings
(timestamp TEXT, temperature REAL,
pressure REAL, humidity REAL)”’)
# Add this inside your while loop
timestamp = datetime.now().strftime(‘%Y-%m-%d %H:%M:%S’)
cursor.execute(”’INSERT INTO readings VALUES (?, ?, ?, ?)”’,
(timestamp, temperature, pressure, humidity))
conn.commit()
“`
Remember to install the required libraries using pip before running the script:
“`bash
pip3 install smbus2 bme280
“`
This code provides a foundation for your environmental monitoring system, which you can expand based on your specific needs and sensor configuration.
Data Storage Solutions
When collecting environmental data from your Raspberry Pi sensors, you’ll need a reliable storage solution to preserve and analyze your readings. The most straightforward approach is logging data to a CSV file, which provides an easily readable format that works well with spreadsheet software and data analysis tools.
For more robust storage, consider implementing a SQLite database. SQLite is lightweight, requires no separate server setup, and comes pre-installed with Python. This makes it perfect for storing timestamped sensor readings and querying historical data. You can organize your measurements in tables with columns for temperature, humidity, pressure, and timestamps.
For projects requiring remote access or data sharing, consider using InfluxDB, a time-series database specifically designed for sensor data. It handles large volumes of time-stamped information efficiently and integrates well with visualization tools like Grafana.
Cloud storage options provide another layer of data security and accessibility. Services like ThingSpeak or Google Sheets can automatically receive and store your sensor readings through their APIs. This approach ensures your data is backed up and accessible from anywhere, though it requires an internet connection.
Local network storage using a NAS (Network Attached Storage) or a dedicated server offers a middle ground between local and cloud solutions, providing fast access speeds while keeping your data within your control.
Remember to implement a data retention policy to manage storage space, especially when collecting readings at short intervals. Consider archiving or downsampling older data to maintain system performance while preserving historical trends.
Creating the Web Interface
To visualize your sensor data, we’ll create a user-friendly web dashboard using Flask and Chart.js. Start by installing Flask with pip install flask, then create a new file named app.py. Set up a basic Flask application that serves an HTML template displaying your sensor readings in real-time.
Create an HTML template incorporating Chart.js for dynamic graphs. Add separate panels for temperature, humidity, and pressure readings. Include both current values and historical data trends to help identify patterns over time. Style your dashboard using Bootstrap for a clean, responsive layout that works well on both desktop and mobile devices.
To update the readings automatically, implement AJAX calls that fetch new sensor data every few seconds without requiring page refreshes. Add simple controls for adjusting the update frequency and viewing different time ranges of historical data. Consider including alert thresholds that highlight when readings fall outside acceptable ranges.
For enhanced functionality, add export options for downloading sensor data in CSV format and implement basic authentication to secure your dashboard if it’s accessible over the network.

Real-World Applications
Home Climate Control
Transform your Raspberry Pi environment sensor into a sophisticated home climate control system by integrating it with your existing smart home setup. With the data collected from your environmental monitoring projects, you can create automated responses to temperature, humidity, and air quality changes.
Connect your sensor system to popular platforms like Home Assistant or OpenHAB to establish automated routines. For example, when temperature readings exceed your comfort threshold, the system can trigger your smart AC or activate connected fans. Consider implementing smart home integration with Zigbee for reliable device communication and expanded automation possibilities.
Using MQTT protocols, your Raspberry Pi can publish sensor data to your home automation hub, enabling real-time monitoring through mobile apps or web interfaces. Create custom dashboards to visualize environmental trends and set up alert notifications for when conditions fall outside acceptable ranges. This integration transforms your sensor project into a practical tool for maintaining optimal indoor living conditions while potentially reducing energy consumption through smarter climate control decisions.
Garden Monitoring
A Raspberry Pi environment sensor system can revolutionize your gardening practices by providing precise, real-time monitoring of crucial plant growth conditions. By tracking temperature, humidity, soil moisture, and light levels, you can create optimal growing conditions for your plants and automate various greenhouse functions.
Set up your sensors at different heights and locations throughout your growing space to create a comprehensive monitoring network. The DHT22 or BME280 sensors can track ambient conditions, while soil moisture sensors placed at root level help maintain ideal watering schedules. For greenhouse applications, connect your Raspberry Pi to automated systems that control ventilation fans, irrigation systems, and shade cloths based on sensor readings.
Create custom alerts to notify you when conditions fall outside optimal ranges for your specific plants. For example, set up SMS or email notifications if temperature drops below freezing or soil moisture becomes too low. You can also log environmental data over time to analyze growing patterns and optimize your gardening strategy.
Consider adding a camera module to monitor plant growth visually and detect early signs of pest problems or diseases. This comprehensive monitoring approach helps ensure healthy plant development while minimizing water waste and energy consumption.
Building a Raspberry Pi environment sensor project opens up exciting possibilities for monitoring and understanding your surroundings. Throughout this guide, we’ve explored the essential components, setup process, and programming requirements needed to create your own environmental monitoring system. From selecting the right sensors to configuring your Pi and implementing data collection scripts, you now have the foundation to build a functional and reliable monitoring solution.
Remember that this project can be customized and expanded based on your specific needs. You might want to add more sensors, implement advanced data visualization, or integrate your system with cloud services for remote monitoring. The flexibility of the Raspberry Pi platform means your environmental monitoring system can grow alongside your skills and requirements.
For beginners, start with the basic setup we’ve outlined and gradually add features as you become more comfortable with the system. More experienced makers might want to explore additional capabilities like machine learning for pattern recognition or automated responses to environmental changes.
The next steps could include setting up a web interface for your sensor data, creating automated alerts for specific environmental conditions, or connecting your system to a larger IoT network. Whatever path you choose, this project serves as an excellent foundation for understanding both environmental monitoring and Raspberry Pi development.
Keep experimenting, documenting your results, and sharing your experiences with the community. Your environmental monitoring project could be the starting point for even more innovative applications in home automation, scientific research, or educational demonstrations.