
Transform your Raspberry Pi into a powerful, cost-effective server in under an hour with minimal technical expertise. Whether you’re interested in running game servers, hosting websites, or creating a home media center, this compact computing powerhouse offers enterprise-level functionality at a fraction of the cost. Armed with just a Raspberry Pi 4 (2GB+ RAM), a microSD card, and basic networking knowledge, you’ll discover how to build, configure, and maintain your own server that runs 24/7 while consuming less power than a standard light bulb. From selecting the right operating system to implementing security best practices, this guide walks you through every critical step to create a reliable, high-performance server that meets your specific needs.
Critical components we’ll cover:
– Server OS installation and initial configuration
– Network setup and port forwarding
– Security hardening and access control
– Performance optimization and monitoring
– Backup and maintenance procedures
Let’s transform your Raspberry Pi into a robust server that rivals commercial solutions.
Essential Hardware Requirements
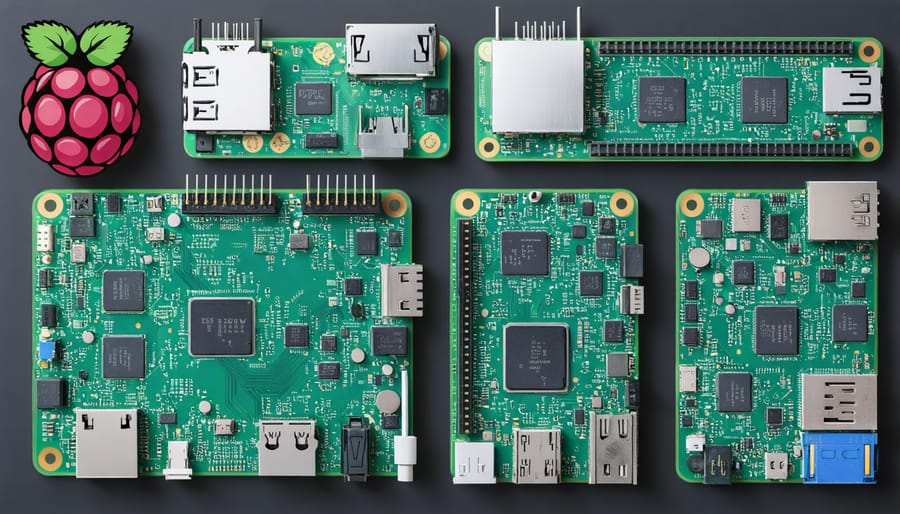
Choosing the Right Raspberry Pi Model
When setting up a gaming server, choosing the right Raspberry Pi model is crucial for optimal performance. The Raspberry Pi 4 Model B stands out as the best choice, offering up to 8GB of RAM and a quad-core processor that can handle multiple game instances efficiently. For lighter gaming servers like Minecraft with few players, the 4GB variant provides sufficient power while being cost-effective.
The Pi 3 Model B+ can work for basic game servers but may struggle with more than 2-3 players simultaneously. While the Pi Zero series is great for other projects, it lacks the processing power needed for gaming servers. The Pi 400 shares similar capabilities with the Pi 4 but comes in a keyboard form factor, making it less ideal for server setups.
Consider your specific needs: if you’re planning to host resource-intensive games or support multiple players, opt for the 8GB Pi 4. For casual gaming with friends, the 4GB model offers the best balance of performance and value.
Storage and Cooling Solutions
For reliable server operation, storage selection and proper cooling are crucial aspects of your Raspberry Pi setup. Start with a high-quality microSD card (at least 32GB) from reputable manufacturers like Samsung or SanDisk, as this will serve as your primary boot drive. For expanded storage, consider connecting an external USB 3.0 hard drive or SSD for better performance and longevity.
Since servers typically run 24/7, proper cooling is essential to prevent thermal throttling and maintain optimal performance. The Raspberry Pi can generate significant heat during continuous operation. A basic heatsink kit for the CPU, RAM, and USB controller chips is a minimum requirement. For more demanding applications, add a small 5V fan mounted directly above the board. Popular cooling options include the ICE Tower Cooler or the official Raspberry Pi case fan.
Monitor your Pi’s temperature using the built-in sensors through terminal commands like ‘vcgencmd measure_temp’. If temperatures consistently exceed 70°C (158°F), consider additional cooling solutions or reducing the CPU load to ensure stable server operation.
Initial Setup and Configuration
Operating System Selection
When setting up a gaming server on your Raspberry Pi, choosing the right operating system is crucial for optimal performance. Raspberry Pi OS (formerly Raspbian) serves as an excellent foundation for most gaming servers, offering stability and extensive community support. However, specific gaming applications might benefit from alternative distributions.
For Minecraft servers, the lightweight Ubuntu Server 20.04 LTS is highly recommended due to its excellent compatibility with Java-based applications and minimal resource overhead. DietPi, another lightweight option, works exceptionally well for running smaller game servers like Terraria or Stardew Valley, as it consumes fewer system resources while maintaining reliable performance.
If you’re planning to host multiple game servers simultaneously, consider Ubuntu MATE. It provides a user-friendly graphical interface while maintaining good performance characteristics. For more experienced users, Arch Linux ARM offers maximum customization and the latest package updates, though it requires more technical expertise to set up and maintain.
Remember that 64-bit operating systems are preferred for gaming servers, as they can better utilize RAM exceeding 4GB. Before making your final choice, ensure your selected OS supports your intended game server software and verify its compatibility with your Raspberry Pi model. Most modern gaming servers run optimally on Raspberry Pi 4 with any of these operating systems.
Network Configuration
Proper network configuration is crucial for your Raspberry Pi server to be accessible and secure. Start by connecting your Pi to your local network via Ethernet for the most stable connection, though Wi-Fi is also an option if mobility is important. Once connected, open the terminal and type ‘ip addr’ to find your Pi’s local IP address, which typically starts with 192.168 or 10.0.
To ensure your server remains accessible, you’ll want to set up a static IP address. Edit the dhcpcd.conf file using:
sudo nano /etc/dhcpcd.conf
Add these lines at the bottom, adjusting the numbers to match your network:
interface eth0
static ip_address=192.168.1.XX/24
static routers=192.168.1.1
static domain_name_servers=192.168.1.1
For external access, you’ll need to configure port forwarding on your router. Log into your router’s admin panel (usually at 192.168.1.1) and locate the port forwarding section. Create a new rule that forwards incoming traffic from your chosen port to your Pi’s static IP address.
For enhanced security, consider setting up SSH key authentication instead of password login:
ssh-keygen -t rsa -b 4096
ssh-copy-id pi@your_pi_ip
Remember to keep your Pi’s network configuration secure by:
– Changing the default SSH port
– Using a firewall (UFW is recommended)
– Regularly updating your system
– Monitoring network traffic for unusual activity
If you’re running specific services (like Minecraft or web servers), ensure you’ve opened the corresponding ports in your firewall settings. Common ports include 80 (HTTP), 443 (HTTPS), and 25565 (Minecraft).
For dynamic DNS services, consider using services like No-IP or DuckDNS to maintain access to your server even when your public IP changes.

Installing Game Server Software
Minecraft Server Setup
Setting up a Minecraft server on your Raspberry Pi requires careful attention to detail, but don’t worry – we’ll walk you through the process step by step. For a complete walkthrough, check out our detailed Minecraft server setup guide.
First, open the terminal on your Raspberry Pi and update your system:
“`
sudo apt update
sudo apt upgrade -y
“`
Next, install Java, which is required to run the Minecraft server:
“`
sudo apt install default-jdk -y
“`
Create a dedicated directory for your Minecraft server:
“`
mkdir minecraft_server
cd minecraft_server
“`
Download the latest version of the Minecraft server software. You’ll want to use the server.jar file specifically optimized for ARM architecture. Using wget, download it directly to your directory:
“`
wget https://launcher.mojang.com/v1/objects/server.jar
“`
Create a startup script to manage your server’s memory allocation and other parameters:
“`
java -Xmx1024M -Xms1024M -jar server.jar nogui
“`
After the first run, accept the EULA by editing the eula.txt file:
“`
nano eula.txt
“`
Change “eula=false” to “eula=true” and save the file.
Configure your server properties by editing the server.properties file. Here you can set parameters like:
– Maximum players
– Server name
– Game mode
– Difficulty level
– Server port (default is 25565)
Finally, start your server using the startup script you created earlier. The initial startup might take several minutes as the server generates the world files.
Remember to configure your router’s port forwarding to allow external connections to your server. Point the port forwarding to your Raspberry Pi’s local IP address using port 25565.
Alternative Gaming Servers
Beyond Minecraft, your Raspberry Pi can host several other popular game servers. Let’s explore some exciting alternatives and their setup processes.
For retro gaming enthusiasts, RetroPie is an excellent choice. After installing the RetroPie operating system, you can transform your Pi into a multiplayer retro gaming station. Simply download the RetroPie image, flash it to your SD card using Etcher, and follow the initial setup wizard. Connect your controllers, and you’re ready to host classic gaming sessions.
Terraria server setup is another popular option. Start by installing TShock, the server software for Terraria. Download the latest TShock release, extract it to a dedicated folder, and modify the config.json file to set your server preferences. Run the server using the command: mono TerrariaServer.exe -config serverconfig.txt
Counter-Strike fans can set up a CS:GO server using LinuxGSM (Game Server Manager). First, install the required dependencies, then download and configure LinuxGSM. Create a dedicated user account for the server, and use the command line interface to manage your CS:GO instance. Remember that CS:GO servers require more processing power, so this works best on a Raspberry Pi 4 with adequate cooling.
For Factorio enthusiasts, the setup process is straightforward. Download the Factorio headless server, extract it, and configure the server-settings.json file. Create a start script with your preferred settings, and use screen or tmux to keep the server running in the background.
Always remember to configure your router’s port forwarding settings for each game server and implement basic security measures like changing default passwords and keeping your system updated. Most game servers also benefit from a static IP address setup and regular maintenance checks to ensure optimal performance.
Performance Optimization
Resource Management
Effective resource management is crucial for maintaining a stable and responsive Raspberry Pi server. Start by monitoring system performance to understand your server’s resource usage patterns and identify potential bottlenecks.
For CPU management, consider using tools like ‘nice’ and ‘cpulimit’ to prioritize important processes and prevent any single task from overwhelming your Pi. Setting process priorities helps maintain smooth operation, especially when running multiple services simultaneously.
RAM management requires careful attention since Raspberry Pis typically have limited memory. Configure swap space appropriately (recommended: 1GB for most setups) and regularly monitor memory usage with ‘top’ or ‘htop’. Consider enabling zram compression to make better use of available memory.
Storage management is equally important. Implement log rotation to prevent system logs from consuming too much space, and regularly clean temporary files and cached data. For better performance, consider using an external SSD instead of a microSD card, particularly for write-intensive operations.
Set up automatic alerts for when resource usage exceeds predetermined thresholds. This proactive approach helps prevent server crashes and ensures optimal performance. Remember to periodically review and adjust these thresholds based on your server’s actual usage patterns and requirements.
Overclocking Considerations
Overclocking your Raspberry Pi can provide additional performance for your server, but it’s essential to approach this process carefully. The Pi 4 offers safe overclocking capabilities through its firmware, making it easier than previous models to boost performance without risking hardware damage.
To begin overclocking, edit the /boot/config.txt file and adjust these key parameters: over_voltage and arm_freq. For a conservative overclock, start with arm_freq=1750 (from the default 1500MHz) and over_voltage=2. This modest increase can provide noticeable performance improvements while maintaining stability.
Monitor your Pi’s temperature during overclocking – it should stay below 85°C (185°F) under load. Adding a small heatsink and fan is highly recommended when overclocking. These cooling solutions are inexpensive and can significantly improve thermal performance.
Signs of unstable overclocking include system crashes, SD card corruption, or the Pi failing to boot. If you encounter these issues, reduce your overclock settings or improve cooling. Remember that each Raspberry Pi responds differently to overclocking due to silicon variations.
A stable overclock can improve server response times and handle more concurrent connections. However, if your server runs critical services, consider whether the performance gain justifies the potential stability risks. For most home server applications, the default clock speeds are usually sufficient.
Security and Maintenance
Security Best Practices
When it comes to securing your Raspberry Pi server, implementing robust security measures is crucial. Start by changing the default password for the ‘pi’ user account to a strong, unique password combining uppercase and lowercase letters, numbers, and special characters.
Enable SSH key-based authentication and disable password authentication to prevent brute-force attacks. Create a new non-root user with sudo privileges and disable the default ‘pi’ user account for additional security. Configure your firewall using UFW (Uncomplicated Firewall) to allow only necessary ports and services.
Keep your system updated by regularly running:
sudo apt update
sudo apt upgrade
Install and configure fail2ban to protect against unauthorized access attempts by automatically blocking suspicious IP addresses. Enable HTTPS for web services using Let’s Encrypt certificates and implement rate limiting to prevent DoS attacks.
Consider setting up a VPN server to access your Raspberry Pi remotely instead of exposing services directly to the internet. Additionally, regularly backup your server configuration and data, and monitor system logs for any suspicious activity using tools like Logwatch.
Remember to disable unnecessary services and ports, and regularly audit your security settings to maintain a strong security posture.
Regular Maintenance Tasks
Regular maintenance is crucial for keeping your Raspberry Pi server running smoothly and securely. Schedule weekly checks to update your system packages using the commands ‘sudo apt update’ followed by ‘sudo apt upgrade’. This ensures you have the latest security patches and performance improvements.
Create automated backups of your server configuration files and important data. You can use tools like rsync to schedule daily backups to an external drive or cloud storage service. A simple cron job can automate this process – just remember to test your backup restoration process periodically to ensure it works when needed.
Monitor your Pi’s temperature and CPU usage using tools like ‘vcgencmd measure_temp’ and ‘top’. If you notice consistently high temperatures (above 80°C) or CPU usage, consider improving ventilation or adding a cooling solution.
Keep an eye on your storage space with ‘df -h’ command. Raspberry Pi’s SD cards have limited space, so regularly clean up old log files and unnecessary data. Consider setting up log rotation to automatically manage growing log files.
Check system logs periodically using ‘sudo journalctl’ to identify potential issues before they become problems. Set up basic monitoring alerts for critical metrics like disk space, temperature, and service status to stay proactive about server health.
Finally, maintain a document detailing your server configuration and any modifications you’ve made. This documentation proves invaluable during troubleshooting or when rebuilding your server.
Setting up a Raspberry Pi server is an exciting and rewarding project that opens up countless possibilities for home networking and hosting. We’ve covered everything from initial hardware setup to security considerations and maintenance procedures. Remember to regularly update your system, monitor performance, and back up your data to ensure smooth operation. If you’re feeling confident, consider exploring additional server applications like media streaming, web hosting, or even creating a VPN. The beauty of a Raspberry Pi server lies in its versatility and scalability – start small and gradually expand its capabilities as your needs grow. With proper maintenance and security measures in place, your Raspberry Pi server can provide reliable service for years to come. Don’t hesitate to join online communities and forums for support and inspiration as you continue your server hosting journey.