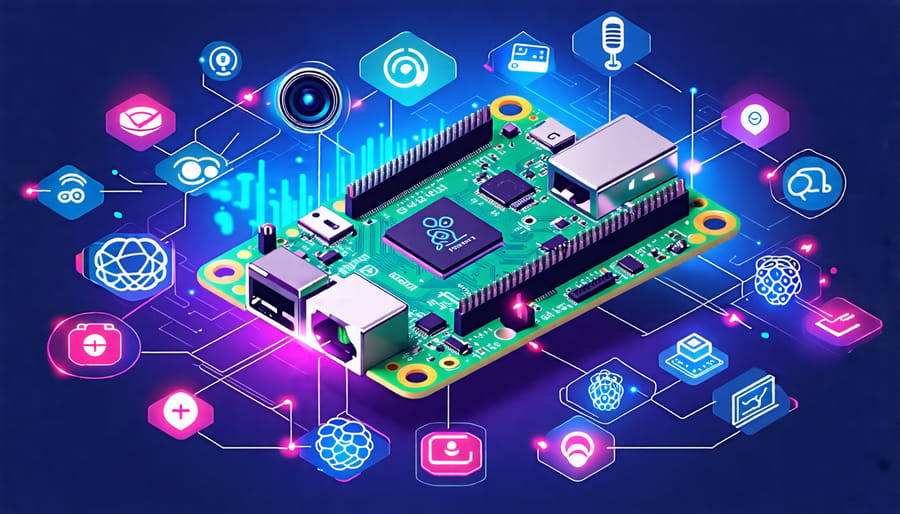
Build a magic mirror using a Raspberry Pi and bring the power of machine learning to your home by embedding facial recognition to display personalized information. Train a neural network to recognize different individuals, then use Python and OpenCV to set up automatic updates and notifications tailored for each family member. Explore gesture-controlled interfaces by connecting a Raspberry Pi to a webcam, leveraging libraries like TensorFlow and OpenCV to teach your device different hand gestures for intuitive control over applications. Transform your Raspberry Pi into a voice-controlled assistant by integrating Google’s Speech-to-Text API and a microphone module, allowing you to command smart home devices or query online information with ease. Enhance security systems with a Raspberry Pi camera and machine learning algorithms to detect suspicious movements or unauthorized entries, providing real-time alerts for enhanced peace of mind.
Setting Up a Machine Learning Environment on Raspberry Pi

Hardware Requirements and Setup
To kick off your machine learning journey with Raspberry Pi, ensuring you have the right hardware and setup is crucial. The most suitable choice for performance-intensive projects is the Raspberry Pi 4 Model B. It boasts up to 8GB of RAM, a powerful quad-core processor, and dual-band Wi-Fi, making it a perfect candidate for running complex ML algorithms.
To get started, you’ll need a microSD card (at least 32GB is recommended) to install your operating system, such as Raspberry Pi OS. A quality power supply ensuring 5V/3A output is essential to prevent power-related issues during processing. Additionally, a heat sink or fan is advisable for cooling, as machine learning tasks can be processing-intensive, leading to increased heat generation.
Connecting a compatible USB camera can be particularly useful for projects involving computer vision or video analysis. Furthermore, an active internet connection, via Ethernet or Wi-Fi, is needed for accessing machine learning libraries and updates.
Finally, consider using a dedicated USB drive or a network storage solution for managing larger datasets efficiently. Structuring your setup with these tips in mind will significantly improve your Raspberry Pi’s performance while exploring fascinating machine learning applications.
Software Installation
Getting your Raspberry Pi ready for machine learning projects is a straightforward process and an exciting first step into the world of AI with tiny devices. Start by ensuring your Raspberry Pi is up-to-date. Open a terminal and run: `sudo apt-get update` followed by `sudo apt-get upgrade`. This ensures your system has the latest software and security patches.
Next, you’ll want to install Python, which is the backbone for many machine learning projects. Your Raspberry Pi likely comes with Python installed, but you can verify this by typing `python –version` in your terminal. For most ML libraries, Python 3 is recommended.
For machine learning, installing key libraries such as NumPy and pandas is essential. You can easily install these using Python’s package manager, pip: `pip install numpy pandas`.
TensorFlow and scikit-learn are popular libraries for ML projects. To install TensorFlow, first make sure your Raspberry Pi has a swap file enabled, as this process can be resource-intensive. Once configured, install TensorFlow: `pip install tensorflow`. Scikit-learn can be installed using: `pip install scikit-learn`.
If you’re interested in computer vision, OpenCV is a powerful library. To install it, use: `sudo apt-get install python3-opencv`. By following these steps, your Raspberry Pi will be ready to dive into a variety of engaging and informative machine learning projects.

Exciting Machine Learning Projects for Raspberry Pi
Project 1: Image Recognition System
Embark on the exciting journey of creating an image recognition system using Raspberry Pi and a camera module. Whether you’re a tech enthusiast, hobbyist, or educator, this project offers a hands-on opportunity to delve into machine learning and Raspberry Pi innovations. To kickstart, assemble your Raspberry Pi setup with a compatible camera module. For optimal quality, you can explore our high-res camera guide to ensure your visuals are crystal clear.
Begin by installing the necessary software libraries. Raspbian OS supports most Python libraries, so installing OpenCV for image processing and TensorFlow or PyTorch for machine learning could be your next step. Make sure your Raspberry Pi is connected to the internet to download these packages seamlessly. Remember, while the Raspberry Pi’s computing power is limited, it’s sufficient for basic image recognition tasks.
Next, train your system. You can either create your own dataset of images or use established ones like ImageNet or CIFAR-10 to simplify the process. With your dataset ready, train your model using the transferred learning technique, which allows your model to adapt pre-trained networks to new tasks.
Implement your trained model in a Python script that captures an image using your camera module and runs it through your image recognition software. With just a bit of code, your Raspberry Pi will identify and categorize objects within the frame. For further refinement, adjust parameters or employ additional libraries to improve accuracy.
This project not only enhances your familiarity with artificial intelligence but also demonstrates the versatility and accessibility of Raspberry Pi. Dive in and transform your Raspberry Pi into a gateway for exploring the fascinating world of image recognition.
Project 2: Speech Recognition Assistant
Embark on your machine learning journey with the Raspberry Pi by creating a Speech Recognition Assistant! This engaging project will have you developing a basic assistant capable of understanding and responding to voice commands, perfect for beginners and tech enthusiasts alike. Using tools such as Python’s SpeechRecognition library and Google’s Speech API, you’ll gain hands-on experience in integrating speech recognition capabilities. Start by installing Raspbian on your Raspberry Pi and ensure all system packages are up-to-date. Then, connect a USB microphone to capture voice inputs.
With the hardware setup, dive into coding. Utilize Python to harness the power of speech-to-text translations. The SpeechRecognition library will serve as your primary tool, converting spoken language into text. By mapping these commands to specific tasks or responses, you can program your assistant to play music, search the web, or even control smart devices connected to your network. This project not only introduces you to the exciting world of voice-controlled technology but also provides a strong foundation in practical machine learning applications. Challenge yourself to expand this project further by incorporating natural language processing features, enhancing the assistant’s understanding and functionality.

Project 3: Smart Home Automation Controller
Embarking on Project 3, a Smart Home Automation Controller using the Raspberry Pi, bridges technology and daily life in impressive harmony. Imagine a home system that intuitively understands your routine, adjusts the thermostat before you get home, dims lights when you head to bed, or even starts the coffee machine as you wake up. This project empowers you to craft such an environment through the magic of machine learning and automation, transforming ordinary living spaces into responsive ones.
To start, you’ll need a Raspberry Pi, various smart devices like lights, thermostats, and plugs compatible with commonly used protocols like Zigbee or Z-Wave, and some basic programming knowledge in Python. One of the pivotal components of this project is leveraging a machine learning framework, such as TensorFlow Lite, which runs efficiently on the Raspberry Pi. It learns patterns from your daily activities to predict and perform actions automatically.
Begin by setting up your Raspberry Pi with Raspbian OS and ensuring you have the latest software updates. Connect your smart devices to the Raspberry Pi, using open-source platforms like Home Assistant or OpenHAB for seamless integration. These platforms facilitate communication between the Raspberry Pi and your devices.
Implement machine learning by collecting data, such as light usage or temperature preferences, then training your model to recognize trends. The model will continuously refine itself to better serve your needs. For more creative inspirations, explore a variety of home automation projects that can be tailored to unique preferences.
This project not only enhances convenience but also offers energy efficiency insights, saving on electricity while providing comfort. By turning your Raspberry Pi into a smart hub, you’re stepping into a future where tech aligns seamlessly with your lifestyle.
Challenges and Tips for Raspberry Pi Machine Learning Projects
Overcoming Hardware Limitations
Leveraging the small but mighty Raspberry Pi for machine learning projects requires clever strategies to navigate its hardware limitations. One effective approach is to offload computation to the cloud, using services like AWS or Google Cloud to handle intensive tasks and returning results to your Pi. This allows you to perform complex models without straining the Pi’s limited processing power. Another tactic is model optimization—by reducing the model’s complexity or using pre-trained models tailored for edge devices, you can achieve faster processing times. TinyML, which focuses on deploying machine learning models on smaller devices, is another exciting avenue. Programming your Raspberry Pi with libraries like TensorFlow Lite helps in running lightweight models efficiently. Furthermore, utilizing external accelerators like the Coral USB Accelerator can significantly enhance your Pi’s capabilities by providing extra computational power for AI tasks. These strategies ensure that even with minimal hardware, your Raspberry Pi can still be a robust tool for innovative machine learning projects.
Ensuring Project Optimization
Optimizing machine learning projects on a Raspberry Pi involves a blend of strategic planning and efficient coding practices to make the most of its capabilities. Begin by selecting a lightweight machine learning library like TensorFlow Lite or scikit-learn, which are specifically designed to deliver efficient performance on less powerful hardware. It’s vital to understand the limitations of Raspberry Pi and scale your machine learning model accordingly—consider simplifying your datasets or models to ensure they run smoothly.
Another key factor is ensuring your Raspberry Pi is operating with optimal power and connectivity. Use efficient power supplies and, if possible, connect to the internet via an Ethernet cable to ensure stable data transfer rates. Additionally, keeping your software up to date can unlock new performance enhancements and bug fixes that improve efficiency. Lastly, don’t forget to leverage the Raspberry Pi’s community forums and resources. These communities are loaded with practical tips and shared experiences that can provide valuable insights and solutions tailored to your project needs.
Conclusion
Exploring machine learning on a Raspberry Pi opens up a world of possibilities for tech enthusiasts, hobbyists, and educators alike. From developing a smart mirror with Raspberry Pi to creating automated home systems, the Raspberry Pi provides an affordable and versatile platform to experiment with cutting-edge technologies.
As a compact yet powerful device, the Raspberry Pi supports various machine learning frameworks, enabling you to implement projects that only require basic initial setup and programming skills. Whether you’re interested in building voice recognition systems, implementing image processing solutions, or developing IoT applications, a Raspberry Pi offers a perfect starting point for your journey into the fascinating world of machine learning.
This small computer’s ability to integrate with numerous sensors and hardware components makes it a practical choice for deploying innovative applications. The accessible community forums and abundant resources ensure that even beginners can troubleshoot and refine their projects effortlessly. As you delve deeper into machine learning, leveraging Raspberry Pi’s capabilities will not only hone your technical skills but also stimulate creativity as you design projects with real-world applications.
Beyond individual projects, Raspberry Pi’s potential as an educational tool is significant. It’s an excellent resource for educators looking to create hands-on learning experiences that bridge theoretical concepts with tangible applications, thereby inspiring the next generation of tech innovators.
The possibilities with machine learning on a Raspberry Pi are as limitless as your imagination. Embrace this opportunity to innovate, experiment, and learn as you explore projects that capture your interest. Whether you’re a seasoned professional or just starting out, there’s no better time to get hands-on with Raspberry Pi and turn your technological visions into reality. So, take the first step—dive into your next Raspberry Pi project and watch your ideas take shape before your eyes.


