Unleash the true potential of your Raspberry Pi by harnessing the power of batteries! Break free from the constraints of wired power supplies and explore a world of untethered possibilities. With the right battery setup, your Raspberry Pi can become a portable powerhouse, enabling you to create innovative projects that go wherever your imagination takes you. From remote sensors and mobile robotics to off-grid applications and educational experiments, battery-powered Raspberry Pis open up a realm of exciting opportunities. Get ready to dive into the world of cordless computing and discover how to safely and effectively power your Raspberry Pi with batteries. Let’s embark on this electrifying journey together!
Choosing the Right Battery for Your Raspberry Pi
Battery Capacity and Runtime
The battery capacity you choose directly impacts the runtime of your Raspberry Pi project. Capacity is measured in milliamp-hours (mAh), with higher values indicating longer potential runtimes. To estimate the runtime for your specific project, first determine the power consumption of your Raspberry Pi model and any connected peripherals. Then, divide the battery capacity by the total current draw to calculate the approximate runtime in hours.
For example, if you have a 10,000 mAh battery and your Raspberry Pi setup draws 2,000 mA (2A), the estimated runtime would be around 5 hours (10,000 mAh / 2,000 mA). Keep in mind that actual runtime may vary based on factors such as battery age, temperature, and power management settings.
When selecting a battery, consider both the capacity and the maximum discharge current. Ensure that the battery can safely provide the required current for your Raspberry Pi and any connected components. It’s also essential to choose a battery with built-in protection circuits to prevent overcharging, over-discharging, and short-circuits.
To maximize runtime, optimize your Raspberry Pi’s power consumption by disabling unused features, adjusting clock speeds, and implementing power management techniques. By carefully selecting your battery capacity and optimizing your setup, you can ensure your Raspberry Pi project runs reliably for the desired duration.
Battery Types and Form Factors
When choosing a battery for your Raspberry Pi project, consider the battery type and form factor that best suits your needs. Two popular battery types are lithium-ion (Li-ion) and lithium-polymer (LiPo). Li-ion batteries are known for their high energy density, low self-discharge rate, and long lifespan, making them a reliable choice for many projects. LiPo batteries, on the other hand, offer a lighter weight and more flexible form factor, which can be advantageous for compact or wearable projects.
In terms of form factors, you can opt for a HAT (Hardware Attached on Top) battery that sits directly on top of your Raspberry Pi board, providing a neat and integrated solution. These HATs often include features like power management, on/off switches, and battery level indicators. Alternatively, you can use a USB power bank, which offers flexibility and convenience as you can easily swap it out when depleted. Power banks come in various capacities, so choose one that matches your project’s power requirements and desired runtime.
When selecting a battery, consider factors such as capacity (mAh), voltage, discharge rate, and safety features like over-charge and over-discharge protection. Always follow the manufacturer’s guidelines and use compatible chargers to ensure optimal performance and longevity of your chosen battery.


Powering Your Raspberry Pi Safely with a Battery
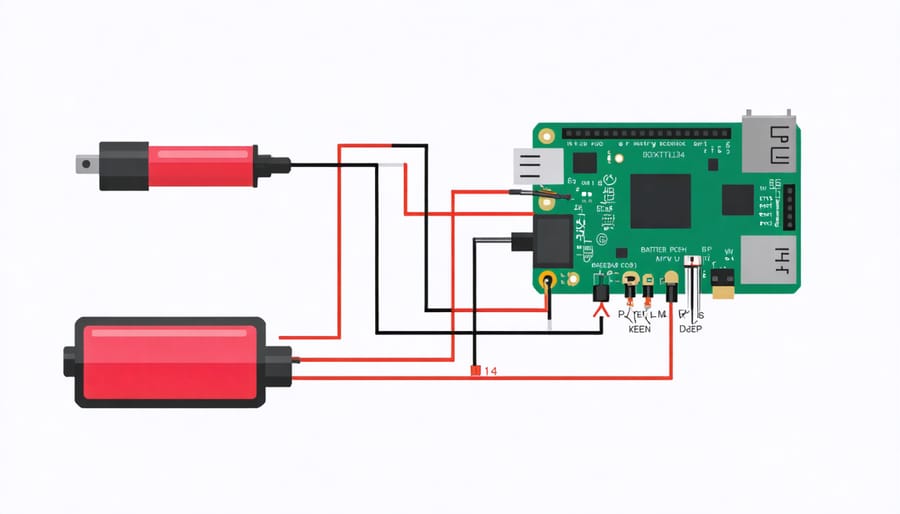
Powering your Raspberry Pi safely with a battery requires careful consideration of voltage regulation, protection circuits, and power management. To begin, select a battery that provides the appropriate voltage for your Raspberry Pi model. Most models require a 5V power supply, but some, like the Raspberry Pi 4, can handle a wider range of input voltages.
When connecting the battery to your Raspberry Pi, it’s essential to use a voltage regulator to ensure a stable 5V supply. Popular options include linear regulators like the LM7805 or switching regulators like the LM2596. These regulators protect your Raspberry Pi from voltage fluctuations and prevent damage from over-voltage or under-voltage conditions.
In addition to voltage regulation, it’s crucial to incorporate protection circuits. A battery management system (BMS) is recommended to monitor the battery’s charge level, prevent overcharging or over-discharging, and protect against short-circuits. The BMS should be compatible with your chosen battery chemistry (e.g., Li-ion, LiPo, or NiMH).
To connect the battery and regulator to your Raspberry Pi, follow these steps:
1. Solder the positive and negative leads of the battery to the input terminals of the voltage regulator, ensuring correct polarity.
2. Connect the output of the voltage regulator to the 5V and GND pins on the Raspberry Pi’s GPIO header.
3. If using a BMS, connect it between the battery and the voltage regulator, following the manufacturer’s instructions.
4. Double-check all connections before powering on your Raspberry Pi.
For added convenience, consider using a power management IC like the MAX17043 to monitor the battery’s charge level and provide alerts when the battery is running low. This allows you to safely shut down your Raspberry Pi before the battery is completely discharged, preventing data corruption or sudden power loss.
Remember to always handle batteries with care, as they can pose fire or explosion risks if damaged or misused. Never short-circuit a battery or expose it to extreme temperatures. When not in use, store batteries in a cool, dry place away from metal objects that could cause a short-circuit.
By following these guidelines and prioritizing safety, you can confidently power your Raspberry Pi with a battery for mobile projects and off-grid applications.

7 Incredible Battery-Powered Raspberry Pi Project Ideas
Transform your Raspberry Pi into a Portable Retro Gaming Console powered by a rechargeable battery. With a few simple modifications, you can create a handheld gaming device that lets you enjoy classic games on the go. Start by selecting a compact battery pack that provides enough power for your gaming sessions. Next, choose a suitable case or 3D print a custom enclosure that securely holds your Raspberry Pi and battery. Wire the battery to your Pi’s power input, ensuring proper voltage regulation. Finally, load up your favorite retro gaming operating system, such as RetroPie or Lakka, and start building your library of classic games. With this portable gaming console, you’ll have hours of nostalgic fun wherever your adventures take you.
For an exciting project that combines Raspberry Pi, battery power, and renewable energy, consider building a solar-powered weather station. This autonomous system can monitor various environmental factors like temperature, humidity, and rainfall, all while running on clean, green solar power. By equipping your Raspberry Pi with a solar panel, rechargeable battery, and weather sensors, you can create a self-sustaining setup that collects data round-the-clock. To transmit the data wirelessly, you can use a Solar-Powered Raspberry Pi with a Wi-Fi or cellular connection, allowing you to access the information remotely. This project not only showcases the versatility of battery-powered Raspberry Pi setups but also highlights the potential for using technology to monitor and understand our environment better.
Create an untethered camera trap using your battery-powered Raspberry Pi for wildlife photography or home security. With a compatible camera module and a motion sensor, you can capture stunning images of elusive creatures or monitor your property remotely. Set up your Raspberry Pi with a high-capacity battery pack and configure the camera to capture images or video when triggered by motion. Optimize power consumption by adjusting camera settings and enabling sleep mode during inactive periods. Deploy your camera trap in strategic locations, such as wildlife trails or entry points, and retrieve the captured media periodically for analysis. This project combines the power of Raspberry Pi with the flexibility of battery power to create a portable, autonomous surveillance system.
Power Optimization Tips for Longer Battery Life
To maximize battery life in your Raspberry Pi projects, there are several power optimization tips you can implement. Start by disabling unused peripherals, such as HDMI, USB ports, and onboard LEDs, to reduce power consumption. You can achieve this by modifying the config.txt file or using the raspi-config utility.
Next, consider adjusting the clock speed of your Raspberry Pi’s CPU and GPU. Lowering the clock speeds can significantly reduce power consumption, especially if your project doesn’t require maximum performance. The config.txt file allows you to set the arm_freq and core_freq parameters to adjust the CPU and GPU clock speeds, respectively.
Another effective strategy is to utilize power management software like pm-utils or tlp. These tools can automatically optimize power settings based on your usage patterns, helping to extend battery life without compromising functionality.
When running your Raspberry Pi on battery power, it’s crucial to monitor the battery level and prevent unexpected shutdowns. You can use scripts or built-in tools to check the battery voltage and set up low-battery warnings or automatic shutdown thresholds.
If your project allows, consider using a Raspberry Pi model with lower power consumption, such as the Raspberry Pi Zero or Zero W. These models have a smaller form factor and consume less power compared to their larger counterparts.
Finally, optimize your software and scripts to minimize resource usage. Close unnecessary background processes, use efficient coding practices, and leverage sleep or idle modes when appropriate. By combining hardware and software optimizations, you can significantly extend the battery life of your Raspberry Pi projects and enjoy longer periods of untethered operation.
Conclusion
In conclusion, powering a Raspberry Pi with a battery opens up a world of possibilities for portable and untethered projects. By carefully selecting the right battery, following safe setup practices, and implementing power optimization techniques, you can create innovative projects that go beyond the desk. Whether you’re building a mobile sensor station, a retro gaming machine, or an autonomous robot, the combination of a Raspberry Pi and a battery can bring your ideas to life. We encourage you to experiment, explore, and share your own battery-powered Raspberry Pi projects with the community. Together, we can push the boundaries of what’s possible with this incredible single-board computer. Happy tinkering!


