

Begin constructing your Raspberry Pi VR headset by selecting the right model and components, such as a Raspberry Pi 4, an HDMI-compatible display, and a VR housing kit for a snug fit and optimal experience. Install the appropriate software by flashing an operating system like Raspbian onto your Raspberry Pi using tools such as Raspberry Pi Imager or Balena Etcher to ensure a smooth setup process. Assemble the components methodically, connecting the Raspberry Pi with the display and sensors within the VR housing, ensuring all connections are secure and tidy for the best functionality. Customize your setup by exploring software libraries and tools like OpenHMD or PiPlay, which provide VR-specific capabilities, enhancing your experience with gaming or educational applications tailored for the Raspberry Pi’s capabilities.
Understanding VR Technology and the Role of Raspberry Pi
What is VR and How Does It Work?
Virtual reality (VR) is a technology that creates immersive, computer-generated environments, allowing users to experience and interact with 3D worlds. VR headsets are essential for this experience, employing a combination of sensors, lenses, and displays to immerse the user. They track head movements and adjust the view accordingly to provide an illusion of presence in a virtual space. Typically, VR headsets consist of stereoscopic displays for depth perception, motion tracking systems like accelerometers and gyroscopes, and input devices to navigate the virtual realm. When integrating Raspberry Pi into VR setups, hobbyists can explore custom projects, offering an innovative approach to learn and build VR technology independently.
Why Raspberry Pi for VR Projects?
Raspberry Pi’s popularity in VR projects stems from its unique combination of affordability, versatility, and user-friendly nature, making it an ideal choice for both beginners and seasoned tech enthusiasts. The low-cost, credit-card-sized computer opens up a world of possibilities without straining your budget, allowing hobbyists and educators to explore virtual reality’s potentials without significant financial risk. Its flexibility is shown through the vast array of compatible accessories and modules, enabling you to tailor your VR headset project to suit specific needs or creative visions. Moreover, Raspberry Pi’s extensive community is a treasure trove of resources, tutorials, and troubleshooting advice, ensuring that users of all skill levels can find support and inspiration. With Python and Scratch programming support, even those new to coding can get involved, creating endless opportunities for learning and innovation. Using Raspberry Pi, you’re not just building a VR headset; you’re embarking on an exciting journey into the world of customized, accessible technology.
Building Your Own Raspberry Pi VR Headset: Step-by-Step Guide
Parts and Tools Needed
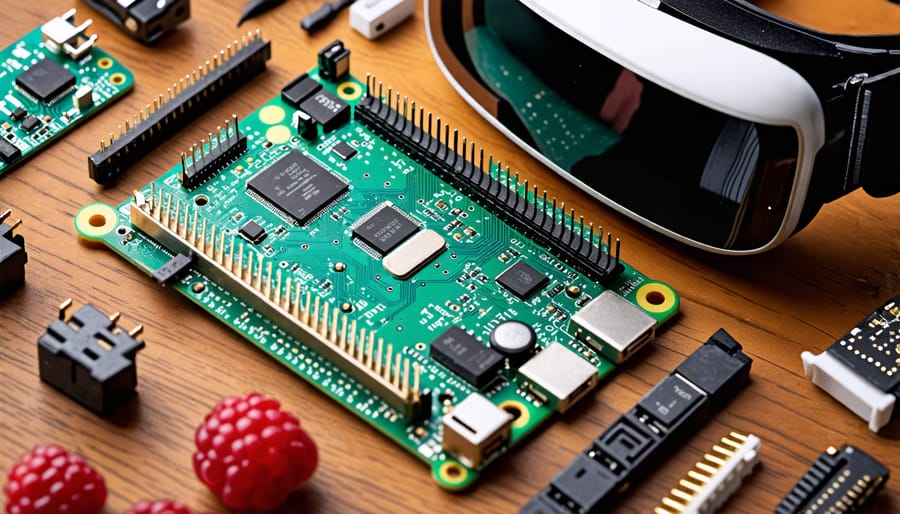
To build a Raspberry Pi VR headset, you’ll need an assortment of parts and tools. First, acquire a Raspberry Pi 4, as it offers sufficient power and connectivity for VR projects. You’ll also need a microSD card with at least 16GB storage for the operating system and applications. Include a 5V 3A power supply to ensure stable performance. For the display, opt for a small, high-resolution HDMI screen, commonly used in DIY VR setups, which will connect directly to your Raspberry Pi. A pair of lenses, similar to those found in Google Cardboard, is necessary for a wearable, immersive experience.
Additional items include a head strap for comfort and materials to construct a headset frame, like cardboard or a 3D printed design. These basics will set the foundation, but don’t forget optional extras like motion sensors for enhanced interactions. For coding and setup, you’ll need a computer and an HDMI cable. Finally, tools like a screwdriver and craft knife will be useful for assembly. To expand your project, consider setting up a game server setup on your Raspberry Pi.
Assembly Instructions
To assemble your Raspberry Pi VR headset, follow these simple steps and get ready to dive into a basic VR experience.
First, gather your components: a Raspberry Pi (preferably a Pi 4 for better performance), a compatible VR headset (Google Cardboard or similar), a microSD card, a power source, and an HDMI display if necessary. Make sure you have cables and adapters to connect everything. Begin by setting up your Raspberry Pi. Flash an operating system like Raspberry Pi OS onto the microSD card using the Raspberry Pi Imager. Insert the card into the Pi, connect it to a power source, and complete the initial setup on a monitor or HDMI display.
Next, install the necessary software. You’ll want a VR software platform that can run on Raspberry Pi. Start by opening a terminal and updating your system with `sudo apt update` and `sudo apt upgrade`. Once updated, you can explore options like VR applications compatible with Pi, such as specific open-source projects or simple VR games.
Now, it’s time to integrate your Raspberry Pi with the headset. Most entry-level VR headsets are essentially holders for smartphones or small displays. You’ll need to mount the small screen that connects to your Raspberry Pi inside the headset. Ensure the head tracking is enabled if your headset supports it. This might involve calibrating the sensors connected to the Pi to accurately follow head movements.
Finally, place the headset on and tweak the calibration settings as needed for a more comfortable visual experience. Adjust the straps and lenses to suit your vision and make sure everything is securely in place. Take your time at this stage to avoid discomfort during viewing.
With these steps, you’ve built your Raspberry Pi-powered VR headset. Enjoy experimenting with different applications, and remember to keep exploring new possibilities with your setup!
Common Issues and Troubleshooting
If you encounter issues with your Raspberry Pi VR headset, don’t worry—common challenges are usually easy to troubleshoot. First, ensure all connections are secure; loose cables can cause display or tracking issues. If your display remains dark or flickering, check the power supply and microSD card. A properly flashed microSD card is crucial—double-check that you’ve correctly set up your operating system. For blurry or unresponsive visuals, adjust the positioning of the lenses and make sure they are clear and clean. Ensure the software is up-to-date; outdated software can lead to compatibility issues. If you’re experiencing lag, verify your network’s stability and try optimizing the performance settings within your VR software. Always refer to the Raspberry Pi forums for community support. Remember, patience is key as you experiment and learn. Enjoy the process, and soon you’ll have a fully functioning VR setup ready to explore virtual worlds!
Programming Your VR Experience
Development Tools and Languages
When developing VR applications for a Raspberry Pi VR headset, a variety of software tools and programming languages can enhance your project. Start with Unity, a powerful game engine, which works well with Raspberry Pi for crafting 3D environments. Python, renowned for its simplicity, plays a key role in developing interactive VR elements, especially with the use of libraries like Pygame or OpenCV for image processing. Additionally, consider using Blender for 3D modeling, providing rich visuals to your VR scenes. Equally essential, Linux-based tools like OpenHMD enable low-level VR integration, making them perfect for a DIY VR setup on Raspberry Pi.
Sample Projects and Tutorials
Building your own Raspberry Pi VR headset can be a fun and rewarding project for tech enthusiasts and hobbyists. To kick-start your journey, here are some simple yet exciting VR projects that can serve as excellent tutorials. Begin with the basic VR viewer project, where you use a cardboard headset and a Raspberry Pi to create a simple 3D environment. This project introduces the basics of virtual reality and allows you to experience spatial immersion using your homemade headset. For those interested in adding a layer of complexity, try integrating motion tracking using inexpensive sensors. This will enhance the interactivity of your VR experiences by allowing users to look around in virtual spaces intuitively.
Another engaging project involves setting up a panoramic 360-degree photo viewer. With this, you can use your Raspberry Pi to explore immersive landscapes or custom environments. Don’t forget to consider IoT security practices during your projects to protect your device and data. These projects are designed to inspire further development, encouraging you to tweak and improve them as you grow more confident in your VR headset skills.
Enhancing Your VR Headset
Adding Sensors and Controllers
Incorporating motion sensors and controllers into your Raspberry Pi VR headset can significantly elevate the immersive experience. To get started, consider adding gyroscope and accelerometer modules, such as the MPU-6050, which are essential for tracking head movements with precision. These sensors allow the VR headset to respond to real-time head tilts and rotations, enhancing the sense of presence in a virtual environment.
Pairing the Raspberry Pi with a Bluetooth or USB VR controller will further refine your interaction. Controllers like the Nintendo Wiimote or Xbox controllers can be easily configured for Raspberry Pi, offering a tactile way to navigate VR spaces. Ensure you set up your Pi to recognize the controller, using Python libraries such as Pygame for integration.
If you’re familiar with the “smart mirror project,” you’ll find the skills and tools learned there transferable and useful here. By using these components, you’re not just building a VR headset, but creating a more dynamic and responsive virtual realm tailored to your specifications.
Conclusion
Embarking on the DIY Raspberry Pi VR headset project is an exciting journey into the world of virtual reality, offering tech enthusiasts and hobbyists a chance to blend creativity with innovation. By following the steps outlined, you’ve created a customizable and affordable VR experience using the versatile Raspberry Pi. This project not only enhances your understanding of VR setups but also opens doors to further exploration and experimentation. As you delve deeper, consider experimenting with additional features, like motion tracking or custom visual enhancements, to continue expanding your skills and knowledge. Keep exploring, learning, and innovating!