

Upgrade your Raspberry Pi’s networking by adding a second Ethernet port using a USB-to-Ethernet adapter. Explore advanced network setups, such as creating a Raspberry Pi-based router or firewall, to effectively manage traffic and enhance security. Integrate a dual Ethernet configuration in your home automation system to separate IoT devices from your main network, improving overall performance and security. Combine your Raspberry Pi with a network-attached storage solution, and leverage multiple Ethernet ports for faster data transfer rates and seamless media streaming experiences.
Why Dual Ethernet Ports? Understanding the Benefits
Enhanced Networking Capabilities
Having two Ethernet ports on a Raspberry Pi can significantly enhance both network performance and reliability, making it an attractive option for tech enthusiasts and educators alike. With dual Ethernet connectivity, your Raspberry Pi can handle more network traffic, serving as both a bridge and a router. This setup allows for better bandwidth management, enabling you to segregate different types of traffic on separate networks, reducing congestion, and improving overall data throughput. This is particularly beneficial for running multiple services or nodes, such as NAS setups or IoT applications, where network efficiency is key.
Moreover, enhanced reliability comes from the ability to implement network redundancy. Dual Ethernet ports allow for failover mechanisms where one connection serves as a backup if the primary network fails. This ensures continuous data flow, which is crucial for projects requiring high uptime or dealing with critical data. Such configurations can transform your Raspberry Pi into a more resilient networking device, offering peace of mind alongside cutting-edge functionality.
Increased Versatility for Projects
The addition of two Ethernet ports on a Raspberry Pi significantly expands the range of projects you can undertake, making it an appealing option for tech enthusiasts, hobbyists, and educators alike. With dual Ethernet capabilities, you can transform your Raspberry Pi into a versatile network device, such as a router or a firewall, effectively managing network traffic between two domains or creating an isolated security layer within your network.
For educational environments, this functionality is ideal for teaching network engineering concepts, allowing students to configure real-world network scenarios affordably. Hobbyists can leverage the dual ports to set up a home server that can handle distinct internal and external communications, facilitating tasks like secure file transfers and web hosting.
Moreover, the two ports allow for more robust IoT applications, where devices on one network can communicate seamlessly with a secondary network, enhancing control and monitoring capabilities. The potential for creative and practical projects is nearly limitless, encouraging users of all levels to explore new horizons in networking and project development.
How to Add a Second Ethernet Port to Your Raspberry Pi
Choosing the Right Adapter
When you’re considering enhancing your Raspberry Pi with extra Ethernet ports, selecting the right USB-to-Ethernet adapter is key to achieving optimal performance in your networking projects. First, make sure that the adapter is compatible with the Raspberry Pi’s operating system. Most modern-day adapters work well with plug-and-play compatibility, but checking for native Linux support can save you from potential headaches.
It’s also crucial to focus on speed and performance. Adapters vary significantly in terms of throughput, so opting for a gigabit model can result in much faster data transfer rates compared to a standard 10/100 Mbps adapter. This is particularly beneficial if your Raspberry Pi is part of a network that handles large volumes of data or if you’re planning to use it as a network server.
Furthermore, consider the power requirements of your adapter. Some models may need extra power supplied via a powered USB hub, particularly if they also add other functionalities like extra USB ports.
Lastly, staying informed can help in selecting the best-fit adapter. Whether you’re exploring options for the first time or upgrading an existing setup, understanding the specifics of your chosen Raspberry Pi model can make a difference. For this, you might find our guide on choosing Raspberry Pi model helpful in aligning your project requirements with the right Raspberry Pi version. By considering these factors, you’ll ensure your Raspberry Pi setup’s network capabilities are both robust and reliable, paving the way for exciting and innovative projects.
Installation and Setup
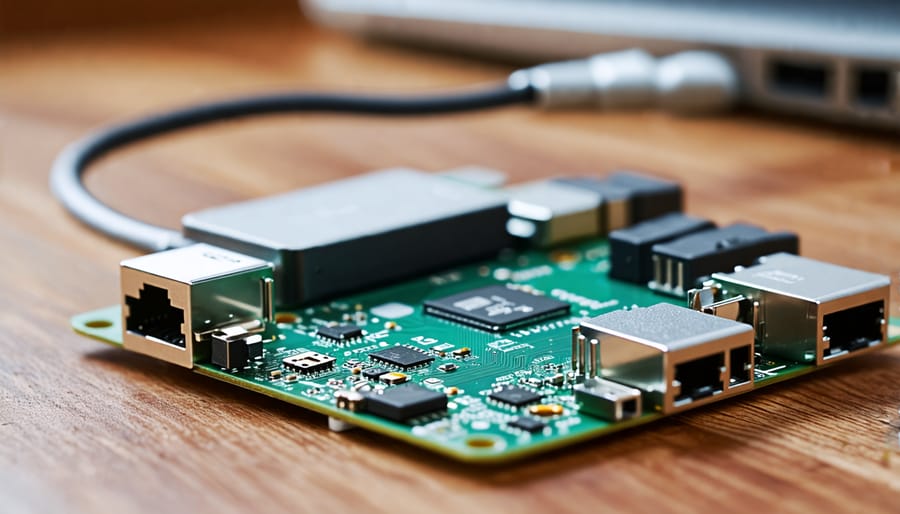
To enhance your Raspberry Pi’s networking capabilities with a dual Ethernet setup, you’ll need a USB to Ethernet adapter that acts as the second port. Start by obtaining a compatible adapter, which can typically be found online or at electronics stores. Once you’ve got your adapter, connect it to one of the Raspberry Pi’s USB ports. This connection allows your Pi to recognize the additional Ethernet port.
Before proceeding with configuration, ensure your Raspberry Pi is powered off to prevent any issues. Insert the Ethernet cables into both ports—the original Ethernet port and the newly added USB adapter. Each cable should be connected to a network switch or router to provide different network paths. After securing the connections, power on your Raspberry Pi.
Once booted, log into your Raspberry Pi’s terminal. You can check if the system detects both Ethernet ports by entering `ifconfig` or `ip a` commands, which will list all network interfaces. Look for the new interface, typically named something like `eth1`. To configure the network settings, you might need to edit the `/etc/dhcpcd.conf` file or use a network manager tool to assign static IPs or DHCP settings, depending on your network requirements. This setup is perfect for projects requiring network isolation or better throughput. By following these steps, your Raspberry Pi will be ready to handle enhanced networking tasks efficiently.
Exploring Use Cases and Real-world Applications
Home Network Gateways
Transforming your Raspberry Pi into a home network gateway or firewall is an engaging project that enhances your setup’s security and connectivity. With its dual Ethernet ports, the Raspberry Pi acts as an efficient bridge between your internet connection and local network devices. To start, ensure you have a Raspberry Pi model with at least two Ethernet ports or consider using a USB to Ethernet adapter for additional ports. Begin by installing the Raspberry Pi OS and updating it to ensure optimal performance. You’ll need software like iptables, a powerful tool for configuring Linux kernel firewall capabilities. Configure iptables rules to restrict and control the traffic flowing in and out of your network, providing a secure environment for your connected devices. This project not only bolsters network security but also offers a practical learning experience for managing network configurations. For those looking to expand their Raspberry Pi’s role further, explore our exciting guide on game server setup using Raspberry Pi.
Network Monitoring Tools
A dual Ethernet Raspberry Pi unlocks a world of possibilities when it comes to network monitoring. One exciting project you can undertake is setting up a Raspberry Pi as a network bridge to monitor traffic between two networks. By installing software like Wireshark, you can capture and analyze data packets in real-time, making it perfect for troubleshooting network issues or gaining insights into network performance. Another intriguing application is transforming the Raspberry Pi into a full-fledged Intrusion Detection System (IDS) using tools like Snort. This setup helps you keep an eye on possible threats and ensures your network’s security. Both projects not only enhance your understanding of networking principles but also provide practical skills in configuring and managing network traffic. With its dual Ethernet capability, the Raspberry Pi can seamlessly integrate into your existing network setups, offering low-cost and customizable solutions for tech enthusiasts eager to explore new networking innovations.
Security Considerations and Best Practices
Enhancing your Raspberry Pi setup with dual Ethernet ports can open up exciting opportunities for improved networking capabilities, but it also brings unique security considerations. Prioritize securing your Raspberry Pi to protect it from unauthorized access and potential cyber threats. Here are some best practices to consider.
Firstly, ensure that your Raspberry Pi operating system is always up-to-date. Regular updates address vulnerabilities and provide patches to keep your system secure. To further safeguard your network, change default passwords and use strong, unique passcodes for each user account.
Pay attention to firewall settings. Configure your firewall to allow only necessary traffic and block any suspicious activity. Using VLANs (Virtual Local Area Networks) can segment traffic, providing an additional layer of security. For those diving into more complex projects, consider setting up a VPN (Virtual Private Network) to encrypt data communication between devices.
Given the increased risk attached to IoT devices, exploring enhanced IoT security measures can be extremely beneficial. This includes network monitoring tools to detect and respond to anomalies in real time.
By integrating these security measures, you can confidently expand your Raspberry Pi’s networking capabilities and enjoy a robust and secure system tailored to your projects.
Conclusion
Exploring the concept of dual Ethernet ports for Raspberry Pi projects opens up a myriad of possibilities for tech enthusiasts and educators alike. Throughout this article, we’ve examined how adding a second Ethernet port can significantly enhance your project’s networking capabilities. From enabling sophisticated network routing to creating more robust IoT devices, dual Ethernet offers an exciting way to push the boundaries of what your Raspberry Pi can achieve. We’ve delved into practical applications, from setting up a secure firewall to designing a complex home automation network. Not only does this upgrade facilitate better data flow and connectivity, but it also empowers you to undertake more advanced projects that were previously out of reach with a single port. By leveraging these capabilities, you can not only enhance performance but also gain invaluable practical experience that deepens your understanding of network configurations. Whether you’re setting up a small-scale server or experimenting with new IoT applications, the flexibility and power of dual Ethernet ports ensure your projects are equipped to handle increased demands and complexity. Embrace this innovation and watch your Raspberry Pi projects soar to new heights, unlocking potential that you might not have previously considered.