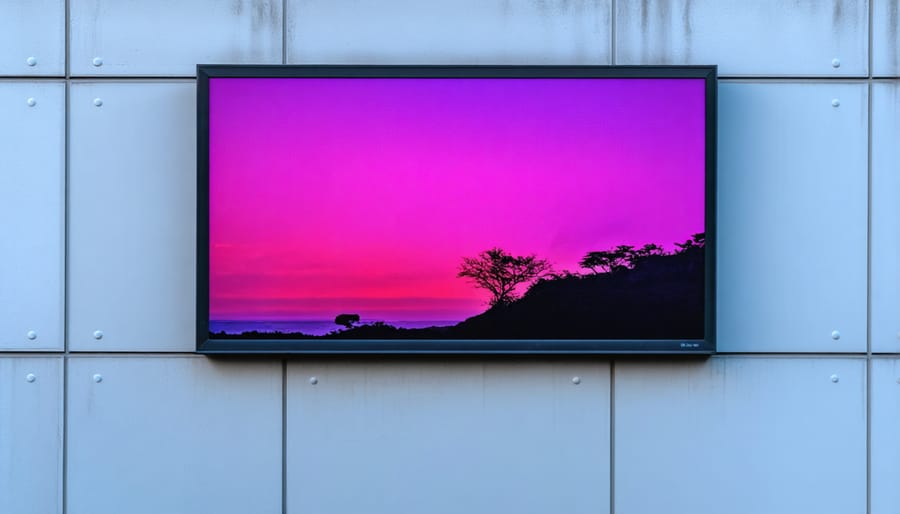
Harness the power of Raspberry Pi to create dynamic, cost-effective digital signage solutions that captivate audiences and elevate your messaging. With its compact size, impressive capabilities, and vast ecosystem of software and hardware components, the Raspberry Pi has revolutionized the digital signage landscape, making it accessible to businesses, educators, and hobbyists alike. Discover how this credit card-sized computer can transform the way you communicate, engage, and inform through stunning visual displays that seamlessly blend creativity and technology. Unleash the potential of Raspberry Pi and embark on a journey to create digital signage experiences that leave a lasting impact.
What You’ll Need

Hardware Requirements
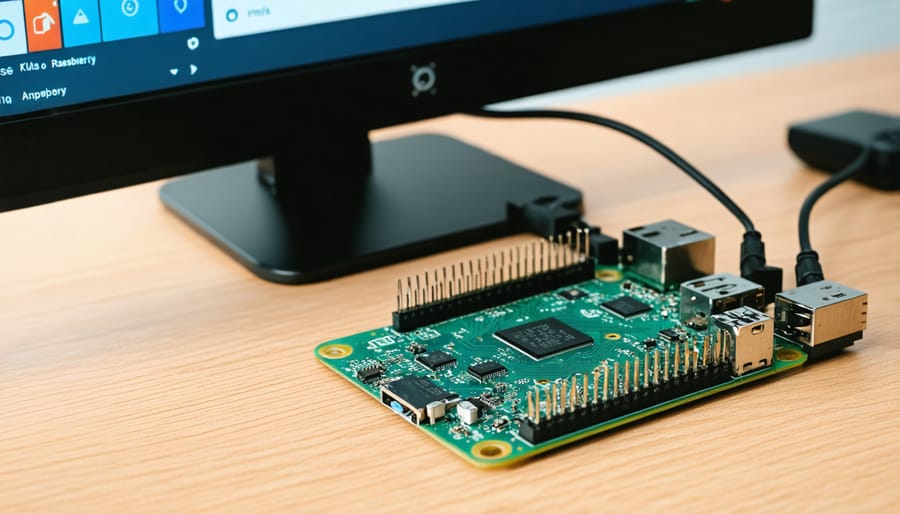
The minimum hardware requirements for a digital signage setup with Raspberry Pi include a Raspberry Pi model 3B or later, with at least 1GB RAM. A compatible display with HDMI input is also necessary, along with a power supply for the Pi and display. For optimal performance, we recommend using a Raspberry Pi 4 with 4GB RAM or more, and a high-resolution display with a screen size appropriate for your needs. Additionally, consider using a case for your Raspberry Pi to protect it from dust and damage, and ensure proper cooling. When selecting a display, look for features such as built-in speakers, a wide viewing angle, and a slim design for easy mounting. To interact with your digital signage, you may also need a keyboard and mouse during the initial setup process.
Software Requirements
The Raspberry Pi supports various operating systems, but the most popular choice for digital signage is Raspberry Pi OS (formerly Raspbian), a Debian-based Linux distribution optimized for the Pi. This lightweight OS provides a stable foundation for your digital signage project.
When it comes to digital signage software, there are several open-source and commercial options available. One popular open-source solution is Screenly OSE, which offers a user-friendly web interface for managing your content. Another option is Concerto, a free and open-source digital signage system that supports various content types and scheduling features.
For those looking for a more comprehensive commercial solution, Yodeck offers a powerful digital signage platform with advanced features like remote management, real-time analytics, and interactive capabilities. Regardless of your choice, ensure that the software is compatible with your Raspberry Pi model and meets your specific digital signage requirements.

Setting Up Your Raspberry Pi
Installing the Operating System
To install the operating system on your Raspberry Pi, first download the OS image from the official website. We recommend using Raspberry Pi OS, which is optimized for the Pi. Once downloaded, use an image writing tool like Etcher to flash the OS image onto your SD card. Insert the SD card into your computer, open Etcher, select the downloaded OS image file, choose the SD card as the target, and click “Flash.” After the process completes, safely eject the SD card and insert it into your Raspberry Pi. Connect the power supply, and your Raspberry Pi will boot into the newly installed operating system. Follow the on-screen prompts to configure basic settings like language, time zone, and password. With the OS installed, you’re ready to start setting up your digital signage software and creating content.
Connecting Peripherals
To connect peripherals to your Raspberry Pi for digital signage, start by attaching the display using an HDMI cable. Ensure the display is compatible with the Pi’s HDMI output. Next, connect a USB keyboard and mouse to the Pi’s USB ports. These peripherals will be essential for initial setup and troubleshooting. For network connectivity, use an Ethernet cable to connect the Pi to your router or plug in a compatible USB Wi-Fi adapter. Once connected, you can configure network settings through the Raspberry Pi’s terminal or graphical interface. Double-check all connections and verify that the peripherals are recognized by the Pi before proceeding with software installation and configuration. With the display, input devices, and network properly connected, your Raspberry Pi digital signage setup is ready for the next steps.
Initial Configuration
To begin setting up your Raspberry Pi for digital signage, power it on and follow the initial setup wizard. Select your preferred language, time zone, and keyboard layout. Set a strong password for security. Connect to your Wi-Fi network or configure Ethernet settings. Once the basic setup is complete, update the system software by running “sudo apt update” and “sudo apt upgrade” in the terminal. Next, navigate to the Raspberry Pi Configuration tool to enable SSH and VNC for remote access, and set your display resolution to match your screen. Finally, reboot your Raspberry Pi to apply the changes and prepare for installing the digital signage software.
Installing and Configuring Digital Signage Software
Choosing Digital Signage Software
When choosing digital signage software for your Raspberry Pi, consider factors such as features, ease of use, and pricing. Popular options include Screenly OSE, PiSignage, and Yodeck. Screenly OSE is a free, open-source solution that offers basic features like image and video playback, web page display, and scheduling. It’s a great choice for beginners or those on a tight budget. PiSignage is a more advanced option with a user-friendly interface, support for multiple zones, and remote management capabilities. It offers a free trial, with paid plans starting at $12.99 per month. Yodeck is another powerful solution that provides a comprehensive set of features, including content scheduling, real-time updates, and advanced analytics. It offers a free plan for a single screen, with paid plans starting at $7.99 per month for additional screens. When evaluating software, look for options that align with your specific needs, such as support for various media formats, integration with external data sources, and the ability to scale as your digital signage network grows. Additionally, consider the level of technical expertise required to set up and manage the software, as well as the availability of documentation and community support.
Installing the Software
To install your chosen digital signage software on Raspberry Pi, follow these steps:
1. Download the software image from the official website. For example, if using Screenly OSE, download the latest release.
2. Write the image to an SD card using a tool like Etcher. Insert the SD card into your computer, open Etcher, select the downloaded image file, choose the SD card, and click “Flash.”
3. Insert the SD card into your Raspberry Pi and connect it to a power source. The Pi will boot into the digital signage software.
4. Access the software’s web interface by entering your Raspberry Pi’s IP address in a web browser. The default login credentials are usually provided in the software’s documentation.
5. Configure your display settings, network connection, and other preferences within the web interface.
6. Start adding your content and creating playlists to display on your digital signage screen.
With these simple steps, you’ll have your Raspberry Pi-powered digital signage up and running in no time, ready to showcase your engaging content.
Configuring the Software
To configure the digital signage software on your Raspberry Pi, start by installing a user-friendly application like Screenly OSE or PiSignage. These platforms allow you to create playlists, schedule content, and customize display settings with ease. Begin by adding your desired content, such as images, videos, and web pages, to the software’s media library. Next, create playlists by selecting the content you want to display and arranging it in the desired order. Set the duration for each item to control how long it appears on the screen. Use the scheduling feature to determine when specific playlists or content should be shown, allowing you to automate your digital signage display. Finally, adjust settings like screen resolution, orientation, and overscan to ensure your content looks its best on the connected display. With a little experimentation, you’ll have a professional-looking digital signage solution up and running in no time.
Creating and Managing Content
Content Creation Tips
To create eye-catching visuals and compelling messages for your Raspberry Pi digital signage, focus on simplicity, readability, and relevance. Use high-contrast colors and bold fonts to ensure your content is easily readable from a distance. Incorporate images, videos, and animations to grab attention and convey information more effectively. Keep text concise and to the point, using short phrases and bullet points when possible.
When crafting your messages, consider your target audience and the purpose of your digital signage. Use language and visuals that resonate with your viewers and align with your brand. Highlight key information, promotions, or calls-to-action to encourage engagement. Regularly update your content to keep it fresh and relevant, and consider using dynamic data sources like RSS feeds or APIs to automate content updates.
To take your digital signage to the next level, explore creative content ideas like interactive quizzes, social media walls, or user-generated content. By combining visually appealing designs with engaging digital signage content, you’ll create a memorable and impactful experience for your audience.

Content Management Strategies
To effectively manage your digital signage content, consider using a content management system (CMS) tailored for Raspberry Pi, such as Screenly or PiSignage. These platforms allow you to organize your content into playlists, schedule content based on specific times or events, and update your signage remotely. Develop a content calendar to plan and track your content updates, ensuring a consistent and engaging experience for your audience. Regularly refresh your content to keep it relevant and captivating, and consider incorporating a mix of static images, videos, and interactive elements. Optimize your content for the display resolution and aspect ratio to ensure optimal visual quality. Additionally, leverage data from sensors or web APIs to display real-time information, such as weather updates or social media feeds, to create dynamic and informative content. By implementing these content management strategies, you can streamline your digital signage operations and deliver compelling content to your target audience.
Conclusion
In conclusion, using a Raspberry Pi for digital signage is an affordable and versatile solution that offers numerous benefits. By following the key steps outlined in this article, you can set up your own digital signage display with ease. From choosing the right hardware components to installing the necessary software and creating engaging content, the process is straightforward and rewarding. With a Raspberry Pi-based digital signage system, you’ll enjoy the flexibility to update and manage your content remotely, saving time and effort. As you embark on your digital signage journey, remember that the possibilities are endless. Don’t hesitate to explore additional resources, experiment with different software options, and customize your setup to suit your unique needs. By diving into the world of Raspberry Pi digital signage, you’ll not only gain valuable skills but also unleash your creativity in delivering compelling visual experiences.


