

Connect your Raspberry Pi to AWS by setting up a secure SSH connection using AWS’s IoT Core. Utilize AWS services like Lambda for processing data from Raspberry Pi sensors, enabling seamless automation and data analysis. Implement AWS S3 for storing and retrieving data generated by your Raspberry Pi projects, enhancing both accessibility and scalability. To streamline the integration, employ AWS Device Management tools to monitor and update your Raspberry Pi fleet, ensuring they’re always running optimally and securely.
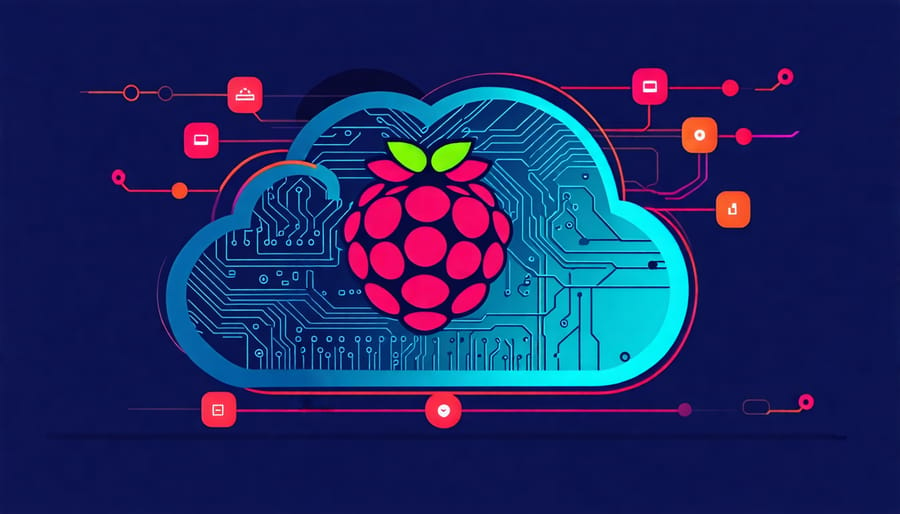
Why Combine Raspberry Pi with AWS?
Affordable Scalability
Leveraging AWS with your Raspberry Pi opens the door to scalable solutions that enhance its cost-effective appeal. AWS enables you to expand your projects seamlessly, from simple applications to complex systems, without the hefty investment traditionally required for scalability. By utilizing AWS services like Lambda or EC2, you can offload intensive tasks from your Raspberry Pi, preserving its limited resources while enjoying the power of cloud computing. Moreover, the pay-as-you-go model ensures that you only pay for what you use, making it an attractive option for tech enthusiasts and educators wanting to create projects without breaking the bank.
Access to Advanced Technologies
Integrating AWS services with Raspberry Pi opens up a world of exciting possibilities, especially in AI, machine learning, data analytics, and IoT. With AWS, your Raspberry Pi projects can harness advanced technologies like cloud-based AI and ML models to analyze images or detect speech. By connecting to AWS IoT Core, you can manage and scale your IoT solutions, securely connecting multiple Raspberry Pi devices. Utilizing AWS’s robust analytics tools, Raspberry Pi can effortlessly handle and interpret vast amounts of data gathered by your projects. This seamless integration not only boosts functionality but also provides a scalable environment to bring your innovations to life.
Setting Up AWS on Raspberry Pi
Prerequisites: What You Need
To start integrating your Raspberry Pi with AWS, you’ll need a few essentials. First, ensure you have a Raspberry Pi (preferably a Model 3 or 4) along with a microSD card (at least 16GB) to install the operating system, power supply, and network connection (Wi-Fi or Ethernet). You’ll also need a computer for remote access and configuration. As for software, prepare a fresh installation of Raspberry Pi OS and update it to the latest version. Python and Git are necessary for various AWS tools, so have those installed as well. Lastly, create an AWS account if you don’t have one already, which will enable access to AWS IoT and other cloud services.
Installing AWS CLI on Raspberry Pi
To install the AWS Command Line Interface (CLI) on your Raspberry Pi, you’ll want to ensure your device is internet-connected and running the latest version of Raspbian OS. Start by updating your package lists with `sudo apt update` and upgrade any outdated packages using `sudo apt upgrade`. Next, you’ll need Python, as the AWS CLI is a Python-based tool. Verify Python is installed by running `python3 –version`. If it’s missing, install it with `sudo apt install python3`.
With Python set up, you’ll use `pip`, Python’s package installer, to install the AWS CLI. First, ensure pip is available by executing `sudo apt install python3-pip`. Once pip is ready, install the AWS CLI by typing `pip3 install awscli –upgrade –user`. After installation, confirm the AWS CLI is correctly set up by running `aws –version`. This command should display the installed AWS CLI version, verifying your installation. Now, your Raspberry Pi is ready to connect with AWS services, opening up possibilities for exciting new projects.
Configuring Your Raspberry Pi
To configure your Raspberry Pi to communicate with AWS, you’ll first need to ensure your Pi is set up correctly. Start by ensuring your Raspberry Pi is connected to the internet. If you haven’t already, consider learning how to setup Raspberry Pi Remote Desktop for easier management. Next, you’ll need to install the AWS Command Line Interface (CLI) on your Raspberry Pi. Open a terminal and input `sudo apt-get update` followed by `sudo apt-get install awscli`. Once installed, configure it by entering `aws configure` and follow the prompts to input your AWS credentials.
For a successful connection, ensure your Raspberry Pi has the appropriate security rights assigned within AWS Identity and Access Management (IAM). Assign an IAM role granting access to the AWS services you intend to use. Lastly, test your setup by running a quick command, such as `aws s3 ls`, to check if you’re able to interact with your AWS resources. This configuration empowers you to seamlessly integrate your Raspberry Pi into AWS, opening up a world of innovative project possibilities.
Project Ideas: Unleash the Power of Raspberry Pi and AWS
Home Automation Systems
Combining Raspberry Pi with AWS opens up a world of possibilities for creating smart home automation systems. The Raspberry Pi’s compact size and powerful capabilities make it an ideal choice for connecting various smart devices throughout your home. By using AWS services like IoT Core, you can easily manage and control these devices remotely. Imagine controlling your lights, thermostat, and even security cameras through a unified interface, all powered by the efficiency of AWS.
AWS IoT Core enables seamless communication between your Raspberry Pi and other smart devices using popular protocols like MQTT. Additionally, with AWS Lambda, you can create serverless functions that respond to specific triggers, providing automation without the need for maintaining a traditional server setup. For those who are just getting started, there are plenty of resources available to simplify these setups, igniting creativity for smart projects without the hassle.
The combination not only enhances security through AWS IAM for managing permissions but also scales effortlessly. Whether it’s automating daily routines or deploying more sophisticated solutions, Raspberry Pi and AWS together offer a robust platform for turning any space into a smart home.

IoT and Data Collection
Transform your Raspberry Pi into a powerful data collection node in your IoT projects with AWS support. Start by setting up your Raspberry Pi with a suitable Linux-based OS, such as Raspberry Pi OS, and ensure it’s equipped with network connectivity. Install necessary libraries like Python for coding flexibility, empowering you to leverage sensors for gathering environmental data, such as temperature and humidity.
With AWS IoT Core, you can seamlessly connect your Raspberry Pi to the cloud, enabling streamlined data collection and management. After creating an AWS account, configure AWS devices and security certificates to ensure secure data transfer. Utilize MQTT, a lightweight messaging protocol, to efficiently transmit data from your Raspberry Pi to AWS.
Through AWS services, you gain robust facilities for real-time data processing, storage with Amazon S3, and analytical insights using AWS Lambda and Amazon QuickSight. This scalable solution not only fosters experimentation but also provides an invaluable learning experience in IoT development, all while effectively utilizing your Raspberry Pi’s capabilities supported by AWS’s powerful ecosystem.
Real-time Monitoring and Alerts
Integrating Raspberry Pi with AWS allows for robust real-time monitoring and alerting capabilities, perfect for DIY projects and educational purposes. By utilizing AWS services such as CloudWatch, you can track system metrics and set up custom alerts for your Raspberry Pi projects. Start by installing the necessary AWS SDKs on your Raspberry Pi. Once set up, define metrics to monitor, such as CPU usage or temperature. AWS CloudWatch can then be configured to send alerts via email or SMS when those metrics exceed specified thresholds. This integration not only enhances your project’s reliability but also offers valuable insights into system performance, making it an engaging tech exploration for enthusiasts and hobbyists.
Challenges and Troubleshooting Tips
Connectivity Issues
When connecting your Raspberry Pi to AWS, several connectivity issues might arise, but they can be tackled with a few straightforward solutions. One common issue is network configuration errors, which often happen if the Pi’s IP address changes or if AWS security groups are misconfigured. Verify that your Raspberry Pi is on a stable network and check that your security group rules on AWS allow inbound and outbound traffic from your Pi’s IP address. Additionally, make sure SSH is properly configured on your Pi for secure remote access. Handling DNS resolution problems can also be tricky; ensuring that your DNS settings are correctly set up on the Raspberry Pi can help maintain connectivity. Importantly, implementing best practices for IoT security ensures your connection remains secure while exploring innovative projects.
AWS Service Limitations
When integrating Raspberry Pi with AWS, you might encounter some limitations that require thoughtful workarounds. AWS imposes service limits, which are often related to resource allocation like the number of instances, storage capacity, and data transfer volumes. These limits are designed to prevent overuse and ensure fair resource distribution. For Raspberry Pi projects, where experimentation is popular, these limits might seem restrictive. Fortunately, AWS allows you to request limit increases through their support, offering flexibility when your project demands more resources. To maximize efficiency, utilize AWS’s free tier eligibility, which provides a cost-effective way to explore and test AWS services with Raspberry Pi without exceeding initial allocation limits. Staying informed about these limitations and planning accordingly can ensure a seamless experience when merging the power of Raspberry Pi with AWS’s robust capabilities.
Conclusion
Integrating Raspberry Pi with AWS unlocks a world of possibilities for tech enthusiasts, hobbyists, and educators. This robust combination offers enhanced computational power, scalable cloud storage, and a wide array of AWS services to elevate your Raspberry Pi projects. With the ability to manage resources efficiently and deploy innovative solutions, you can transform simple ideas into dynamic applications. Whether you’re automating tasks or diving into IoT projects, this integration streamlines processes and expands capabilities. Embrace the journey by exploring the numerous tutorials and resources available. Start experimenting and push the boundaries of what’s possible with Raspberry Pi and AWS.