
Transform your Raspberry Pi into a powerful image processing powerhouse with real-time computer vision capabilities that rival professional systems at a fraction of the cost. Modern image processing on the Pi has evolved from basic pixel manipulation to sophisticated machine learning applications, enabling everything from facial recognition to automated quality control systems.
The Raspberry Pi’s combination of affordable hardware, extensive GPIO capabilities, and robust Python libraries like OpenCV and PIL makes it an ideal platform for developing computer vision applications. Whether you’re building an automated surveillance system, creating smart agriculture solutions, or developing educational projects, the Pi’s processing power can handle complex image manipulation tasks while maintaining energy efficiency.
This comprehensive guide will walk you through setting up your Raspberry Pi for image processing, implementing essential computer vision algorithms, and optimizing performance for real-time applications. From camera module selection to code optimization techniques, we’ll cover everything you need to transform your Pi into a sophisticated image processing system. Get ready to unlock the full potential of computer vision with one of the most versatile and accessible computing platforms available today.
Essential Hardware Setup for Real-Time Processing
Camera Selection and Setup
Selecting the right camera module is crucial for successful image processing projects with your Raspberry Pi. The official Raspberry Pi Camera Module (currently v3) offers excellent Raspberry Pi camera capabilities with its 12.3MP sensor and support for both visible light and infrared photography. For beginners, this module provides the best compatibility and documentation support.
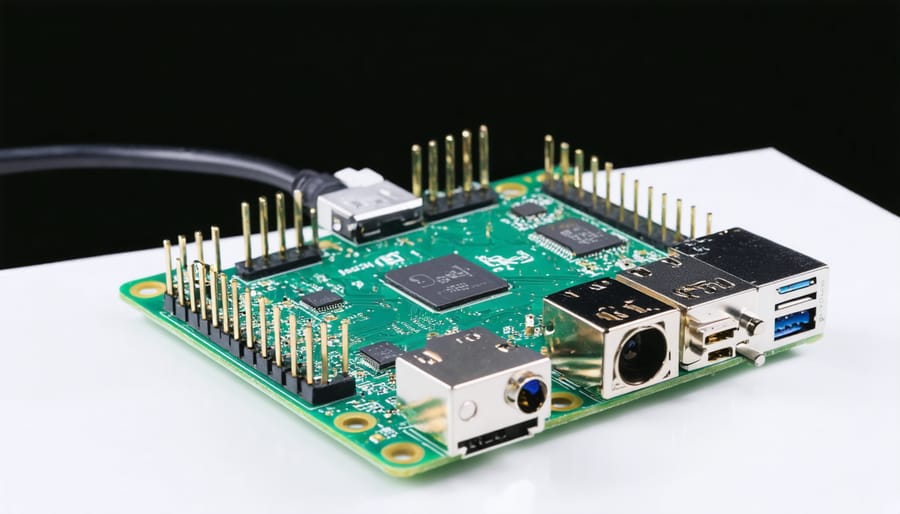
When setting up your camera, ensure you’re connecting it to the dedicated Camera Serial Interface (CSI) port on your Raspberry Pi board. The ribbon cable should be inserted with the blue side facing the Ethernet port. After connection, enable the camera interface through raspi-config by navigating to Interfacing Options > Camera.
For projects requiring different specifications, third-party cameras like Arducam modules or standard USB webcams are viable alternatives. USB cameras might offer plug-and-play convenience but could introduce additional latency compared to CSI cameras. Consider factors like resolution, frame rate, and field of view based on your specific project requirements. Remember to check Python library compatibility, especially when using OpenCV for image processing tasks.
Performance Optimization Tips
To achieve optimal image processing speeds on your Raspberry Pi, focus on maximizing hardware performance through strategic adjustments. Start by overclocking your Pi safely using the raspi-config tool – aim for a modest 100-200MHz increase while monitoring temperatures. Enable GPU memory split by allocating at least 128MB to the GPU for better image processing capabilities.
Consider using a high-quality Class 10 microSD card or upgrading to a USB 3.0 SSD for faster read/write speeds. Install a small heatsink and fan to maintain stable temperatures during intensive processing tasks. This cooling solution helps prevent thermal throttling, which can significantly impact performance.
To reduce processing overhead, resize your images before manipulation and utilize hardware-accelerated libraries like OpenCV with GPIO optimization. Run your Pi in headless mode when possible, disabling unnecessary services and the desktop environment. These tweaks can yield up to 25% improvement in processing speed for most image-related tasks.
Software Requirements and Libraries
OpenCV Installation and Setup
Installing OpenCV on your Raspberry Pi is essential for image processing projects. Follow these straightforward steps to get started:
First, update your Raspberry Pi’s package list and upgrade existing packages:
“`bash
sudo apt-get update
sudo apt-get upgrade
“`
Next, install the required dependencies:
“`bash
sudo apt-get install build-essential cmake pkg-config
sudo apt-get install libjpeg-dev libtiff-dev libjasper-dev libpng-dev
sudo apt-get install libavcodec-dev libavformat-dev libswscale-dev libv4l-dev
sudo apt-get install libxvidcore-dev libx264-dev
sudo apt-get install libgtk-3-dev
sudo apt-get install libcanberra-gtk*
sudo apt-get install libatlas-base-dev gfortran
“`
Now, install Python development tools and NumPy:
“`bash
sudo apt-get install python3-dev
sudo pip3 install numpy
“`
Finally, install OpenCV using pip:
“`bash
sudo pip3 install opencv-python
“`
To verify the installation, open Python and import OpenCV:
“`python
python3
>>> import cv2
>>> cv2.__version__
“`
If no errors appear and you see the version number, OpenCV is successfully installed. For optimal performance, consider increasing your swap space, especially when working with larger images or real-time processing. Set the swap size to at least 2GB by modifying the /etc/dphys-swapfile configuration file.
Python Libraries for Image Processing
Python offers several powerful libraries that make image processing on Raspberry Pi both accessible and efficient. The most essential package is OpenCV (cv2), which provides comprehensive tools for real-time image processing, computer vision, and machine learning applications. OpenCV excels at tasks like face detection, object tracking, and image filtering.
PIL (Python Imaging Library) and its modern fork, Pillow, are excellent choices for basic image manipulation tasks. These libraries handle operations like resizing, rotating, and applying filters with minimal code. They’re particularly useful when working with different image formats and performing basic transformations.
For scientific image processing, NumPy is indispensable. While not strictly an image processing library, NumPy’s array operations form the foundation for efficient image manipulation, as images are essentially multi-dimensional arrays. Combined with SciPy, it enables advanced operations like image segmentation and feature extraction.
Matplotlib complements these libraries by providing visualization capabilities, allowing you to display processed images and plots directly on your Raspberry Pi. For machine learning-based image processing, TensorFlow Lite and scikit-image offer optimized tools specifically designed for resource-constrained devices like the Pi.
These libraries can be easily installed using pip, though some may require additional dependencies. It’s recommended to install them within a virtual environment to maintain a clean development space and avoid version conflicts.
Real-Time Processing Techniques
Multi-Threading for Better Performance
Image processing tasks can be computationally intensive, especially when dealing with real-time video streams or large image datasets. Implementing multi-threading on your Raspberry Pi can significantly improve performance and create smoother processing operations. By distributing tasks across multiple CPU cores, you can achieve faster processing times and better resource utilization.
To implement multi-threading in your image processing projects, consider using Python’s threading or multiprocessing libraries. The threading library works well for I/O-bound tasks, while multiprocessing is better suited for CPU-intensive operations. For example, you can process different regions of an image simultaneously or handle multiple frames from a video stream in parallel.
Here’s a practical approach: divide your image into segments and process each segment on a different thread. This technique, combined with other edge computing optimization techniques, can reduce processing time by up to 75% on a Raspberry Pi 4’s quad-core processor.
Remember to monitor CPU temperature and usage when implementing multi-threading, as parallel processing can increase system load. Start with a smaller number of threads and gradually increase them while testing performance. For optimal results, consider using thread pools to manage resource allocation efficiently and prevent system overload.
Frame Rate Optimization
Maintaining optimal frame rates is crucial for real-time image processing on the Raspberry Pi. To achieve the best performance, start by reducing the resolution of your input stream. While 1080p might seem appealing, processing at 640×480 or even 320×240 can dramatically improve frame rates without significantly compromising quality for many applications.
Memory management plays a vital role in frame rate optimization. Use NumPy arrays instead of regular Python lists when manipulating image data, as they’re more efficient for numerical operations. Additionally, implement frame skipping when necessary – processing every second or third frame can maintain smooth performance while reducing computational load.
Consider using hardware acceleration whenever possible. The Raspberry Pi’s GPU can be leveraged through OpenGL ES, and the V4L2 driver provides direct access to the camera hardware, reducing CPU overhead. For Python implementations, the ‘picamera’ library’s array mode offers better performance than capturing to conventional image formats.
Threading can significantly improve frame rates by separating image acquisition from processing. Implement a producer-consumer pattern where one thread captures frames while another processes them. Use a fixed-size queue to prevent memory buildup, and ensure proper synchronization between threads.
Optimize your processing algorithms by minimizing loops and complex calculations. When possible, use lookup tables for common operations and consider implementing critical sections in Cython or C++ for improved performance.
Memory Management
Memory management is crucial when processing images on a Raspberry Pi due to its limited resources. To optimize performance, implement a frame buffer strategy that reuses memory allocations instead of constantly creating and destroying them. This approach significantly reduces memory fragmentation and improves processing speed.
Consider using NumPy arrays for image data manipulation, as they provide efficient memory usage and faster processing compared to standard Python lists. When working with high-resolution images, implement downsampling techniques before processing to reduce memory requirements while maintaining essential image features.
Memory mapping (mmap) can be particularly useful when dealing with large image files, as it allows you to access file contents without loading the entire file into memory. For real-time image processing applications, maintain a fixed-size circular buffer to store recent frames, preventing memory leaks and ensuring consistent performance.
Monitor your application’s memory usage using tools like ‘top’ or ‘htop’. If you’re experiencing memory constraints, consider implementing batch processing for large datasets or using streaming techniques for real-time video processing. Additionally, properly release resources by closing file handles and destroying window objects when they’re no longer needed.
For projects requiring extensive image processing, consider using the Pi’s GPU through libraries like OpenCV with NEON optimization to offload computations from the main memory. This approach frees up RAM for other essential tasks while maintaining processing efficiency.
Practical Implementation Examples
Motion Detection System
Building a motion detection system with your Raspberry Pi is an exciting project that combines image processing with practical applications. The system works by comparing consecutive frames from the camera feed to detect changes that indicate movement.
To get started, you’ll need the OpenCV library and a Pi Camera or USB webcam. First, capture two consecutive frames and convert them to grayscale for easier processing. Apply Gaussian blur to reduce noise and minimize false detections. Then, calculate the absolute difference between these frames using OpenCV’s absdiff() function.
The resulting difference image highlights areas where motion occurred. Apply a threshold to create a binary image where white pixels represent movement. To eliminate small noise, use erosion and dilation operations. You can enhance the detection by drawing rectangles around areas with significant movement using contour detection.
Here’s a basic implementation approach:
1. Capture initial frame as reference
2. Continuously capture new frames
3. Compare frames using difference calculation
4. Apply threshold and filtering
5. Identify motion areas
6. Trigger actions (like saving images or sending notifications)
For better results, consider adjusting sensitivity parameters and implementing a buffer zone to prevent false triggers from minor changes like lighting fluctuations. You can also add features like motion tracking or zone-based detection for more sophisticated applications.
Real-Time Object Recognition
Real-time object recognition on the Raspberry Pi using OpenCV opens up exciting possibilities for creating smart surveillance systems, automated sorting machines, and interactive projects. By leveraging OpenCV’s powerful computer vision libraries, you can implement object detection that identifies and tracks multiple objects simultaneously.
To get started, install OpenCV on your Raspberry Pi using the terminal command:
“`
sudo apt-get install python3-opencv
“`
The most straightforward approach for real-time object detection is using pre-trained models like the HAAR Cascade Classifier for face detection or the Single Shot Detector (SSD) with MobileNet for general object detection. These models offer a good balance between accuracy and processing speed on the Pi’s limited resources.
Here’s a basic implementation structure:
1. Initialize the Pi’s camera module
2. Load the pre-trained model
3. Capture frames in real-time
4. Process each frame through the detection algorithm
5. Draw bounding boxes around detected objects
6. Display the processed frame
For optimal performance, consider:
– Reducing the frame resolution to decrease processing load
– Using multi-threading to separate capture and processing operations
– Implementing frame skipping if needed
– Optimizing lighting conditions for better detection accuracy
The Raspberry Pi 4 can achieve approximately 5-10 frames per second with basic object detection, making it suitable for many practical applications while maintaining reasonable accuracy.

Image processing on the Raspberry Pi opens up a world of exciting possibilities for hobbyists and developers alike. Throughout this guide, we’ve explored the essential components of setting up your Pi for image processing, from installing necessary libraries to implementing basic and advanced processing techniques. Remember that success in image processing projects often comes from starting small and gradually building complexity. Consider beginning with basic operations like grayscale conversion or edge detection before moving on to more advanced applications like facial recognition or object tracking. The Raspberry Pi’s versatility, combined with its active community support, makes it an excellent platform for experimenting with computer vision projects. Whether you’re building a smart security system or creating an automated plant monitoring solution, the foundations covered here will serve as your stepping stone to more advanced implementations. Keep experimenting, stay curious, and don’t hesitate to leverage the vast online resources available to the Raspberry Pi community.