Dive into the exciting world of robotics with Raspberry Pi, a powerful credit card-sized computer that makes it easy to build and program your first robot buggy. This versatile platform offers a hands-on approach to learning the fundamentals of robotics, from understanding the basic components to writing your first lines of code. With its user-friendly interface and vast community support, Raspberry Pi empowers beginners to explore the limitless possibilities of robotics, while also providing a solid foundation for more advanced projects. Whether you’re a curious hobbyist, a student eager to learn, or an educator looking to inspire the next generation of innovators, Raspberry Pi is the perfect tool to kickstart your robotics journey and bring your ideas to life.
Gathering Your Raspberry Pi Robot Components

Essential Components
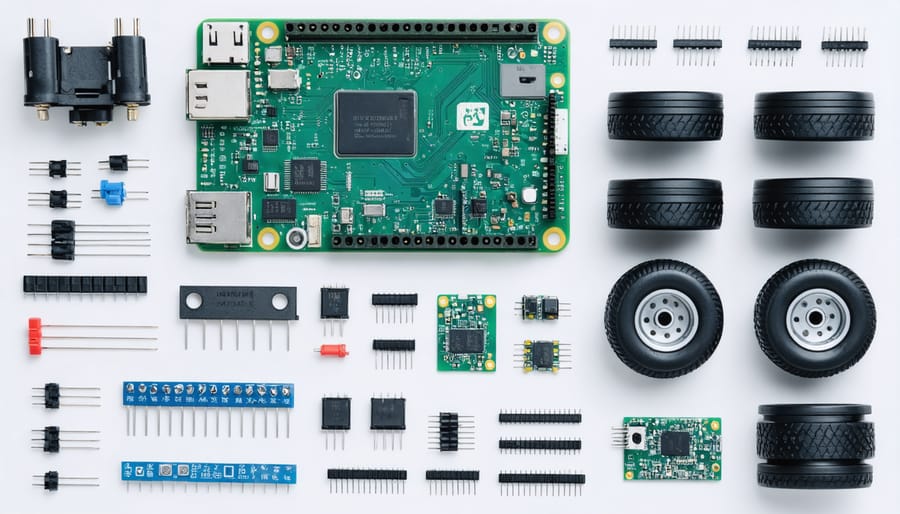
To start your robotics journey with Raspberry Pi, you’ll need a few essential components. At the heart of your project is the Raspberry Pi board, a credit card-sized computer that serves as the brain of your robot. You’ll also require motors to enable movement, which can be DC motors, servo motors, or stepper motors depending on your specific design. A sturdy chassis or frame is crucial to house and protect the electronic components while providing a structure for your robot. Don’t forget about the power supply – you’ll need batteries or a power bank to keep your robot running. Additional items like wheels, sensors, and a breadboard for prototyping will come in handy as you build your robotic creation. With these core components, you’ll be well on your way to bringing your Raspberry Pi-powered robot to life!
Optional Add-ons
Once you’ve mastered the basics, consider expanding your robot’s capabilities with optional add-ons. Sensors like ultrasonic distance sensors, infrared sensors, or line followers can help your robot navigate and interact with its environment. A camera module opens up possibilities for computer vision applications, allowing your robot to detect objects, faces, or even follow a target. For more precise control, you might explore using a joystick, gamepad, or even a mobile app to direct your robot’s movements. These add-ons can be easily integrated with your Raspberry Pi using the GPIO pins and a bit of additional programming. As you gain confidence, challenge yourself to incorporate new features and functions to make your robot more autonomous and intelligent. Remember, the beauty of using a Raspberry Pi lies in its flexibility and expandability, so don’t be afraid to experiment and customize your robotic creations!
For a unique take, you could explore how to build a solar-powered Raspberry Pi to power your robotics projects sustainably.
Setting Up Your Raspberry Pi for Robotics

Installing the Raspberry Pi OS
To get started with robotics using Raspberry Pi, you’ll need to install the recommended operating system (OS). The official Raspberry Pi OS, formerly known as Raspbian, is the ideal choice for beginners. It’s a Debian-based Linux distribution optimized for the Raspberry Pi hardware.
First, visit the official Raspberry Pi downloads page and select “Raspberry Pi OS.” Choose the “Raspberry Pi OS (32-bit) with desktop” option for a user-friendly experience. Download the ZIP file and extract the image file (.img) to your computer.
Next, you’ll need to write the OS image to a microSD card. Download and install a tool like Etcher, which simplifies the process. Launch Etcher, select the image file, choose your microSD card, and click “Flash.” This process may take several minutes.
Once the flashing is complete, safely eject the microSD card and insert it into your Raspberry Pi. Connect the necessary peripherals (keyboard, mouse, monitor, and power supply) and boot up your Raspberry Pi.
On the first boot, the system will guide you through initial setup steps, such as setting your language, time zone, and password. You can also configure your Wi-Fi connection at this stage.
With the Raspberry Pi OS installed, you’re ready to dive into the exciting world of robotics! The OS comes pre-installed with programming tools like Python and Scratch, making it easy to start coding your robot’s behaviors and interactions.
Enabling Interfaces and Connecting Components
To enable I2C and SPI interfaces on your Raspberry Pi, start by running `sudo raspi-config` in the terminal. Navigate to “Interfacing Options” and select the interfaces you wish to enable. For connecting motors and sensors, consult the pinout diagram for your specific Raspberry Pi model. GPIO pins can be used for digital inputs and outputs, while I2C and SPI pins are dedicated for those protocols. When wiring components, ensure proper voltage levels and use appropriate resistors or driver modules to protect your Pi. It’s also a good idea to utilize a breadboard for prototyping. Additionally, consider setting up a remote desktop connection to your Raspberry Pi for easier access and programming. With the interfaces enabled and components connected, you’re ready to start writing code to control your robot. Libraries like RPi.GPIO and smbus simplify the process of interacting with the GPIO pins and I2C devices. Remember to double-check your connections and refer to component datasheets for specific wiring instructions. By taking the time to properly enable interfaces and connect components, you’ll create a solid foundation for your Raspberry Pi robotics projects.
Programming Your Raspberry Pi Robot
Python Basics for Robotics
Python is a versatile, easy-to-learn programming language that is widely used in robotics projects. To get started with Python for your Raspberry Pi robot, you’ll need to understand some key concepts. First, learn about variables, which store data like numbers or text that you can use in your code. Next, explore conditional statements like “if” and “else” to make your robot make decisions based on certain conditions. Loops, such as “for” and “while”, allow your robot to repeat actions a set number of times or until a specific condition is met. Functions are reusable blocks of code that perform specific tasks, helping keep your code organized and efficient. Finally, learn how to use libraries, which are collections of pre-written code that simplify complex tasks. For robotics, you might use libraries like GPIO Zero for controlling motors and sensors or OpenCV for computer vision. By mastering these fundamental Python concepts, you’ll be well-equipped to write code that brings your Raspberry Pi robot to life, responding to its environment and performing exciting tasks.
Using the GPIO Zero Library
The GPIO Zero library simplifies the process of controlling motors and reading sensor data with the Raspberry Pi. This beginner-friendly Python library provides a set of easy-to-use functions and classes that abstract away the complexities of working with the GPIO pins directly. With GPIO Zero, you can control various types of motors, such as DC motors, servo motors, and stepper motors, using just a few lines of code. The library also supports reading data from sensors like ultrasonic distance sensors, infrared sensors, and push buttons. By leveraging the GPIO Zero library, you can quickly prototype and build robot projects without getting bogged down in low-level details. The library’s intuitive naming conventions and well-documented functions make it accessible to beginners, while still providing powerful functionality for more advanced users. Whether you’re building a simple robot car or a complex autonomous system, the GPIO Zero library is an excellent starting point for your Raspberry Pi robotics journey.

Exploring Other Robotics Libraries
While the Raspberry Pi and Python offer a great starting point for learning robotics, there are many other powerful libraries and frameworks available for more advanced projects. Two popular choices are the Robot Operating System (ROS) and OpenCV.
ROS is an open-source framework that provides a set of tools and libraries for building complex robot applications. It supports a wide range of programming languages and enables communication between different components of a robotic system. OpenCV, on the other hand, is a library focused on computer vision and image processing. It allows you to incorporate visual perception capabilities into your robots, such as object detection, face recognition, and motion tracking.
As you progress in your robotics journey, exploring these libraries can open up new possibilities and help you create more sophisticated projects.
Assembling and Testing Your First Robot
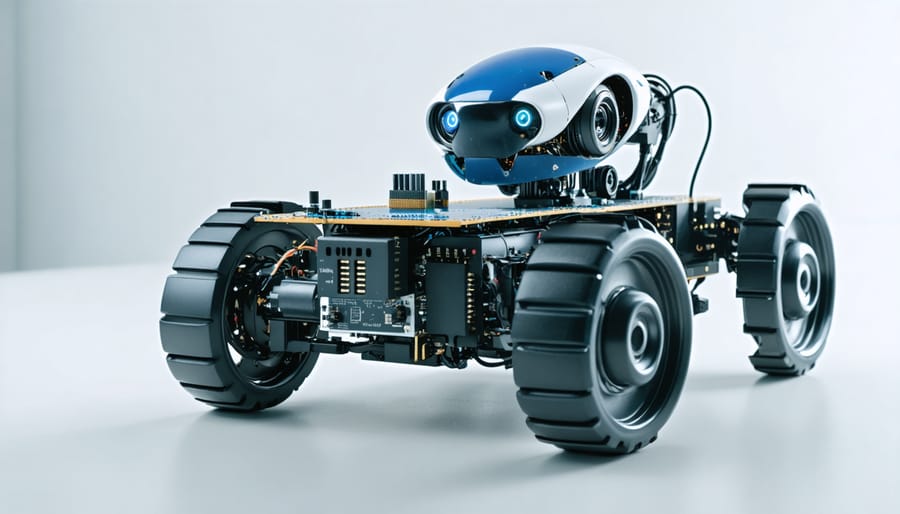
Now that you have all the necessary components and have set up your Raspberry Pi, it’s time to assemble your first robot and run a simple test script. Begin by attaching the motors to the chassis using the provided mounting hardware. Ensure that the motors are securely fastened and aligned correctly. Next, connect the motor driver board to the Raspberry Pi, following the manufacturer’s instructions. This typically involves connecting the power, ground, and control pins to the appropriate GPIO pins on the Raspberry Pi.
Once the motor driver is connected, attach the wheels to the motors. If your kit includes encoders, make sure to attach them as well, as they will help you measure the rotation of the wheels for more precise control. Now, connect the battery pack to the motor driver board, ensuring that the polarity is correct.
With the hardware assembled, it’s time to test your robot. Create a new Python script in your preferred IDE and import the necessary libraries for controlling the motor driver. Write a simple script that sends commands to the motors to move the robot forward, backward, left, and right. Upload the script to your Raspberry Pi and run it to see your robot come to life!
If everything is working correctly, your robot should move according to the commands in your script. If you encounter any issues, double-check your connections and review your code for errors. Once you have a working test script, you can experiment with more advanced movements and sensor integration to create a more sophisticated robot.
Remember to take your time, follow instructions carefully, and don’t be discouraged if things don’t work perfectly the first time. With practice and perseverance, you’ll soon be building and programming your own custom robots using your Raspberry Pi.
Learning robotics with Raspberry Pi is an exciting journey that opens up a world of possibilities. By following the steps outlined in this guide, you’ll have the foundation to build and control your first simple robot. Remember to start with the basics, experiment with different components and code, and don’t be afraid to make mistakes – that’s how you learn! As you continue to explore, you’ll find countless resources and communities dedicated to Raspberry Pi robotics. From online tutorials and forums to local meetups and workshops, there’s always more to discover. For inspiration, check out these mind-blowing Raspberry Pi projects that showcase the incredible potential of this tiny computer. So, keep tinkering, keep learning, and most importantly, have fun on your robotics adventure with Raspberry Pi!


