
Transform your Raspberry Pi from a blank slate into a fully functional computing powerhouse in under 30 minutes. Download and flash the latest getting started with Raspberry Pi OS image using the official Raspberry Pi Imager, which automatically handles format and verification. Connect essential peripherals—keyboard, mouse, and display—before powering up, ensuring stable 5V/3A power delivery through the official USB-C power supply. Configure crucial initial settings through the first-boot wizard, including wireless networking, locale settings, and user credentials. Strengthen your Pi’s security by immediately changing the default password, enabling SSH with key-based authentication, and updating all system packages through ‘sudo apt update && sudo apt upgrade’. These foundational steps create a secure, optimized platform ready for your specific project needs, whether you’re building a home media server, retro gaming console, or IoT hub.
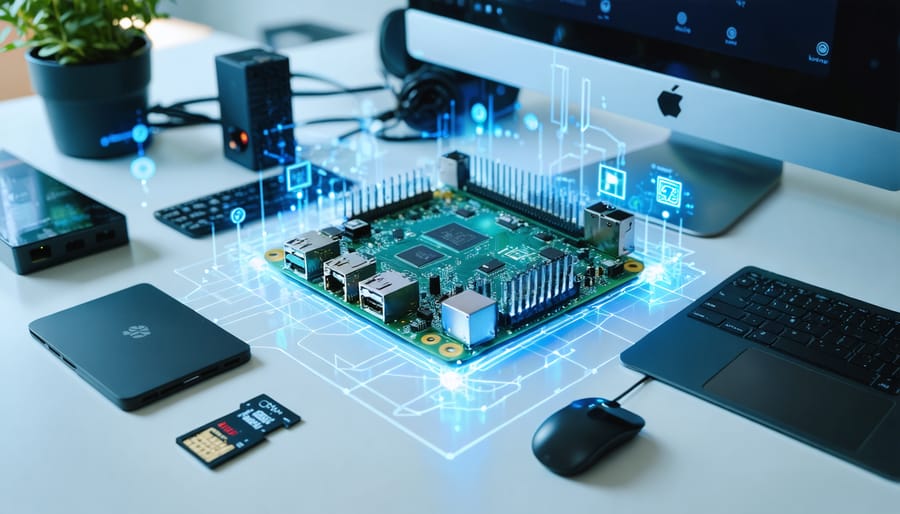
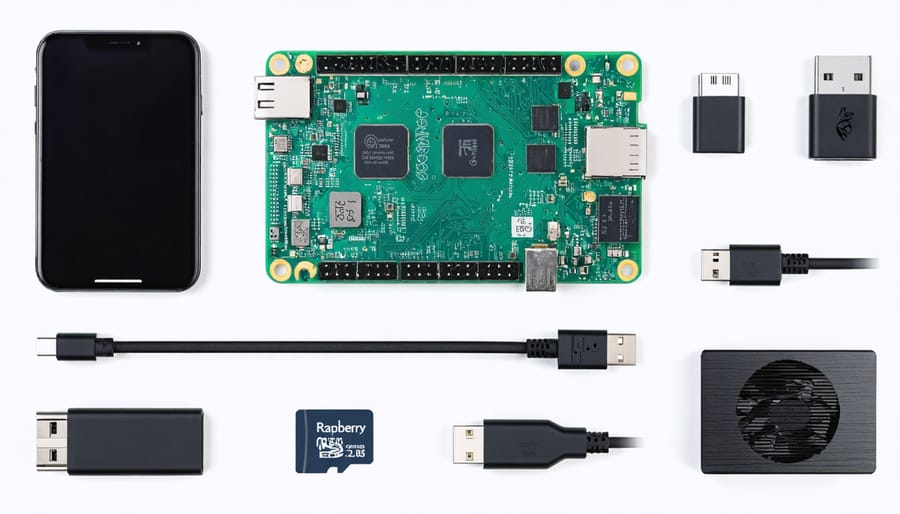
Essential Hardware Requirements
Power Supply Considerations
The Raspberry Pi requires a stable, reliable power supply for optimal performance. For the latest Raspberry Pi models, a 5V power supply with at least 3A output is recommended. Using an official Raspberry Pi power supply ensures compatibility and prevents common issues like undervoltage warnings or unexpected shutdowns. If you’re using a third-party power supply, make sure it can deliver consistent power through a high-quality USB-C cable.
Poor power delivery can cause various problems, including system instability, SD card corruption, and reduced performance. The tell-tale sign of insufficient power is the lightning bolt icon appearing in the top-right corner of your screen. To avoid these issues, avoid using phone chargers or low-quality power supplies, and ensure your power cable is no longer than 1 meter for optimal performance.
Consider using a UPS (Uninterruptible Power Supply) for projects requiring 24/7 operation or data-critical applications.
Storage and Cooling Solutions
The Raspberry Pi 5 generates more heat than its predecessors, making proper storage and cooling essential for optimal performance. For storage, you have several options depending on your needs. A high-quality microSD card (Class 10 or UHS-I) with at least 32GB capacity serves as the minimum requirement, but for better performance, consider using an NVMe SSD via the PCIe interface. This provides faster boot times and improved overall system responsiveness.
Cooling is crucial for the Pi 5, especially during intensive tasks. The official active cooler is highly recommended and easily attaches to the board. If you prefer passive cooling, several third-party heatsink solutions are available, but these may not provide sufficient cooling during heavy workloads. For optimal performance, combine a heatsink with a small fan.
When setting up your Pi, ensure adequate ventilation around the case. If you’re using a custom case, make sure it has proper airflow channels and consider drilling additional ventilation holes if necessary. Monitor your Pi’s temperature using the built-in sensors through terminal commands like ‘vcgencmd measure_temp’ to ensure it stays within safe operating limits.
Initial Operating System Installation
Preparing the microSD Card
Before installing the operating system on your Raspberry Pi, you’ll need to properly prepare your microSD card. Start by inserting the card into your computer using a card reader. If you’re reusing an old card, it’s recommended to format it first to ensure a clean installation.
Download and install the official Raspberry Pi Imager tool from the Raspberry Pi website – it’s available for Windows, macOS, and Linux. This user-friendly tool simplifies the process of writing the operating system to your card.
Launch the Raspberry Pi Imager and click ‘Choose OS’ to select your preferred operating system. For beginners, Raspberry Pi OS (formerly Raspbian) is recommended. Next, click ‘Choose Storage’ and select your microSD card from the list. Double-check that you’ve selected the correct drive to avoid overwriting other devices.
Before writing the image, click the settings icon (gear symbol) to configure optional features like hostname, SSH, and Wi-Fi credentials. Finally, click ‘Write’ and wait for the process to complete. Once finished, safely eject the card from your computer.

Installing Raspberry Pi OS
Begin your journey by installing Raspberry Pi OS using the official Raspberry Pi Imager tool. Download and install the Imager on your computer, then launch the application. Insert your microSD card into your computer using a card reader.
In the Raspberry Pi Imager, click “Choose OS” and select the most recent version of Raspberry Pi OS. For beginners, we recommend the 64-bit version with desktop environment. Next, click “Choose Storage” and select your microSD card from the list of available devices.
Before writing the image, click the gear icon to access advanced options. Here, you can preconfigure important settings like hostname, WiFi credentials, and enable SSH access. This saves time during the initial boot. Set a username and password, and configure your local keyboard layout and timezone.
Click “Write” to begin the imaging process. This typically takes 5-10 minutes, depending on your card’s speed and the OS version selected. Once complete, safely eject the microSD card and insert it into your powered-off Raspberry Pi.
Connect your display, keyboard, and mouse, then power on your Pi. The first boot might take a few minutes as the OS configures itself. If you pre-configured settings in the Imager, you’ll boot directly to the desktop. Otherwise, follow the initial setup wizard to configure your location, password, and network settings.
Once at the desktop, run sudo apt update && sudo apt upgrade in the terminal to ensure your system has the latest updates and security patches.
First Boot Configuration
Network Setup
Getting your Raspberry Pi connected to the network is essential for updates, downloads, and remote access. You can configure WiFi settings through either the desktop interface or command line.
For WiFi setup, click the network icon in the top-right corner of the desktop. Select your network from the list and enter your password when prompted. Alternatively, modify the wpa_supplicant.conf file via terminal for headless setup.
If using ethernet, simply plug in a cable to the RJ45 port, and your Pi should automatically obtain an IP address through DHCP. For static IP configuration, navigate to the network settings and input your desired IP address, subnet mask, and gateway.
To verify your connection, open terminal and type ‘ping google.com’. A successful response indicates your network is working properly. For remote access, enable SSH by using the raspi-config tool or creating an empty file named ‘ssh’ in the boot partition.
Remember to change default passwords and consider setting up a firewall for enhanced security when connecting to networks.
User Account Setup
After your initial boot, you’ll need to set up a user account to secure your Raspberry Pi. The default username ‘pi’ and password ‘raspberry’ should be changed immediately for security purposes. Open the terminal and type ‘passwd’ to change your password. Choose a strong password combining letters, numbers, and special characters.
To create additional user accounts, use the command ‘sudo adduser username’, replacing ‘username’ with your desired name. The system will prompt you to set a password and enter optional user information. For administrative privileges, add the new user to the sudo group with ‘sudo usermod -aG sudo username’.
To enhance security, consider disabling the default ‘pi’ user account after creating your new account. Before doing this, ensure your new user has sudo privileges and test them. To disable the pi account, use ‘sudo passwd -l pi’.
For organizations or educational settings, you might want to create multiple user accounts with different permission levels. Use ‘sudo groupadd groupname’ to create user groups, and ‘sudo usermod -aG groupname username’ to add users to specific groups.
Remember to log out and test each new account to verify proper functionality before proceeding with your configuration.
Performance Optimization
Memory Management
Proper memory management is crucial for optimal Raspberry Pi performance. Start by checking your current memory allocation using the command ‘free -h’ in the terminal. For most applications, the default split between RAM and GPU memory works well, but you can adjust this in the /boot/config.txt file.
To modify GPU memory allocation, add or edit the ‘gpu_mem’ parameter. For basic desktop use, 128MB is sufficient (gpu_mem=128), while media centers or gaming might require up to 256MB or more. Remember that allocating too much GPU memory reduces available system RAM.
Setting up a swap file can provide additional virtual memory when RAM is limited. Create a swap file using:
sudo fallocate -l 2G /swapfile
sudo chmod 600 /swapfile
sudo mkswap /swapfile
sudo swapon /swapfile
To make this permanent, add the following line to /etc/fstab:
/swapfile swap swap defaults 0 0
Monitor memory usage regularly using ‘top’ or ‘htop’ commands to ensure your configuration meets your project’s needs.
Overclocking Options
Overclocking your Raspberry Pi can provide additional performance, but it’s important to approach it cautiously. The Pi’s firmware includes several safe overclocking presets that won’t void your warranty. To access these options, open the Raspberry Pi Configuration tool from the preferences menu or use ‘sudo raspi-config’ in the terminal.
For a modest performance boost, start with the ‘Medium’ preset, which typically increases the CPU frequency to 1.8GHz. If your Pi remains stable and temperatures stay below 80°C, you can experiment with the ‘High’ preset. Always ensure you have adequate cooling – either a good quality heatsink or fan is essential when overclocking.
Monitor your system’s stability using stress tests and temperature readings. The command ‘vcgencmd measure_temp’ will display your current CPU temperature. If you experience system crashes or see the temperature icon appear in the top-right corner, immediately revert to default settings.
Remember that every Raspberry Pi responds differently to overclocking, and the latest Pi models generally offer better headroom for safe overclocking than older versions.
Security Essentials
Securing your Raspberry Pi is crucial, especially if it’s connected to the internet or your home network. Start by changing the default password for the ‘pi’ user account using the passwd command in the terminal. Choose a strong password that combines letters, numbers, and special characters.
Next, enable SSH (Secure Shell) only if you need remote access to your Pi. If you do enable SSH, disable password authentication and use SSH keys instead. Create your SSH key pair and add the public key to your Pi’s authorized_keys file for more secure remote access.
Install and configure a firewall to control incoming and outgoing traffic. The uncomplicated firewall (UFW) is an excellent choice for beginners. After installation, allow only the ports you need for your specific projects and block everything else.
Keep your system updated by regularly running:
“`
sudo apt update
sudo apt upgrade
“`
Consider changing the default SSH port from 22 to a non-standard port to reduce automated attack attempts. Additionally, install fail2ban to protect against brute-force login attempts by automatically blocking IP addresses that show suspicious activity.
If your Pi is accessible from the internet, disable unnecessary services and ports. Remove unused software packages to minimize potential security vulnerabilities. For projects requiring wireless connectivity, change the default WiFi password and consider using a hidden SSID.
Finally, create regular backups of your system using tools like dd or rpi-clone. This ensures you can quickly restore your Pi’s configuration if security is compromised or hardware fails.
Configuring your Raspberry Pi is an exciting journey that opens up countless possibilities for creative projects and learning experiences. We’ve covered the essential steps from initial hardware setup to operating system installation, network configuration, and securing your device. By following this guide, you should now have a fully functional Raspberry Pi ready for your next project.
Remember to regularly update your system, maintain secure passwords, and back up your important data. The Raspberry Pi community is vast and supportive, offering countless resources and project ideas to explore. Whether you’re interested in home automation, media centers, retro gaming, or learning programming, your configured Pi provides the perfect foundation.
For beginners, start with simple projects to build confidence and gradually work your way up to more complex applications. Advanced users can experiment with different operating systems, clustering, or custom configurations to push their Pi’s capabilities further.
Don’t forget to join online Raspberry Pi forums and communities to share your experiences and learn from others. Happy tinkering!