Transform your Raspberry Pi into a powerful 5G-enabled computing platform by combining the versatility of this single-board computer with cutting-edge cellular connectivity. The integration of 5G capabilities opens up unprecedented possibilities for IoT projects, remote monitoring systems, and mobile edge computing applications. Modern 5G HAT modules and USB dongles now make it possible to achieve download speeds of up to 2.5 Gbps on your Pi, revolutionizing what’s possible for portable and remote computing solutions. Whether you’re building an advanced IoT gateway, a mobile surveillance system, or a remote data collection station, understanding how to implement 5G connectivity on your Raspberry Pi is becoming increasingly essential for staying at the forefront of DIY tech innovation.
This guide explores the essential hardware components, setup procedures, and practical applications that will help you harness the full potential of 5G technology with your Raspberry Pi. From selecting the right 5G modem to configuring your system for optimal performance, we’ll cover everything you need to know to get started with this powerful combination of technologies.
Understanding 5G Connectivity for Raspberry Pi
5G Hardware Options
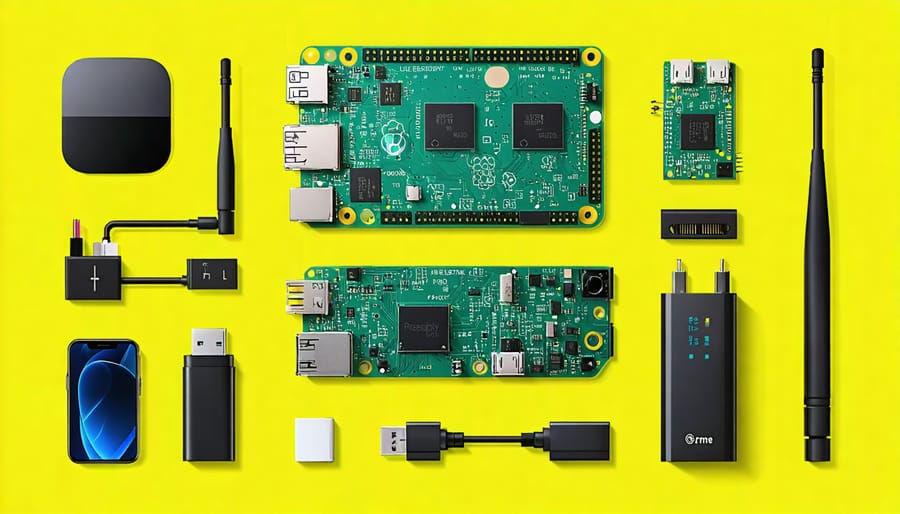
Several hardware options are available for adding 5G capabilities to your Raspberry Pi, making it perfect for advanced cellular connectivity projects. The most popular choice is using 5G HATs (Hardware Attached on Top), which connect directly to the GPIO pins. Notable options include the Waveshare SIM8200EA-M2 5G HAT and the SixFab 5G & LTE Cellular HAT, both offering plug-and-play functionality.
USB modems provide a more flexible alternative, allowing easy connection and removal. The Quectel RM500Q-GL and Huawei 5G USB modems are widely compatible with Raspberry Pi models. These typically require minimal setup and offer good mobility.
For those seeking a more integrated solution, shields like the RAK Wireless RAK5010 combine 5G connectivity with additional features such as GPS and sensor capabilities. While slightly more expensive, these all-in-one solutions offer enhanced functionality for IoT and mobile applications.
When selecting hardware, consider factors like network band compatibility, power requirements, and your region’s 5G network availability to ensure optimal performance.

Connectivity Requirements
Implementing 5G connectivity on your Raspberry Pi requires careful attention to several key specifications. First, consider the power requirements, as 5G modules typically need a stable 5V supply with at least 2.5A capacity. Your Pi should be equipped with USB 3.0 ports to handle the high-speed data transfer rates that 5G offers.
For bandwidth considerations, ensure your network infrastructure can support speeds up to 1Gbps for optimal performance. A compatible 5G HAT or USB modem is essential, along with proper antenna connections for reliable signal reception. Most 5G modules require at least 2GB of RAM and adequate cooling solutions to prevent overheating during extended use.
Hardware compatibility is crucial – verify that your Raspberry Pi model supports the specific 5G module you plan to use. The Raspberry Pi 4 Model B is recommended due to its superior processing power and USB capabilities. Remember to check regional 5G band support and carrier compatibility before purchasing any hardware components.
Hardware Setup and Configuration
Physical Installation
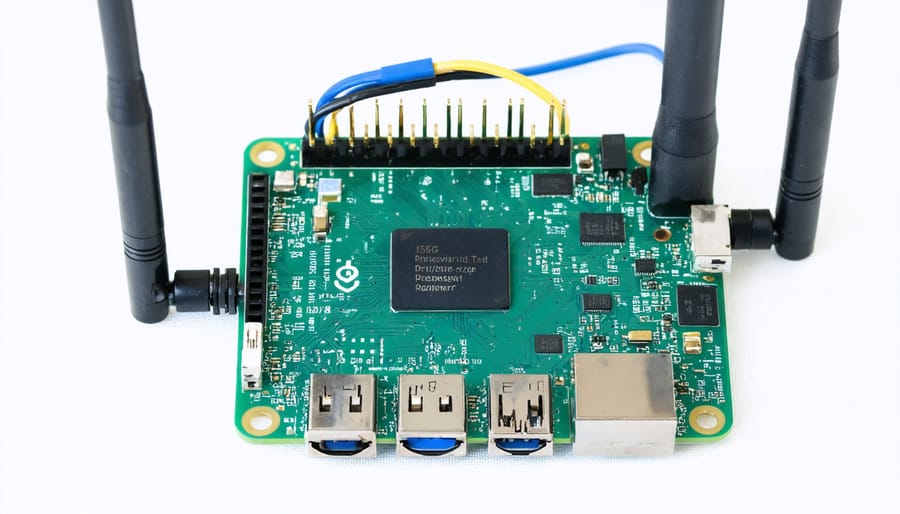
The physical installation of a 5G module on your Raspberry Pi requires careful attention to detail and proper handling of components. Begin by ensuring your Raspberry Pi is powered off and disconnected from any power source. Most 5G HAT modules connect to the Pi via the 40-pin GPIO header, so carefully align the pins before pressing the module into place. Ensure there’s no gap between the HAT and the Raspberry Pi board.
For antenna connections, most 5G modules come with designated spots for attaching the main and diversity antennas. Mount these antennas in positions that maximize signal reception, typically away from metal objects and with clear line-of-sight to the outside. If your setup includes external antennas, route the cables carefully to avoid strain on the connectors.
Many 5G modules require additional power beyond what the GPIO pins can provide. In such cases, connect the supplementary power cable to the designated power input on the HAT. Some modules may also need a SIM card – insert this into the provided slot, ensuring correct orientation.
If your 5G module came with a heat sink, install it following the manufacturer’s guidelines. 5G modules can generate significant heat during operation, so proper thermal management is crucial. Consider adding a small cooling fan if you plan to use the module intensively.
Finally, double-check all connections before powering on your Raspberry Pi. Look for any loose connections or misaligned components. Once everything is secure, you can proceed with the software configuration necessary for enabling 5G connectivity on your device.

Driver Installation and Updates
Before diving into 5G connectivity, it’s essential to configure your Raspberry Pi OS with the necessary drivers and updates. Start by ensuring your Raspberry Pi is running the latest version of Raspberry Pi OS, as this provides the most current driver support and security features.
For 5G modem compatibility, you’ll need to install the USB Mode Switch package using the terminal command:
sudo apt-get install usb-modeswitch
Next, update your system’s package list and upgrade existing packages:
sudo apt-get update
sudo apt-get upgrade
Most 5G modems require specific drivers that aren’t included in the standard Raspberry Pi OS distribution. You’ll need to identify your modem’s chipset manufacturer (commonly Qualcomm, MediaTek, or Huawei) and download the appropriate driver package.
For optimal performance, install the following additional packages:
– wvdial (for modem connection management)
– ppp (for point-to-point protocol support)
– network-manager (for easier network configuration)
Remember to regularly check for driver updates, as 5G technology is continuously evolving. You can automate this process by adding a cron job to run system updates periodically:
sudo crontab -e
Add the line: 0 0 * * 0 apt-get update && apt-get upgrade -y
If you encounter connection issues, check the system logs using:
sudo dmesg | grep tty
This will help identify any driver-related problems that need addressing.
Software Configuration and Testing
Network Configuration
Configuring your Raspberry Pi for 5G connectivity requires careful attention to network parameters and APN (Access Point Name) settings. Begin by accessing your Raspberry Pi’s network configuration file using the terminal command ‘sudo nano /etc/network/interfaces’. Here, you’ll need to add the specific configurations for your 5G modem.
First, locate your modem’s APN settings from your cellular provider. These settings typically include the APN name, username, and password. Common APNs for major carriers are usually in the format “provider.net” or “internet.provider.com”. Enter these details in the configuration file using the following format:
allow-hotplug wwan0
iface wwan0 inet dhcp
apn your.provider.apn
username your_username
password your_password
For optimal performance, configure the connection mode to prefer 5G by adding:
connection_mode 5g_preferred
Remember to set the correct USB port configuration if you’re using a USB 5G modem. This can be done by adding the appropriate USB mode switch commands to ‘/etc/usb_modeswitch.conf’.
After saving your configurations, restart the networking service using ‘sudo systemctl restart networking’. Verify your connection status using ‘mmcli -m 0’ to check signal strength and connection mode. If you encounter issues, check your modem’s compatibility and ensure your SIM card is properly activated for 5G service.
Connection Testing
Once you’ve set up your 5G hardware with your Raspberry Pi, it’s crucial to verify the connection is working correctly. Start by checking the basic connectivity using the command line interface. Open the terminal and type ‘ip addr’ to confirm your 5G modem is recognized and has been assigned an IP address.
To test the connection speed and stability, you can use standard networking tools like ‘speedtest-cli’. Install it using ‘sudo apt-get install speedtest-cli’ and run a speed test by simply typing ‘speedtest-cli’ in the terminal. This will give you detailed information about your upload and download speeds, as well as latency.
If you encounter connection issues, first check your signal strength using ‘mmcli -m 0’ (assuming your modem is recognized as the first modem). Look for the ‘signal quality’ parameter – anything above 70% indicates a good connection. Poor signal strength might require repositioning your antenna or moving to a location with better coverage.
Common troubleshooting steps include:
– Checking physical connections and USB ports
– Verifying modem firmware is up to date
– Confirming APN settings are correct for your carrier
– Resetting the modem using ‘sudo mmcli -m 0 -r’
For persistent issues, try connecting your modem to a different USB port or using a powered USB hub, as 5G modems can be power-hungry devices. Keep system logs handy using ‘dmesg’ command to identify any hardware-related issues.

Real-World Applications
IoT Projects
The combination of 5G capabilities and Raspberry Pi opens up exciting possibilities for innovative IoT projects. With enhanced IoT integration, makers can create sophisticated solutions that leverage high-speed connectivity and low latency.
One compelling project is a real-time environmental monitoring system that uses multiple sensors to collect data about air quality, temperature, and humidity. The 5G connection enables instant transmission of sensor readings to cloud platforms for analysis and visualization, making it ideal for smart city applications.
Another practical implementation is a remote surveillance system that streams high-definition video footage with minimal delay. The increased bandwidth of 5G allows for multiple camera feeds to be transmitted simultaneously, perfect for home security or wildlife monitoring applications.
Smart agriculture enthusiasts can develop automated irrigation systems that use soil moisture sensors and weather data to optimize water usage. The 5G connection ensures reliable communication between sensors, control systems, and mobile apps for remote management.
For education settings, students can build interactive robotics projects with real-time control capabilities. The low latency of 5G enables precise movement control and immediate response to commands, making it excellent for remote learning scenarios.
These projects demonstrate how 5G technology transforms traditional Raspberry Pi applications into more responsive and capable systems, pushing the boundaries of what’s possible with single-board computing.
Performance Optimization
To maximize your Raspberry Pi’s 5G performance, start by positioning your device in an area with strong signal coverage. Keep the 5G modem away from metal objects and other electronic devices that might cause interference. Consider using a short, high-quality USB cable if you’re using a USB modem to minimize signal loss.
Optimize your Raspberry Pi’s power settings by ensuring it receives adequate power supply. A 5G modem can be power-hungry, so use a reliable power supply rated at least 3A. If you’re running on battery power, implement power management settings to balance performance and battery life.
Update your system regularly with the latest firmware and drivers. This ensures compatibility and optimal performance with your 5G hardware. Configure your network settings properly by adjusting the MTU (Maximum Transmission Unit) settings if needed – typically between 1400 and 1500 for 5G connections.
Monitor your system resources using tools like htop or iftop to identify potential bottlenecks. If you’re experiencing slower speeds, check CPU usage and temperature. Consider adding a small cooling fan if your Pi runs hot during extended 5G usage.
For bandwidth-intensive applications, prioritize network traffic using Quality of Service (QoS) settings. This helps maintain stable connections for critical tasks while managing background processes effectively. Remember to regularly test your connection speed and maintain logs to track performance over time.
The integration of 5G connectivity with Raspberry Pi opens up a world of exciting possibilities for IoT projects, edge computing, and mobile applications. Throughout this guide, we’ve explored the essential components, setup procedures, and practical applications that make 5G-enabled Raspberry Pi projects both accessible and powerful. From selecting the right 5G HAT or modem to configuring your system and implementing security measures, you now have the foundational knowledge to begin your journey into high-speed connectivity.
Remember that while implementing 5G on your Raspberry Pi may seem challenging at first, the benefits of ultra-low latency, increased bandwidth, and improved reliability make it worth the effort. Start with simple projects to build your confidence, and gradually work your way up to more complex applications like mobile edge computing or real-time video streaming.
The future of IoT and edge computing is increasingly dependent on high-speed connectivity, and by combining 5G with Raspberry Pi, you’re positioning yourself at the forefront of this technological revolution. Whether you’re a hobbyist, educator, or professional developer, the skills you’ll gain from these projects will prove invaluable as 5G continues to reshape our connected world.
Don’t hesitate to experiment, learn from the community, and share your experiences with others. The possibilities are limitless, and your next 5G Raspberry Pi project could be the stepping stone to something truly innovative.


