Connect your 1-Wire devices to the Raspberry Pi’s GPIO pins and harness the power of this simple, low-cost communication protocol. Raspberry Pi gaming enthusiasts and hobbyists alike can easily read temperature sensors, control LEDs, and build home automation projects using just a single data line. With minimal wiring and the right Python libraries, you’ll be collecting real-world data and controlling devices in no time. Dive into this beginner-friendly guide to master 1-Wire communication on your Raspberry Pi and unlock a world of exciting possibilities for your next project.
Understanding 1-Wire Protocol
1-Wire Bus Topology
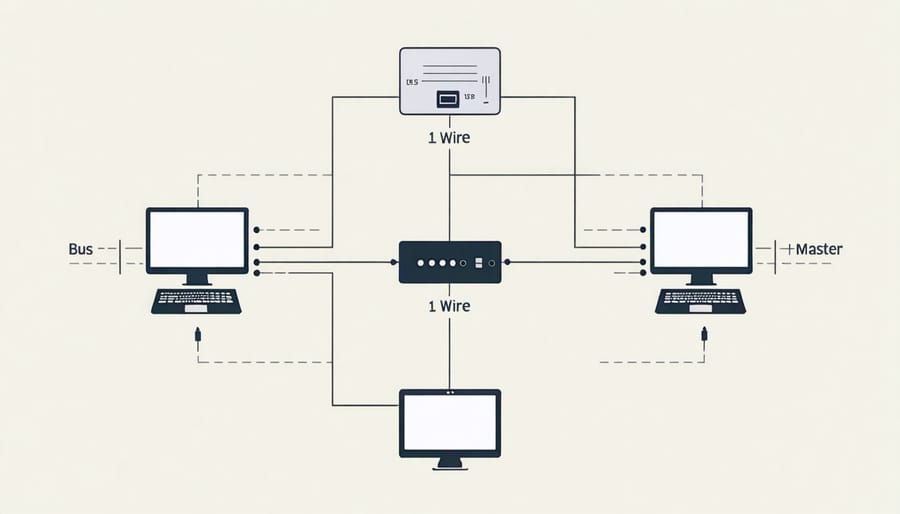
The 1-Wire bus topology is a simple yet efficient way to connect multiple devices using a single data line and ground. In a 1-Wire network, all devices are connected in parallel to the same bus, which consists of a single data wire and a ground reference. This allows for easy expansion and device management, as new sensors or actuators can be added to the network without requiring additional GPIO pins on the Raspberry Pi.
One of the key advantages of the 1-Wire bus topology is its ability to support multiple devices on a single bus. Each device has a unique 64-bit serial number, which allows the Raspberry Pi to identify and communicate with individual devices on the network. This addressing scheme enables the master device (Raspberry Pi) to issue commands and request data from specific sensors or actuators without interfering with other devices on the bus.
The 1-Wire bus supports various network configurations, including linear topology, stubbed topology, and star topology. In a linear topology, devices are connected in a daisy-chain fashion, with each device’s data line connected to the next device’s data input. Stubbed topology involves connecting each device directly to the main bus, while star topology uses a central hub to distribute the bus to multiple devices. Choose the most suitable topology for your project based on factors such as device count, wiring complexity, and physical layout constraints.
Communication Protocol
The 1-Wire protocol enables data transmission between the Raspberry Pi and 1-Wire devices using a single data line. Communication begins with the master (Raspberry Pi) initiating a reset pulse, followed by a presence pulse from the slave device, indicating its availability. The master then sends a ROM command, such as “Search ROM” to discover connected devices or “Match ROM” to address a specific device.
Data is transmitted bit by bit, with the master pulling the line low to write a ‘0’ or releasing it to write a ‘1’. The slave reads the state of the line after a short delay. For reading data, the master initially pulls the line low, and the slave responds by holding the line low for a ‘0’ or letting it rise for a ‘1’.
Timing is critical in 1-Wire communication. Standard mode requires a minimum of a 5μs recovery time between bits, while Overdrive mode allows for faster communication with a 1μs recovery time. The protocol includes error checking through an 8-bit CRC, ensuring data integrity.
With its simple wiring and reliable data transfer, the 1-Wire protocol is an efficient choice for connecting low-speed devices to the Raspberry Pi, making it ideal for sensor-based projects and home automation applications.
Hardware Requirements
Raspberry Pi Board
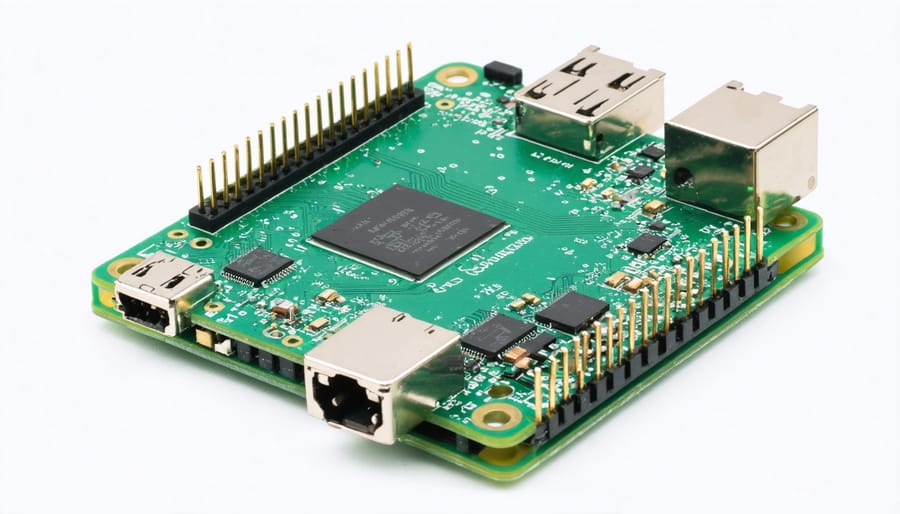
The 1-Wire protocol is compatible with a wide range of Raspberry Pi models, including the Raspberry Pi 1 Model B+ and later versions. For optimal performance and stability, it is recommended to use a Raspberry Pi 2, 3, or 4. When selecting a Raspberry Pi for your 1-Wire project, ensure that it has a 40-pin GPIO header, as this is required for connecting the 1-Wire bus. Additionally, make sure your Raspberry Pi has sufficient processing power and memory to handle the specific requirements of your 1-Wire application, especially if you plan to connect multiple sensors or perform complex data processing tasks.

1-Wire Sensors
1-Wire sensors are versatile devices that can measure various physical quantities, making them popular for Raspberry Pi projects. Common 1-Wire sensors include:
– DS18B20 temperature sensor: Accurately measures temperatures from -55°C to +125°C, ideal for weather stations, home automation, and industrial applications.
– DS2413 dual channel addressable switch: Controls two separate devices or circuits, useful for cybersecurity projects, home automation, and energy management.
– DS2408 8-channel addressable switch: Offers eight individually controllable channels, perfect for complex automation tasks and multi-sensor setups.
– DS2438 smart battery monitor: Monitors battery voltage, current, and temperature, essential for power management in portable Pi projects.
These sensors communicate with the Raspberry Pi using the 1-Wire protocol, allowing multiple sensors to be connected using a single GPIO pin, simplifying wiring and enabling efficient data collection in various applications.
Pull-up Resistor
The pull-up resistor is a crucial component in 1-Wire circuits. It ensures a stable voltage level on the data line when no devices are communicating. Without a pull-up resistor, the data line would float, leading to unreliable communication. Typically, a 4.7kΩ resistor is connected between the data line and the power supply to maintain a high voltage level when the bus is idle.
Setting Up 1-Wire on Raspberry Pi
Enabling 1-Wire Interface
To enable the 1-Wire interface on your Raspberry Pi, start by opening the Raspberry Pi configuration tool. You can access it by clicking on the Raspberry Pi icon in the top-left corner of your screen and selecting “Preferences” followed by “Raspberry Pi Configuration”. In the configuration window, navigate to the “Interfaces” tab. Locate the “1-Wire” option and select “Enable”. This will activate the 1-Wire interface, allowing your Raspberry Pi to communicate with 1-Wire devices. Click “OK” to save the changes and reboot your Raspberry Pi for the settings to take effect. After the reboot, your Raspberry Pi will be ready to interact with 1-Wire sensors and devices. Keep in mind that you may need to install additional software libraries or packages, depending on the specific 1-Wire devices you plan to use and the programming language you choose for your projects.
Connecting 1-Wire Sensors
To connect 1-Wire sensors to your Raspberry Pi, you’ll need a 1-Wire adapter or a GPIO pin configured for 1-Wire communication. Many 1-Wire sensors, such as the DS18B20 temperature sensor, have three pins: VCC (power), GND (ground), and DQ (data). Connect VCC to the 3.3V pin on the Raspberry Pi, GND to a ground pin, and DQ to GPIO4 (or any other GPIO pin you’ve set up for 1-Wire).
If you’re using multiple 1-Wire sensors, you can connect them in parallel by sharing the VCC and GND pins and connecting each sensor’s DQ pin to the same GPIO pin on the Raspberry Pi. This is possible because each 1-Wire device has a unique 64-bit address, allowing the Raspberry Pi to communicate with them individually on the same bus.
When wiring your sensors, it’s essential to use a pull-up resistor (usually 4.7kΩ) between the DQ pin and VCC to ensure reliable communication. Some 1-Wire sensors may have a built-in pull-up resistor, so check your sensor’s documentation before adding an external one.
Once you’ve connected your 1-Wire sensors, you can proceed to configure the 1-Wire interface on your Raspberry Pi and start reading sensor data using Python libraries like w1thermsensor or DS18B20.
Installing Required Software Packages
To start using 1-Wire with your Raspberry Pi, you’ll need to install a few essential software packages. Begin by updating your system packages to ensure you have the latest versions. Open a terminal and run `sudo apt update` followed by `sudo apt upgrade`. Next, install the 1-Wire interface using the command `sudo apt install w1-gpio`. This package enables communication between your Raspberry Pi and 1-Wire devices. Additionally, install the Python 3 package `python3-w1thermsensor` by running `sudo apt install python3-w1thermsensor`. This library simplifies the process of reading temperature data from 1-Wire sensors in Python scripts. With these packages installed, you’re ready to connect your 1-Wire devices and start experimenting. If you plan on accessing your Raspberry Pi remotely to work on your 1-Wire projects, be sure to set up Raspberry Pi remote access for convenient development and monitoring.
Reading Sensor Data with Python
Detecting Connected Sensors
To detect connected 1-Wire sensors, you’ll need to use the os.listdir() function in Python to list the devices in the /sys/bus/w1/devices/ directory. Each sensor will have a unique ID starting with “28-“. You can read the sensor’s ID and store it in a variable for later use. For example, device_folder = glob.glob('/sys/bus/w1/devices/28*')[0] will find the first connected sensor. Once you have the device folder, you can access the sensor’s data file using device_file = device_folder + '/w1_slave'. This file contains the raw temperature data from the sensor, which you can read and parse using Python to obtain the actual temperature value.
Reading Temperature Data
Here’s an example Python code snippet for reading temperature data from a DS18B20 sensor connected to your Raspberry Pi via the 1-Wire interface:
“`python
import os
import glob
import time
os.system(‘modprobe w1-gpio’)
os.system(‘modprobe w1-therm’)
base_dir = ‘/sys/bus/w1/devices/’
device_folder = glob.glob(base_dir + ’28*’)[0]
device_file = device_folder + ‘/w1_slave’
def read_temp_raw():
f = open(device_file, ‘r’)
lines = f.readlines()
f.close()
return lines
def read_temp():
lines = read_temp_raw()
while lines[0].strip()[-3:] != ‘YES’:
time.sleep(0.2)
lines = read_temp_raw()
equals_pos = lines[1].find(‘t=’)
if equals_pos != -1:
temp_string = lines[1][equals_pos+2:]
temp_c = float(temp_string) / 1000.0
temp_f = temp_c * 9.0 / 5.0 + 32.0
return temp_c, temp_f
while True:
print(“Temperature: {:.1f} °C, {:.1f} °F”.format(*read_temp()))
time.sleep(1)
“`
This code allows you to read the current temperature from the sensor every second. You can easily integrate this into your own projects, such as building a Raspberry Pi weather station. The `read_temp()` function handles the parsing of the raw data from the sensor and returns both Celsius and Fahrenheit temperature values for your convenience.

Conclusion
In this article, we’ve explored the fundamentals of 1-Wire communication and its integration with Raspberry Pi. We covered the essential hardware components, the setup process, and how to read data from 1-Wire sensors using Python. By following the step-by-step instructions and example code, you should now have a solid foundation to start building your own 1-Wire projects with Raspberry Pi.
Remember, the possibilities with 1-Wire are endless. From monitoring temperature and humidity to creating home automation systems, 1-Wire offers a simple and efficient way to connect multiple sensors to your Raspberry Pi. We encourage you to experiment with different sensors, explore advanced 1-Wire libraries, and share your projects with the community.
Keep learning, keep tinkering, and most importantly, have fun with your 1-Wire adventures on Raspberry Pi!


