

Transform your home security with a custom Raspberry Pi surveillance system that rivals commercial solutions at a fraction of the cost. Building Raspberry Pi security projects unlocks powerful features like AI-powered motion detection, facial recognition, and real-time mobile alerts – all while maintaining complete control over your data and privacy.
Starting with just a Raspberry Pi 4, camera module, and basic sensors, you’ll create a sophisticated security hub that can monitor multiple zones, analyze potential threats using TensorFlow Lite, and seamlessly integrate with home automation systems. This DIY approach not only saves thousands compared to professional installations but also provides unparalleled customization options and valuable hands-on experience with cutting-edge technologies.
Whether you’re securing a small apartment or a large property, this project scales elegantly to meet your needs. By following our comprehensive guide, you’ll learn to implement enterprise-level security features like encrypted video streams, cloud backup integration, and automated incident response – all through accessible, open-source solutions that put you in complete control of your home’s security infrastructure.
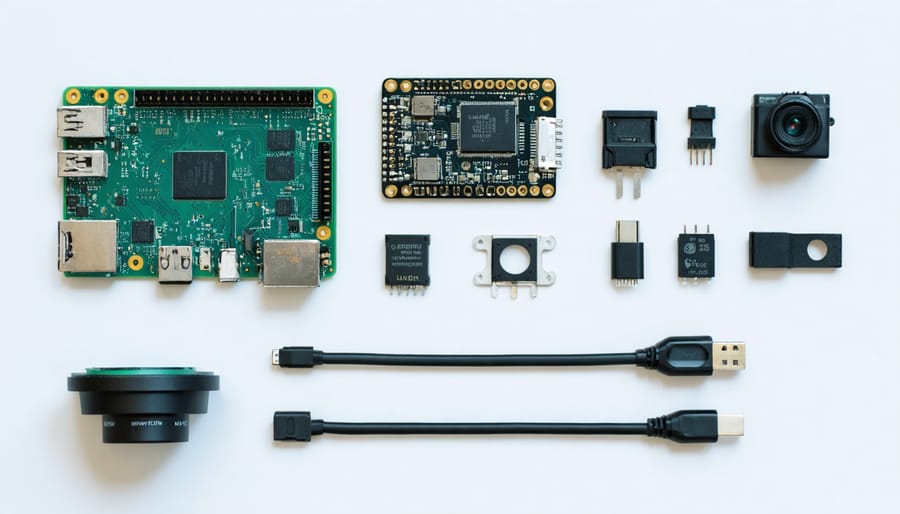
Essential Hardware Components
Core Components
Building a reliable security system starts with selecting the right core components. For the brain of your system, we recommend the Raspberry Pi 4 Model B with at least 4GB RAM, which offers excellent processing power for running multiple cameras and sensors while handling AI-based detection. If you’re on a budget, the Raspberry Pi 3B+ can still perform adequately for basic setups.
For visual surveillance, the Raspberry Pi Camera Module 3 stands out with its 12MP resolution and support for both day and night vision. Alternatively, the cheaper Camera Module 2 provides good quality at 8MP. You can also connect USB cameras, though they may require additional configuration to secure your Raspberry Pi system properly.
Essential sensors for a comprehensive security setup include:
– PIR motion sensors (HC-SR501) for detecting movement
– Door/window magnetic contact sensors for entry points
– Sound detection modules for audio monitoring
– Light-dependent resistors (LDRs) for ambient light sensing
Consider adding environmental sensors like temperature and humidity monitors (DHT22) to protect against environmental threats. For power backup, include a UPS HAT or battery pack to ensure continuous operation during power outages. Remember to factor in storage requirements – a high-capacity microSD card (32GB minimum) is essential for recording footage and logging events.
Optional Enhancements
To enhance your Raspberry Pi security system’s capabilities, consider integrating these powerful hardware additions. The PIR (Passive Infrared) motion sensor is an essential upgrade, detecting movement through heat signatures with remarkable accuracy. When paired with your Pi camera, it can trigger recording only when motion is detected, saving storage space and making footage review more efficient.
For comprehensive night-time surveillance, the NoIR (No Infrared Filter) camera module is a game-changing addition. Unlike standard Pi cameras, the NoIR module captures infrared light, enabling clear vision in complete darkness when paired with infrared LED illuminators. These illuminators are invisible to the human eye but provide excellent lighting for your camera.
Environmental monitoring can be enhanced with DHT22 temperature and humidity sensors, helping you detect potentially harmful conditions in your space. Adding a small LCD display allows you to monitor system status without checking the web interface, while a UPS (Uninterruptible Power Supply) HAT ensures your system stays operational during power outages.
For audio capabilities, consider adding a USB microphone or the ReSpeaker HAT, enabling two-way communication and sound detection. More advanced users might want to explore servo motors for pan-tilt camera control, giving you full coverage of larger areas from a single camera position. These additions can be integrated gradually, allowing you to build a increasingly sophisticated system that meets your specific security needs.
Setting Up the AI Framework
TensorFlow Installation
Before we dive into computer vision capabilities, we need to set up TensorFlow Lite on your Raspberry Pi. This lightweight version of TensorFlow is perfect for our security system project. First, ensure your Raspberry Pi is up to date by running:
sudo apt-get update && sudo apt-get upgrade
Next, install the Python virtual environment package:
sudo apt-get install python3-venv
Create and activate a new virtual environment:
python3 -m venv ~/tflite
source ~/tflite/bin/activate
Now, install the TensorFlow Lite interpreter:
pip3 install tflite-runtime
For optimal performance, we’ll need OpenCV for image processing:
sudo apt-get install libatlas-base-dev
pip3 install opencv-python
Once these dependencies are installed, perform basic security hardening steps to protect your system. Test the installation by running:
python3
import tflite_runtime.interpreter as tflite
print(“TensorFlow Lite installed successfully!”)
If you see no errors, you’re ready to proceed with implementing object detection for your security system. Remember to always activate your virtual environment (source ~/tflite/bin/activate) when working on this project.
Object Detection Model
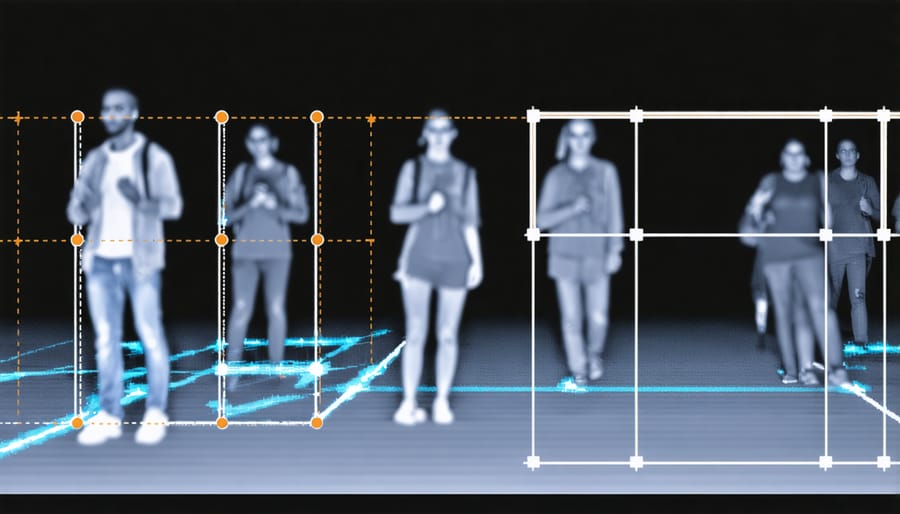
For our security system, we’ll implement a reliable person detection model using TensorFlow Lite, which is optimized for Raspberry Pi’s limited resources. The model we’ll use is MobileNet SSD v2, a pre-trained model that offers an excellent balance between accuracy and performance.
To get started, install TensorFlow Lite by running:
“`bash
pip3 install tflite-runtime opencv-python
“`
Download the model files and labels from TensorFlow’s model zoo. The COCO dataset-trained model works well for person detection, achieving detection speeds of 2-3 frames per second on the Raspberry Pi 4.
For better performance, we’ll implement frame skipping and resize our input images to 300×300 pixels before feeding them to the model. Here’s a basic implementation:
“`python
def detect_person(frame):
frame_resized = cv2.resize(frame, (300, 300))
input_data = np.expand_dims(frame_resized, axis=0)
interpreter.set_tensor(input_details[0][‘index’], input_data)
interpreter.invoke()
boxes = interpreter.get_tensor(output_details[0][‘index’])[0]
classes = interpreter.get_tensor(output_details[1][‘index’])[0]
scores = interpreter.get_tensor(output_details[2][‘index’])[0]
return boxes[scores > 0.5]
“`
The model returns bounding box coordinates and confidence scores for detected persons. We’ll set a confidence threshold of 0.5 to filter out uncertain detections and reduce false positives.
Motion Detection Algorithm
The core of our security system’s intelligence lies in its motion detection capabilities, which we’ll implement using OpenCV (Open Computer Vision) library. After installing OpenCV on your Raspberry Pi using ‘pip install opencv-python’, we’ll create a Python script that captures video feed and analyzes frame differences to detect movement.
Our motion detection algorithm works by comparing consecutive frames from the camera feed. First, we convert each frame to grayscale to simplify processing and apply Gaussian blur to reduce noise. The script then calculates the absolute difference between frames, which highlights areas where movement has occurred.
To filter out minor movements and reduce false positives, we’ll implement a threshold value. When pixel differences exceed this threshold, the system marks it as significant motion. We can fine-tune this sensitivity by adjusting the threshold value – higher values require more pronounced movement to trigger detection.
Here’s the basic implementation flow:
1. Capture current frame
2. Convert to grayscale
3. Apply Gaussian blur
4. Compare with previous frame
5. Apply threshold
6. Identify motion areas
7. Draw rectangles around detected regions
For optimal performance, consider implementing frame resizing to reduce processing load on your Raspberry Pi. You can also add timestamp overlays to recorded footage and implement a “cool-down” period between detections to prevent continuous triggering from sustained movement.
System Integration
Camera Feed Setup
Setting up your camera feed is crucial for a reliable security system. First, connect your Raspberry Pi Camera Module to the CSI port on your board, ensuring the ribbon cable is properly seated. Enable the camera interface through raspi-config by running `sudo raspi-config` in the terminal, navigating to “Interface Options,” and selecting “Camera.”
For live streaming, we’ll use the lightweight Motion software. Install it by running:
“`
sudo apt-get update
sudo apt-get install motion
“`
Configure Motion by editing its configuration file:
“`
sudo nano /etc/motion/motion.conf
“`
Key settings to modify include:
– daemon on
– stream_port 8081
– stream_localhost off
– width 1280
– height 720
– framerate 30
To enable automatic recording when motion is detected, set:
– motion_detection on
– target_dir /home/pi/security_footage
Start the Motion service with:
“`
sudo service motion start
“`
You can now access your live camera feed by entering your Raspberry Pi’s IP address followed by the port number (e.g., http://192.168.1.100:8081) in any web browser on your network.
For better video quality and storage management, consider implementing H.264 encoding and setting up a rotation schedule for recorded footage. This helps maintain system performance while ensuring important security events are captured and stored efficiently.
Alert System Configuration
A robust alert system ensures you’re immediately notified when your security system detects suspicious activity. We’ll configure both email notifications and push alerts to your mobile device, giving you real-time updates wherever you are.
For email notifications, we’ll use Python’s built-in SMTP library along with a Gmail account. First, create an app-specific password in your Google Account settings for enhanced security. Add the following code to your main script:
“`python
import smtplib
from email.mime.text import MIMEText
from email.mime.image import MIMEImage
from email.mime.multipart import MIMEMultipart
def send_email_alert(image_path):
sender_email = “your-email@gmail.com”
receiver_email = “your-email@gmail.com”
password = “your-app-specific-password”
msg = MIMEMultipart()
msg[‘Subject’] = ‘Security Alert!’
msg[‘From’] = sender_email
msg[‘To’] = receiver_email
“`
For push notifications, we’ll implement the Pushbullet service, which offers a free tier perfect for this project. Install the Pushbullet library using pip:
“`bash
pip install pushbullet.py
“`
After creating your Pushbullet account and obtaining an API key, add this functionality to your script:
“`python
from pushbullet import Pushbullet
pb = Pushbullet(“your-api-key”)
push = pb.push_note(“Security Alert”, “Motion detected!”)
“`
You can customize alert triggers based on various events: motion detection, door/window sensors, or even specific times of day. Consider implementing a cool-down period between alerts to prevent notification flooding during continuous motion events.
Remember to test your alert system thoroughly before deploying it. Start with a short testing period where alerts are sent only to your email, then gradually integrate push notifications once you’re confident in the system’s reliability.
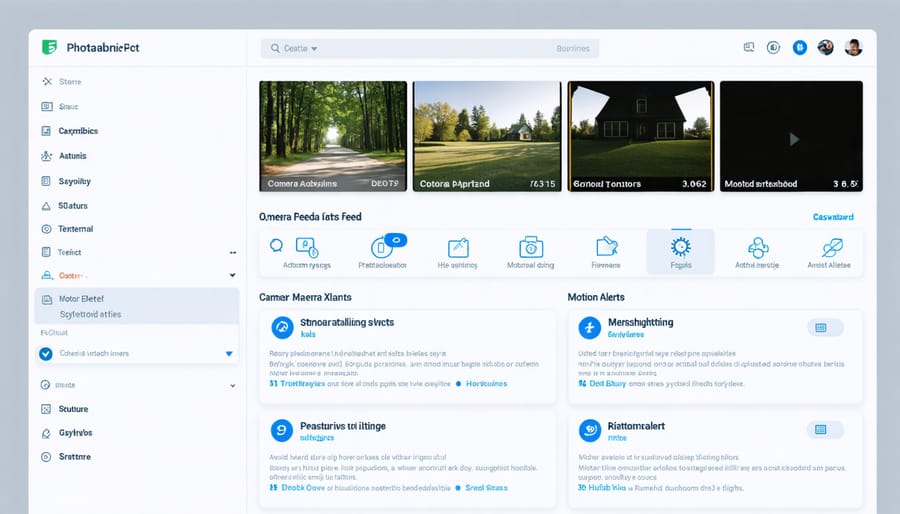
Web Interface Creation
Creating a web interface allows you to monitor your security system from anywhere. Using Flask, a lightweight Python web framework, we can build a simple yet effective dashboard. Start by installing Flask with pip install flask and create a new Python file for your web application.
In your Flask application, set up routes to display the live camera feed and system status. A basic template might include a main page showing the current camera view, a history of detected events, and system controls. Here’s a simple example:
“`python
from flask import Flask, render_template
app = Flask(__name__)
@app.route(‘/’)
def index():
return render_template(‘index.html’)
“`
Create an HTML template that’s mobile-responsive using Bootstrap. Include sections for live video streaming, a notification panel for alerts, and basic controls like arm/disarm buttons. To stream the camera feed, you can use Motion JPEG (MJPEG) format, which works well with most browsers.
For real-time updates, consider implementing WebSocket connections to push notifications instantly when motion is detected. This creates a more responsive experience than polling the server for updates.
Add authentication to protect your dashboard from unauthorized access. Flask-Login is an excellent choice for handling user sessions securely. Remember to use HTTPS when accessing your dashboard remotely to encrypt all communications between your browser and the Raspberry Pi.
Advanced Features
Cloud Storage Integration
To ensure your security footage is safely stored and accessible from anywhere, integrating cloud storage into your Raspberry Pi security system is essential. While local storage works for immediate access, cloud backup provides an extra layer of protection against data loss and enables remote viewing capabilities.
Start by setting up a basic cloud server setup on your Pi, then configure automatic uploading using rclone, a powerful command-line program for managing cloud storage. Popular services like Google Drive, Dropbox, or Amazon S3 work well for this purpose.
Install rclone using:
“`
sudo apt-get install rclone
“`
After installation, run ‘rclone config’ to set up your preferred cloud service credentials. Create a simple bash script to automatically upload your security footage:
“`
#!/bin/bash
rclone copy /home/pi/security_footage remote:backup –include “*.mp4”
“`
Schedule this script using cron to run at specific intervals. For example, to upload footage every hour:
“`
0 * * * * /home/pi/upload-footage.sh
“`
Consider implementing file retention policies to manage storage space and costs. You can configure rclone to delete local files after successful upload or remove clips older than a specified period. Remember to encrypt sensitive footage before uploading to maintain privacy and security.
Smart Home Integration
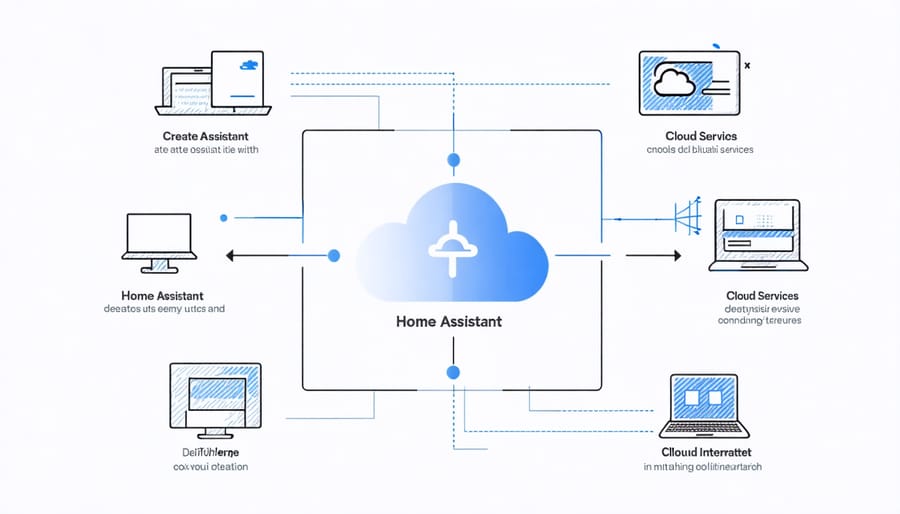
Integrating your Raspberry Pi security system with smart home platforms elevates its functionality and creates a more cohesive home automation experience. Home Assistant stands out as an excellent open-source platform that can seamlessly connect with your Pi-based security setup. To begin, install Home Assistant on a separate Raspberry Pi or as a container on your existing security system.
Once installed, you can configure your security cameras, motion sensors, and door contacts to communicate with Home Assistant through MQTT protocols. This integration enables you to create sophisticated automation routines, such as turning on lights when motion is detected or sending notifications to your phone when doors open.
To enhance security further, make sure to secure your home network before connecting your devices. Home Assistant can also integrate with popular platforms like Google Home and Amazon Alexa, allowing you to control your security system through voice commands.
Consider creating custom dashboards in Home Assistant to monitor your security feeds, sensor states, and system status in real-time. You can even set up conditional triggers that activate different security protocols based on your home’s occupancy status or time of day. The platform’s robust API support means you can expand functionality by incorporating additional smart devices or services as your needs grow.
Building your own Raspberry Pi security system offers a cost-effective and highly customizable alternative to commercial solutions. Throughout this project, you’ve learned how to combine hardware components, configure software, and implement AI features to create a sophisticated security setup tailored to your specific needs. The system’s flexibility allows for continuous improvement and expansion, whether you want to add more cameras, implement additional sensors, or enhance the AI capabilities for better threat detection.
One of the greatest advantages of this DIY approach is the valuable learning experience it provides in programming, networking, and system integration. As your skills grow, you can explore advanced features like facial recognition, integration with smart home systems, or even developing mobile applications for remote monitoring.
Remember that security is an evolving concern, so regularly update your system’s software and explore new ways to enhance its capabilities. Whether you’re protecting your home or workspace, this Raspberry Pi security system serves as an excellent foundation that can grow alongside your security needs while maintaining complete control over your privacy and data.