
Start by selecting materials such as wood, acrylic, or 3D-printed plastic for your custom Raspberry Pi case. Measure your Raspberry Pi and components to ensure a snug fit, allowing for necessary ventilation and access to ports. Design your case using CAD software or online tools, taking inspiration from existing projects or your creativity. Construct your case by cutting and assembling the chosen materials, using adhesives or screws for durability, and personalize with paint or decals to match your project theme.
Why Customize Your Raspberry Pi Case?
Personalization
Custom Raspberry Pi cases offer an exciting way to express personal style while enhancing the aesthetic of your tech setup. By designing your own case, you have the freedom to tailor every detail—from color schemes and materials to thematic designs that reflect your interests and passions. Whether you prefer the sleek elegance of acrylic, the warmth of wood, or the futuristic appeal of 3D-printed solutions, the possibilities are endless. This personal touch not only showcases individuality but also inspires creativity, making technology more engaging and accessible. Dive into the world of custom cases and transform your Raspberry Pi project into a unique work of art.
Improved Functionality
Custom Raspberry Pi cases are more than just aesthetic upgrades; they significantly improve functionality by enhancing cooling and usability. A well-ventilated case can increase airflow and incorporate heat sinks or fans, preventing overheating and prolonging the lifespan of your device. Moreover, custom designs offer better access to crucial ports, making it easier to connect peripherals without hassle. This is especially beneficial for tech enthusiasts working on intricate projects requiring frequent adjustments. For educators and hobbyists, the increased usability of a tailored case can streamline project setup and execution, allowing more time for creativity and exploration in your Raspberry Pi endeavors.
Protection and Durability
A well-designed custom Raspberry Pi case offers crucial protection and durability, ensuring your device remains safe from harm. Whether you’re setting up a static project on your desk or working on a more adventurous setup like a solar-powered Raspberry Pi, a case is fundamental. It shields the delicate components from dust, spills, and accidental knocks that can easily damage circuit boards. Moreover, it helps in managing heat distribution, preventing overheating during intensive operations. With the added benefit of customizable designs, you can create a case that not only fits your aesthetic but also enhances the longevity of your Raspberry Pi, making it a resilient partner in your tech projects.
Materials and Tools You’ll Need
Common Materials
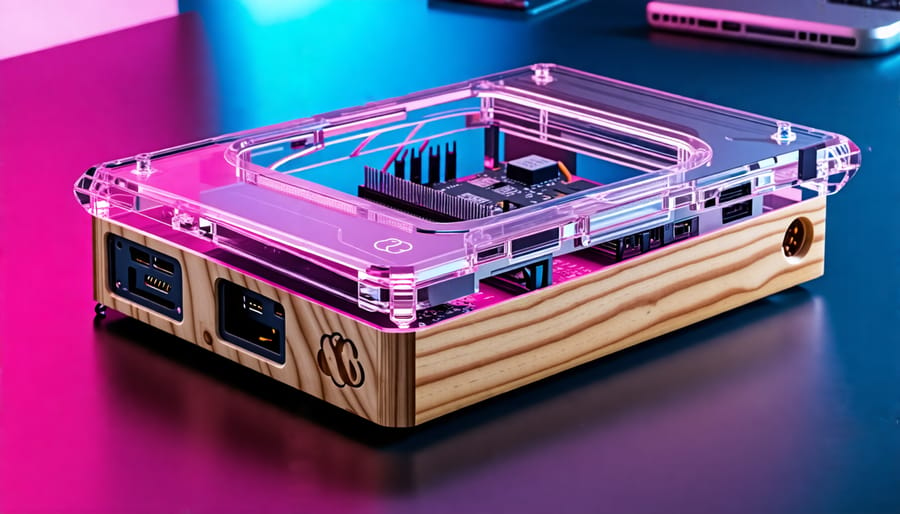
When it comes to crafting a custom Raspberry Pi case, selecting the right material is key not only for aesthetics but also for functionality. Acrylic is a popular choice for many hobbyists, thanks to its transparency and ease of cutting and engraving. It allows you to showcase the Raspberry Pi’s internals and add personalized designs. However, it can be fragile and prone to cracking under pressure.
Wood offers a warm and classic appeal, with the added benefit of easy customization using basic woodworking tools. It’s sturdy and can provide better heat insulation; however, it lacks the translucency of acrylic, and moisture can potentially warp it over time.
Metal, on the other hand, provides superior durability and heat dissipation, making it ideal for projects involving high-performance computing. Metals like aluminum are lightweight yet sturdy, but they require specialized tools for cutting and assembling, which might be daunting for beginners.
Ultimately, the choice of material should align with your project needs and personal skill level, guiding your creativity and functionality hand in hand.
Essential Tools
Building a custom Raspberry Pi case requires a selection of essential tools to transform your vision into reality. First, acquire precise cutting tools, such as a craft knife or a Dremel tool, handy for shaping materials like acrylic or wood. Accurate measurements are key, so a ruler or measuring tape is indispensable for ensuring your case fits snugly around your device. Secure your creation with appropriate adhesives, such as super glue or double-sided tape, which offer strong bonds without the bulkiness of screws. Lastly, keep sandpaper on hand for smoothing edges, ensuring a professional look for your Raspberry Pi project.
Designing Your Custom Raspberry Pi Case
Layout and Dimensions
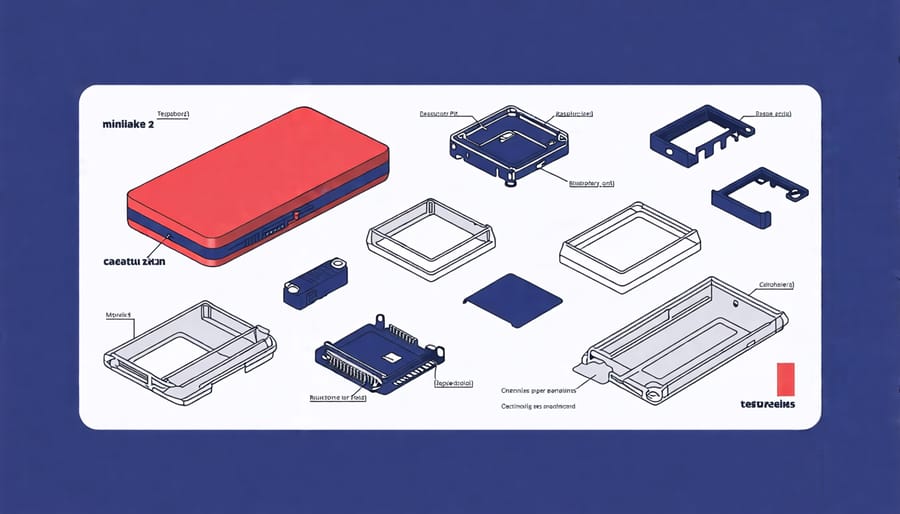
Creating a custom Raspberry Pi case starts with planning the layout and dimensions to ensure all components fit perfectly. First, identify the specific Raspberry Pi model and any additional components like hats, fans, or heat sinks that you’ll be using. Measure each component carefully, noting the overall footprint you’ll need. Consider not just the base dimensions but also the height needed for components mounted on top. It’s crucial to keep in mind any ports or connectors that need access, ensuring they’re not blocked. Sketch a basic design layout, or use CAD software if you’re comfortable with digital tools, to visualize where each piece will sit. Planning helps avoid overcrowding or alignment issues and creates a more seamless and functional case designed to support your unique Raspberry Pi project setup efficiently.
Adding Custom Features
When customizing your Raspberry Pi case, incorporating unique features can greatly enhance both its functionality and aesthetic appeal. Adding an additional cooling system, such as small fans or heat sinks, can be crucial if you’re running intensive applications, helping to maintain optimal performance and prevent overheating. LED indicators are another exciting feature, offering a visual display of your Raspberry Pi’s status or activity. These can be simply connected to GPIO pins and programmed to indicate various processes. Furthermore, effective cable management is key in keeping your setup tidy and efficient. Integrating custom grooves or clips within the case can help organize wires, reducing clutter and preventing potential damage. With these modifications, your Raspberry Pi case not only serves as a protective shell but also enhances your project’s overall functionality and style.
Step-by-Step Case Construction
Cutting and Assembling the Shell
To begin cutting and assembling your custom Raspberry Pi case, gather all necessary materials, including precision cutting tools, measuring instruments, and safety gear. Start by sketching out your design on the chosen material, such as acrylic or wood, making sure to account for the Raspberry Pi component layout to ensure proper fitting. Using a ruler and a cutting tool—like a laser cutter for precision or a fine-toothed saw—carefully cut each piece according to your design specifications. Employ clamps or a vice to keep the material steady during cutting for clean edges.
Once all pieces are cut, dry-fit them together to ensure they align perfectly. If adjustments are required, fine sandpaper can help smooth edges and ensure a snug fit. For assembly, use screws, bolts, or an adhesive suitable for your material. Begin with the base, and work your way up, ensuring each joint is secure and aligned. Throughout the process, double-check the fit of your Raspberry Pi to confirm everything stays aligned. This hands-on project not only enhances your DIY skills but also brings a personal touch to your computing setup, boosting both functionality and aesthetics.
Finishing Touches
To perfect your custom Raspberry Pi case, adding finishing touches like painting and polishing is crucial. Start by selecting a paint suitable for your case material—spray paints often work wonders for a smooth, even coat. Ensure your work area is well-ventilated, and apply several light coats, allowing ample drying time between layers to avoid drips or uneven texture. Primer can help the paint adhere better, especially on plastic or metal surfaces. Once the paint is dry, a clear sealant can protect the finish and add shine. Next, use fine-grit sandpaper or a polishing cloth to buff out any imperfections or rough edges, creating a sleek, professional look. Polishing creams can also add luster to transparent cases, enhancing their appearance. To personalize your case further, consider adding decals or labels with a theme that matches your project. Each detail enhances the uniqueness of your Raspberry Pi setup, making it not only functional but visually appealing.
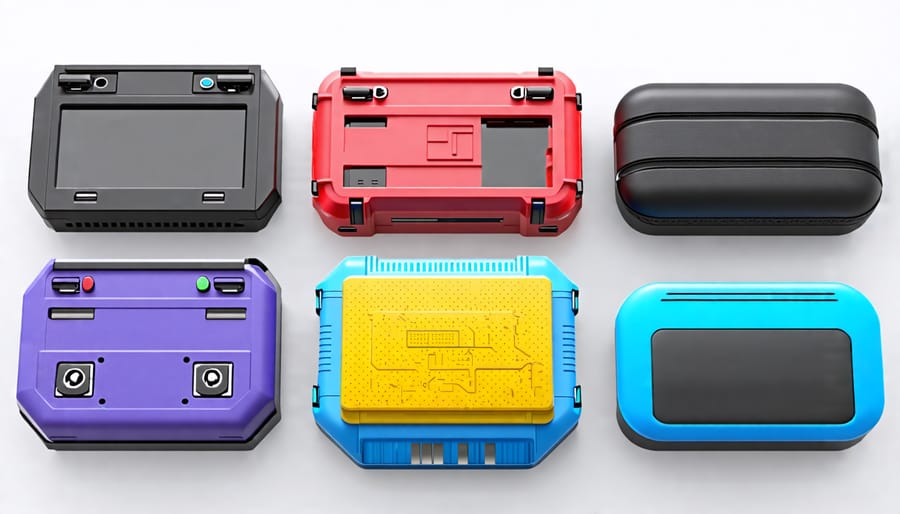
Showcase: Inspiring Custom Raspberry Pi Case Projects
Explore the creativity sparked by Raspberry Pi enthusiasts who have transformed simple boards into truly unique devices with custom cases. Each project tells a story of innovation and passion, encouraging you to bring your own ideas to life. Take, for example, the retro gaming case—created by James Morgan, an ardent hobbyist. By repurposing an old Super Nintendo shell and integrating a Raspberry Pi, James delivers not just a gaming console but a nostalgic artifact that bridges past and present.
Another inspiring project is Lisa Tran’s “Nature Pi” case, which mimics the look and feel of a tiny terrarium. Using a transparent acrylic box and artificial plants, she combines aesthetics with functionality, providing ventilation and accessibility to hardware components. Lisa explains her approach: “I wanted something beautiful and utilitarian that could sit comfortably in any room.”
For educators, look no further than Ian Fox’s classroom-safe case. Engineered from durable, food-safe materials, it not only protects the device but also withstands classroom rigors. Ian says, “This case invites students to engage with technology safely.”
These showcases prove that your Raspberry Pi can be both functional and an expression of personal style. Dive into the realm of custom Raspberry Pi cases; you might find your next DIY project is just a spark of inspiration away.
Conclusion
Creating a custom Raspberry Pi case not only enhances the aesthetic appeal of your project but also provides protection and personalization tailored to your unique needs. Embracing the challenge of designing and building your case can unlock a world of creativity and innovation, allowing you to transform your Raspberry Pi setups into truly unique creations. This hands-on experience enriches your understanding of design and materials while sparking further inspiration. Whether you’re showcasing a Smart Mirror with Raspberry Pi or another inventive application, embarking on this journey is as rewarding as it is educational. So dive in, unleash your creativity, and bring your Raspberry Pi projects to life!