Unleash the power of portability with a battery-powered Raspberry Pi Zero! This tiny, credit card-sized computer packs a punch, offering endless possibilities for mobile projects, from wireless sensors to wearable tech. With its low power consumption and compact form factor, the Pi Zero is the perfect foundation for your next untethered innovation. In this comprehensive guide, we’ll walk you through the essential components, step-by-step assembly, and battery optimization techniques to help you bring your ideas to life. Get ready to break free from the constraints of wires and outlets as you embark on a journey of portable computing with the battery-powered Raspberry Pi Zero!

Gathering the Components
Raspberry Pi Zero
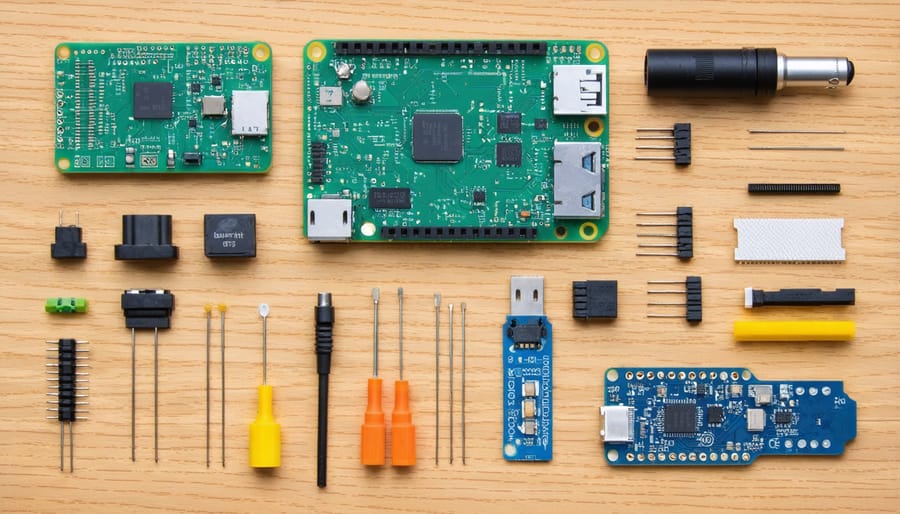
The Raspberry Pi Zero is a compact and affordable single-board computer that’s ideal for battery-powered projects. When choosing a Pi Zero model, consider your project requirements. The Pi Zero W includes built-in Wi-Fi and Bluetooth, making it suitable for wireless applications, while the Pi Zero WH adds a pre-soldered GPIO header for easier prototyping. The Pi Zero 2 W offers improved performance with a quad-core processor, making it a good choice for more demanding tasks. All models have a single micro USB port for power and data, a mini HDMI port for video output, and a microSD card slot for storage. Keep in mind the power consumption of each model when selecting a battery.
Battery Pack
When powering your Raspberry Pi Zero, you have several battery pack options to consider. The most common choices are lithium-ion (Li-ion) and lithium-polymer (LiPo) batteries, which offer a good balance between capacity, size, and output. Look for battery packs with a capacity of at least 2000mAh to ensure a decent runtime for your projects. It’s also essential to choose a battery with a stable 5V output to safely power your Pi Zero. Compact battery packs are ideal for portable projects, while larger capacities are suitable for stationary builds. Remember to consider the battery’s dimensions and weight when selecting a pack to ensure it fits your project’s physical constraints. Some popular battery options include the official Raspberry Pi Power Bank, Anker PowerCore, and Adafruit’s range of Li-ion and LiPo batteries. Always prioritize safety and compatibility when choosing a battery pack for your Raspberry Pi Zero.
Other Accessories
To complete your battery-powered Raspberry Pi Zero setup, consider additional accessories. A protective case safeguards your Pi from damage while maintaining portability. High-quality microSD cards ensure reliable storage for your operating system and projects. Depending on your needs, you may want to include peripherals like a mini HDMI adapter for display output, a USB hub for connecting input devices or sensors, or a camera module for computer vision applications. These accessories enhance the functionality and versatility of your battery-powered Pi Zero.
Assembling Your Battery-Powered Pi Zero

Connecting the Battery
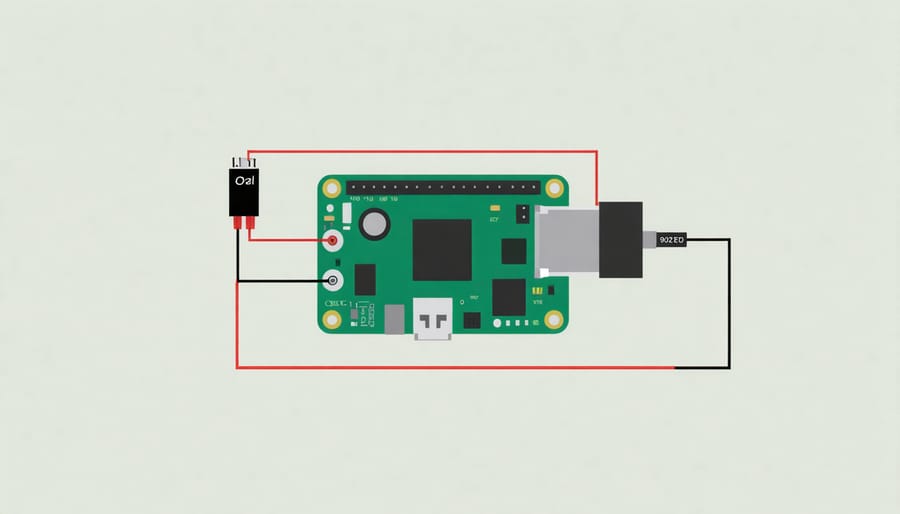
Connecting the battery pack to your Raspberry Pi Zero is a straightforward process, but it’s essential to follow proper safety precautions to avoid damaging your device. First, ensure that your battery pack’s voltage output is compatible with the Pi Zero’s requirements (typically 5V). Next, identify the positive and negative terminals on both the battery pack and the Pi Zero’s GPIO pins. It’s crucial to double-check the polarity before making any connections.
To connect the battery pack, you can either solder the wires directly to the GPIO pins or use a compatible connector, such as a JST plug. If soldering, be careful not to apply excessive heat, as it may damage the Pi Zero. When using a connector, ensure a secure fit to prevent any loose connections.
Once you’ve connected the battery pack, it’s a good idea to use a multimeter to verify the voltage and polarity before powering on your Pi Zero. This extra step can save you from potential short-circuits or other electrical issues. With the battery pack properly connected, you’re now ready to enjoy the freedom and flexibility of a portable, battery-powered Raspberry Pi Zero!
Configuring the Software
To get started, download and install the Raspberry Pi OS onto an SD card using the official Raspberry Pi Imager tool. For optimal battery life, choose the Lite version without a desktop environment. Once the OS is installed, boot up your Pi Zero and connect it to a monitor, keyboard, and mouse for initial setup.
Access the Pi’s configuration menu by running “sudo raspi-config” in the terminal. Here, you can adjust various settings to optimize battery life, such as disabling unnecessary peripherals like HDMI, LEDs, and Bluetooth. Also, consider lowering the CPU frequency and disabling overclocking to reduce power consumption.
Next, update your Pi’s software by running “sudo apt update” and “sudo apt upgrade” to ensure you have the latest power management features. Install any necessary software or libraries for your specific project, keeping in mind that minimizing the number of running processes will help extend battery life.
Finally, configure your Pi to automatically shut down when the battery reaches a certain threshold to prevent damage from over-discharge. You can achieve this by using a battery monitoring tool like “bcm2835-power-monitor” or writing a custom script to monitor voltage levels and initiate a safe shutdown when necessary.
Fitting Everything in the Case
When fitting everything into the case, careful planning and cable management are key. Start by securing the Raspberry Pi Zero to the case using standoffs or mounting tape. Arrange the battery pack and any additional components, like sensors or modules, in a way that maximizes space and minimizes clutter. Use zip ties or adhesive cable clips to keep wires tidy and prevent them from interfering with other components. If your case has multiple compartments, utilize them to separate the battery from the Pi and accessories. Consider using a small piece of foam or padding to prevent the battery from shifting during use. Double-check that all connections are secure and that no wires are being pinched or strained before closing the case.

Project Ideas and Inspiration
Wearable Tech
The Raspberry Pi Zero’s compact size and low power consumption make it an ideal choice for wearable tech projects. With a little creativity, you can transform the Pi Zero into a smart accessory or integrate it into clothing. Imagine a jacket with built-in LED displays controlled by the Pi Zero, or a smart watch that runs on Raspberry Pi power. The possibilities are endless!
To get started, you’ll need to consider power management carefully. Choose a lightweight, rechargeable battery that can provide enough power for your project without adding too much bulk. Lipo batteries are a popular choice for wearable projects due to their slim profile and high energy density. You may also want to explore solar charging options for longer battery life.
When designing your wearable, think about how you’ll protect the Pi Zero and its components from the elements. Waterproofing and durability are key considerations, especially for outdoor use. With the right materials and a bit of ingenuity, you can create a stylish and functional wearable that showcases the power of the Raspberry Pi Zero.
Mobile Hacking Tool
The battery-powered Raspberry Pi Zero is an excellent tool for mobile penetration testing and network analysis. By installing Mobile Hacking Tool like Kali Linux or Parrot OS on your Pi, you can transform it into a portable hacking device. These operating systems come pre-loaded with a wide range of security tools, including packet sniffers, vulnerability scanners, and wireless network analyzers. With your battery-powered Pi, you can discreetly assess the security of networks on the go, whether you’re at a coffee shop, airport, or any other location. The compact size and low power consumption of the Pi Zero make it an ideal choice for mobile pentesting, allowing you to conduct network reconnaissance and identify potential vulnerabilities without drawing attention to yourself. By leveraging the power of your portable Pi, you can enhance your cybersecurity skills and contribute to a safer online environment.
Pocket Media Server
The Raspberry Pi Zero’s compact size and low power consumption make it an ideal candidate for creating a portable media server. With a few additional components, you can transform your battery-powered Pi Zero into a pocket-sized file and streaming server. By connecting a USB storage device or an SD card loaded with your favorite media files, you can access your content on the go. Setting up a lightweight media server software, such as Plex or Kodi, allows you to stream videos, music, and photos to other devices over a local network or even the internet. This pocket media server project is perfect for sharing content with friends and family during gatherings or enjoying your media collection while traveling without relying on internet connectivity.
Extending Battery Life
To maximize the Pi’s battery life, several advanced techniques can be employed. One effective method is to reduce the clock speed and disable unused hardware components, such as HDMI, Bluetooth, and LEDs, when they are not needed. This can be achieved by modifying the config.txt file or using specialized scripts.
Another approach is to optimize your code for power efficiency. Avoid using busy loops that continuously consume CPU cycles, and instead, utilize sleep functions or event-driven programming techniques. Additionally, consider using lightweight programming languages and libraries that have lower resource requirements.
Implementing a power management strategy is crucial for long-term battery-powered projects. You can use tools like “vcgencmd” to monitor the Pi’s power consumption and identify power-hungry processes. Based on this information, you can make informed decisions about which features to disable or optimize.
In situations where the Pi needs to operate for extended periods without user interaction, you can implement deep sleep modes. By configuring the Pi to enter a low-power state when idle and wake up only when necessary, you can significantly prolong battery life. Tools like “gpio-poweroff” and “rtc-sleep” can help automate this process.
Lastly, selecting the right battery and power management hardware is essential. Opt for high-capacity batteries with low self-discharge rates, such as lithium-ion or lithium-polymer batteries. Pair them with efficient voltage regulators and power management ICs to ensure stable and efficient power delivery to the Pi.
By combining these advanced techniques and carefully monitoring power consumption, you can drastically extend the battery life of your Raspberry Pi Zero, enabling it to operate for prolonged periods without the need for frequent recharging.
Conclusion
In conclusion, a battery-powered Raspberry Pi Zero opens up a world of possibilities for portable projects and innovative applications. By combining the right components, following the assembly instructions, and implementing battery optimization techniques, you can create a versatile and efficient device that suits your specific needs. Whether you’re building a mobile sensor hub, a wearable gadget, or an educational tool, the Pi Zero’s low power consumption and compact size make it an ideal choice. With the knowledge gained from this article and a bit of creativity, you’re now equipped to try their own battery Pi projects and bring your ideas to life. So go ahead, unleash your inner inventor, and embark on an exciting journey of exploration and innovation with your battery-powered Raspberry Pi Zero!


