

Leverage the power of a Raspberry Pi and Security Onion to create an affordable, effective network security monitoring solution. Combining these open-source tools enables you to detect threats, gain visibility into your network traffic, and enhance your overall security posture. By following a step-by-step guide, you can transform your Raspberry Pi into a dedicated Raspberry Pi security monitoring device, capable of analyzing network packets, identifying suspicious activities, and generating alerts. With its low cost and flexibility, this Raspberry Pi-based Security Onion setup is ideal for home labs, small businesses, and educational environments looking to implement robust network security monitoring without breaking the bank. Dive into this powerful combination and take control of your network security today.
What is Security Onion?

Open source intrusion detection
Security Onion harnesses the power of open source intrusion detection tools like Snort, Suricata, Zeek, and Wazuh to provide comprehensive network security monitoring on the Raspberry Pi. These tools work together to analyze network traffic, detect suspicious activities, and generate alerts. Snort and Suricata are intrusion detection systems that use rule-based engines to identify potential threats, while Zeek focuses on network analysis and behavior monitoring. Wazuh adds host-based intrusion detection capabilities, monitoring system logs and file integrity. By combining these tools, Security Onion creates a robust, multi-layered approach to network security, empowering users to detect and respond to threats effectively on their Raspberry Pi.
Network visibility
Security Onion leverages powerful tools like Zeek (formerly Bro) and Suricata to provide deep packet inspection capabilities on your Raspberry Pi. These tools analyze network traffic in real-time, identifying potential security threats, suspicious activities, and protocol anomalies. Additionally, Security Onion enables full packet capture, allowing you to record and store all network traffic for later analysis and forensic investigations. With these features, you gain comprehensive visibility into your network, making it easier to detect and respond to security incidents. By deploying Security Onion on a Raspberry Pi, you can create an affordable yet effective network monitoring solution that helps safeguard your home or small office network from potential threats.
Setting Up Security Onion on Raspberry Pi
Hardware requirements
To run Security Onion effectively on a Raspberry Pi, you’ll need a Raspberry Pi 4 with at least 4GB of RAM. While it’s possible to use a Raspberry Pi 3B+ or earlier models, the limited memory and processing power may impact performance and functionality. In terms of storage, a minimum of a 64GB microSD card is recommended to accommodate the Security Onion image and provide sufficient space for log storage and analysis. However, for optimal performance and long-term use, consider using a larger capacity microSD card or an external SSD connected via USB 3.0 for increased storage and faster read/write speeds.
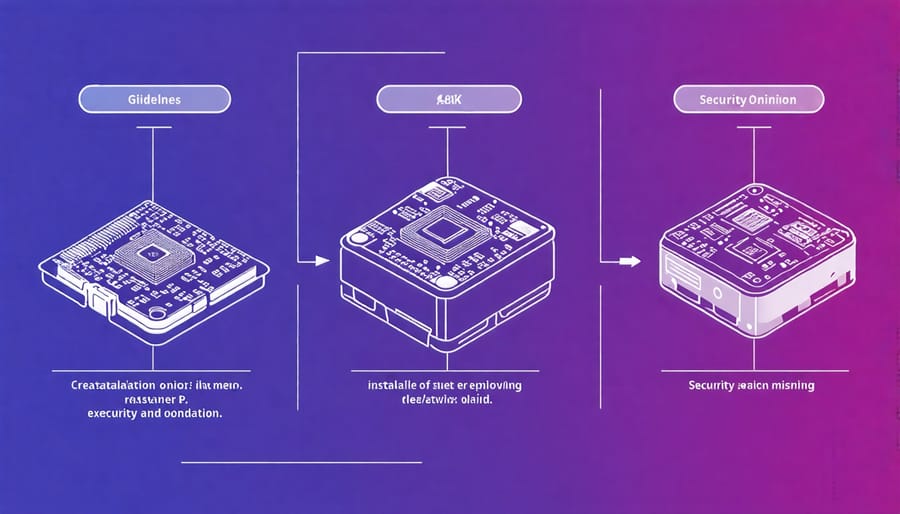
Installation steps
To install Security Onion on your Raspberry Pi, start by downloading the latest Security Onion ISO image from the official website. Ensure you choose the ARM version specifically designed for Raspberry Pi. Next, use a tool like Etcher or Raspberry Pi Imager to write the ISO image to a high-quality micro SD card with at least 16GB capacity.
Once the image is written, insert the micro SD card into your Raspberry Pi and power it on. The initial boot process may take several minutes as Security Onion sets up the necessary components. When prompted, log in using the default credentials (username: onion, password: onion).
After logging in, run the ‘sudo soup’ command to launch the Security Onion Setup wizard. This user-friendly interface will guide you through the configuration process. Begin by selecting ‘Configure’ to start the setup.
Choose your desired network interfaces for management and monitoring. The management interface is used for accessing the web interface and SSH, while the monitoring interface is responsible for capturing network traffic. If you have multiple network adapters, select the appropriate ones based on your setup.
Next, configure the hostname and domain name for your Security Onion instance. Choose a descriptive hostname that reflects the purpose of your deployment. Set a strong password for the ‘onion’ user account to enhance security.
In the following step, select the services you want to enable on your Security Onion instance. For a Raspberry Pi deployment, it’s recommended to start with the essential services like Zeek, Suricata, and Wazuh. You can always enable additional services later based on your specific requirements.
Finally, review your configuration settings and click ‘Proceed’ to begin the installation process. Security Onion will now download and install the necessary components, which may take some time depending on your internet connection speed.
Once the installation is complete, you can access the Security Onion web interface by opening a web browser on a device connected to the same network and navigating to the IP address of your Raspberry Pi. Log in using the ‘onion’ username and the password you set during the setup process.
Congratulations! You have successfully installed Security Onion on your Raspberry Pi. You can now proceed to configure your monitoring rules, customize dashboards, and start analyzing network traffic for potential security threats.
Initial configuration
To get started with Security Onion on your Raspberry Pi, you’ll need to perform some initial configuration. First, connect a monitor, keyboard, and mouse to your Pi. Power it on and log in with the default credentials. Open a terminal and run the setup wizard by entering ‘sudo sosetup’. Follow the prompts to configure basic settings like hostname, IP address, and password. Choose the “Evaluation Mode” for a quick setup. The wizard will guide you through selecting interfaces to monitor and enabling key services. Once complete, reboot your Pi, and you’ll be ready to start exploring Security Onion’s powerful features for network security monitoring.
Deploying Your Raspberry Pi Security Onion Sensor
Placement considerations
When deploying your Raspberry Pi Security Onion sensor, strategic placement is crucial for maximizing network visibility and coverage. Consider placing the device at a central network location, such as near your main router or switch, to ensure it can monitor traffic from all connected devices. If you have a larger network, you may need multiple sensors to cover different network segments effectively.
Ensure the Raspberry Pi is connected to a reliable power source and has a stable Ethernet connection to your network. Avoid placing the device in areas with high electromagnetic interference or extreme temperatures, as this can impact its performance. Consider using a case to protect the Raspberry Pi from dust and physical damage.
For optimal security, place the sensor in a secure location with limited physical access to prevent tampering or unauthorized modifications. Regularly monitor the sensor’s performance and logs to ensure it is functioning as expected and detecting potential threats on your network.

Connecting to the network
To connect your Raspberry Pi running Security Onion to the network you want to monitor, you’ll need two network interfaces. One interface will be used for management, allowing you to access and configure the device. The other interface will be set to promiscuous mode, enabling it to passively capture network traffic for analysis.
Start by connecting the management interface to your main network or router. This can be done using an Ethernet cable or by configuring the Raspberry Pi’s Wi-Fi settings. Ensure that the Raspberry Pi is assigned a static IP address to maintain consistent access.
Next, connect the second network interface to the network you wish to monitor. This could be a SPAN port on a switch, a network tap, or a mirrored port. It’s crucial to ensure that this interface can see all the relevant network traffic you want to analyze.
Once physically connected, configure the monitoring interface within Security Onion to capture traffic. This typically involves setting the interface to promiscuous mode and defining capture filters to focus on specific traffic of interest.
By properly connecting and configuring the interfaces, your Raspberry Pi running Security Onion will be able to effectively monitor and analyze the network traffic, providing valuable security insights and threat detection capabilities.
Analyzing Alerts and Threat Hunting
Alert triage
When analyzing intrusion detection alerts in Security Onion, prioritize them based on severity and potential impact. Focus on high-severity alerts indicating successful exploits or compromises. Investigate the source and destination IP addresses, ports, and protocols involved. Look for patterns and correlations between alerts to identify coordinated attacks. Use Security Onion’s tools like Sguil and Squert to visualize and analyze alert data. Consult threat intelligence sources to determine if the detected activity matches known malware signatures or attack techniques. Document your findings and take appropriate actions, such as blocking malicious IP addresses or updating firewall rules. Regular alert triage helps you stay on top of potential threats and maintain a secure network.
Pivoting and investigation
Security Onion’s network visibility features enable you to quickly pivot from alerts and dig deeper during incident investigations. When an alert is triggered, you can easily access the related network traffic and dive into packet-level details using tools like Wireshark or NetworkMiner. This allows you to analyze the suspicious activity, identify the source and destination of the traffic, and uncover any malicious payloads or communication patterns. By examining the network logs and session data, you can trace the attacker’s movements, determine the scope of the compromise, and gather crucial evidence for remediation. Security Onion’s intuitive web interface, Sguil, provides a centralized view of alerts, allowing you to quickly pivot to the relevant data and perform in-depth investigations. With the ability to correlate events across multiple sensors and data sources, Security Onion empowers you to connect the dots, reconstruct the attack timeline, and make informed decisions during incident response.
Conclusion
Combining a Raspberry Pi with Security Onion offers an affordable and effective solution for network security monitoring. This setup provides a cost-effective way to gain visibility into network traffic, detect potential threats, and enhance overall security posture. With its user-friendly interface and powerful features, Security Onion on Raspberry Pi empowers tech enthusiasts, hobbyists, and educators to explore the world of network security hands-on. By following the steps outlined in this article, you can easily set up and deploy your own Raspberry Pi-based security monitoring system. Whether you’re looking to protect your home network, learn about network security, or create an educational tool, this combination is worth trying out. So, grab your Raspberry Pi, install Security Onion, and start monitoring your network like a pro!