
Begin by selecting a Raspberry Pi model compatible with machine learning projects, such as the Raspberry Pi 4, for optimal processing power. Next, set up your Raspberry Pi with a robust OS like Raspberry Pi OS and install essential libraries for machine learning, such as TensorFlow Lite or OpenCV, to facilitate streamlined project development. Dive into creating a basic image recognition project—start with collecting and annotating data, then train your model to identify simple objects like fruits or everyday items using pre-trained models. Explore innovative applications by integrating sensors; deploy a real-time motion detection system using a camera module to enhance security or automate tasks. Each step not only ignites creativity but also sharpens technical skills, ensuring a rewarding learning experience for both beginners and seasoned tech enthusiasts.
Essential Components and Setup
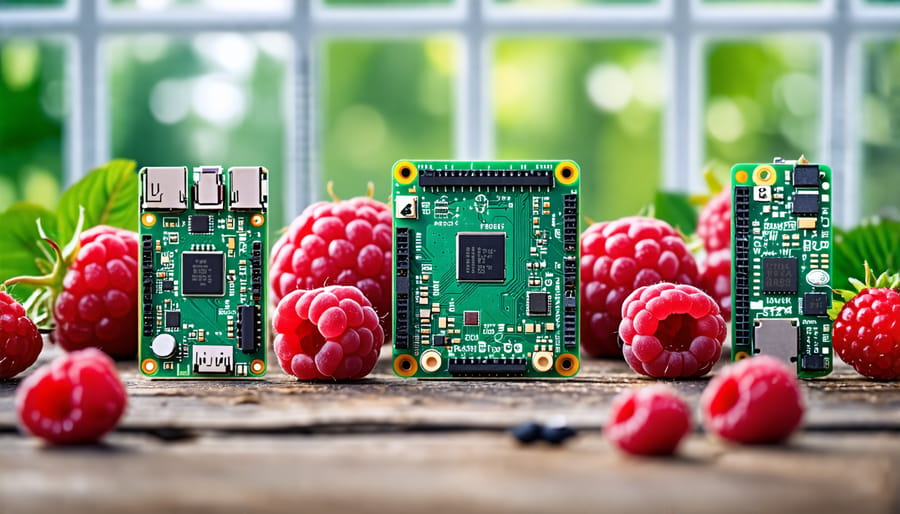
Choosing the Right Raspberry Pi Model
When embarking on machine learning projects using a Raspberry Pi, selecting the right model is pivotal. The latest Raspberry Pi 4 offers impressive processing power and RAM options up to 8GB, making it ideal for running more complex ML algorithms. However, beginners or cost-conscious hobbyists might find the Raspberry Pi 3 B+ perfectly adequate for less demanding tasks. If you’re interested in creating a portable project, consider a solar-powered Raspberry Pi setup to take advantage of renewable energy. The Raspberry Pi Zero is another option, celebrated for its affordability and compact size, though it’s best for light ML tasks due to its limited processing capabilities. For a deeper dive into the specifications and how they align with your project needs, check out our Raspberry Pi model comparison. Whichever route you choose, Raspberry Pi serves as an excellent platform to explore the fascinating world of machine learning.
Software and Libraries
To embark on machine learning projects using Raspberry Pi, you’ll need a mix of essential software and libraries that are both accessible and powerful. The first step is setting up an operating system tailored for the Raspberry Pi, such as Raspberry Pi OS, which is Linux-based and comes with many pre-installed tools suitable for development. Once your OS is ready, you’ll want to install Python, the go-to programming language for machine learning projects due to its simplicity and extensive support.
A pivotal component is the installation of machine learning libraries. TensorFlow Lite is a lightweight version of TensorFlow, ideal for devices with limited computational power like the Raspberry Pi. TensorFlow Lite allows for the integration and execution of machine learning models efficiently. Alongside, Scikit-learn offers robust tools for data mining and provides simple tools for building predictive models. Keras, which acts as an interface for TensorFlow, can be used for quicker model development and experimentation.
For computer vision projects, OpenCV is crucial. This library empowers the Raspberry Pi to process and analyze images at lightning speed, enabling projects ranging from face recognition to object detection. The RPi.GPIO library is also good to have, especially if you plan to interface your models with other hardware components for interactive projects.
Additionally, Jupyter Notebook offers an interactive environment to write code, visualize data, and document your project simultaneously, making it an invaluable tool for education and collaboration. Installing these tools and libraries on a Raspberry Pi sets the foundation for exploring exciting machine learning projects. With a bit of tinkering, you’ll be transforming raw data into insightful predictions and intelligent interactions in no time.
Top Machine Learning Projects for Raspberry Pi Enthusiasts
Building an AI-based Face Recognition System
Are you ready to embark on a tech-savvy journey into the world of face recognition? Building an AI-based face recognition system with your Raspberry Pi is not only a fascinating project but also a practical one that can enhance your home security. Let’s dive into the step-by-step process of creating this innovative system.
To start, you’ll need a Raspberry Pi 4, a camera module or USB webcam, a microSD card, and an internet connection. Begin by installing Raspberry Pi OS on your microSD card and setting up your Pi with the essentials. For a more comprehensive guide on related projects, consider exploring various Raspberry Pi security projects.
Next, update and upgrade your system by running `sudo apt-get update` and `sudo apt-get upgrade` in the terminal. Install the necessary Python libraries: OpenCV, NumPy, and facial recognition libraries, which can be installed via pip.
Now, connect your camera to the Raspberry Pi and ensure it’s enabled in the configuration. Start by reading the camera input and capturing images. Utilize OpenCV to detect faces within the captured frames. You’ll then employ the face recognition library to identify captured faces using a pre-trained model. The library works by encoding facial features and comparing them against a dataset of known faces.
For home security, you can configure the system to trigger alerts or automatically lock doors when an unrecognized face is detected. Experiment with different configurations and features to tailor the system to your needs. This hands-on project is perfect for enhancing your Raspberry Pi skills and creating a customizable security solution.
Embrace the challenge and enjoy the sense of accomplishment as you create a system that blends technology with innovation. With patience and creativity, you’ll unlock the potential of machine learning on a budget-friendly device.
Voice Command Recognition
Creating a voice-activated assistant using a Raspberry Pi is not only a fascinating project but also an excellent way to delve into the world of machine learning. This hands-on project will guide you through developing a voice command recognition system, transforming your Raspberry Pi into an intelligent assistant that responds to vocal commands. Here’s how you can get started.
First, gather your essential components: a Raspberry Pi (preferably with Wi-Fi capabilities), a USB microphone, a speaker or headphones, and an SD card with the latest Raspberry Pi OS installed. You’ll also need access to the internet for downloading software packages and libraries.
Begin by setting up your Raspberry Pi and ensuring it is connected to your network. Next, you need to install a few crucial software packages to facilitate voice recognition. Start with installing Python and pip, which will allow you to manage additional Python libraries. The key libraries for this project are `SpeechRecognition` and `PyAudio`; these enable your Raspberry Pi to capture and interpret voice inputs.
Once the setup is complete, it’s time to integrate machine learning models for speech-to-text conversion. You can utilize cloud-based services like Google’s Speech-to-Text API. Although this may require setting up an API key and understanding some basic API requests, it significantly enhances the accuracy of voice recognition.
Write a Python script that continuously listens for audio input using the microphone. Upon detecting a command, the script should process it—via the machine learning model—into text and then trigger specific actions based on recognized keywords. For example, saying “Turn on the light” could activate a GPIO pin connected to a light source.
Test and refine your voice command recognition system by adding more commands or adjusting the code to improve recognition accuracy. Experiment with increasing the complexity by incorporating additional functionalities and integrating other IoT devices.
This project not only enhances your programming skills but also offers a glimpse into the potential of how Raspberry Pi can be used to build intelligent, everyday solutions.
Automated Plant Watering System
Creating an automated plant watering system using machine learning and a Raspberry Pi is an exciting venture that combines hardware skills with AI. This project involves setting up a Raspberry Pi to control sensors that measure soil moisture and other environmental factors. By training a machine learning model, you can predict when plants need watering, optimizing water usage and ensuring plant health.
To begin, you’ll need a Raspberry Pi and sensors such as soil moisture probes, temperature, and humidity sensors. Connect these sensors to the Raspberry Pi’s GPIO pins, and use Python to collect and process data. The fun part is integrating machine learning. Train a model using collected data to recognize patterns indicating when a plant needs water. You can perform this training using popular libraries like TensorFlow or scikit-learn.
Once your model is trained, deploy it on the Raspberry Pi. Use it in real time to make decisions and automatically activate a water pump when moisture levels drop below a threshold. Not only does this project give you hands-on experience with both hardware and machine learning, but it also provides a practical solution for home gardening enthusiasts. With continuous training and data collection, your system will become more accurate over time, reflecting the true power of machine learning in a tangible way.

Tips for Optimizing Your Pi’s Performance
To maximize your Raspberry Pi’s performance for machine learning tasks, a few strategic adjustments can make a significant difference. Start by ensuring your system is up to date. Keeping your software current will often boost performance and security. Consider overclocking your Pi, which can improve processing speed. This will increase power consumption and heat, so ensure proper cooling with a heat sink or fan to prevent overheating. Reducing background processes is another effective strategy; keep unnecessary applications and services closed to allocate more resources to your machine learning tasks.
Memory management is crucial. Adjust the swap space, which is virtual memory on your SD card, to support larger datasets, but be cautious as excessive use can lead to wear and potential data corruption. Choose a high-quality SD card with fast read and write speeds to ensure quick data access. Utilizing a lightweight operating system like Raspberry Pi OS Lite can also free up valuable resources, providing more room for your models to maneuver.
Finally, optimize your machine learning models for the Raspberry Pi’s limited hardware. This might mean simplifying networks or using models specifically designed for edge devices. Frameworks like TensorFlow Lite or PyTorch Mobile can be helpful as they optimize models for performance on low-power devices. By following these tips, you’ll be able to harness the full potential of your Raspberry Pi in your machine learning projects.
Overcoming Common Challenges
Working on Raspberry Pi machine learning projects can be incredibly rewarding, but it’s not without its challenges. One common obstacle is limited computational power. The Raspberry Pi, while versatile, doesn’t have the processing capabilities of a full-fledged computer. To tackle this, optimize your models by using lightweight algorithms or pre-trained models specifically designed for resource-constrained environments. You can also use remote cloud servers for intensive training tasks, while running simpler inference tasks locally.
Another challenge is software compatibility. Ensure you’re using software libraries and tools that are compatible with Raspberry Pi’s ARM architecture. Platforms like TensorFlow Lite or PyTorch Mobile can be excellent choices for machine learning projects on Raspberry Pi.
Lastly, the initial setup can be daunting for beginners. Simplify this by following step-by-step tutorials and leveraging the large Raspberry Pi community for support and guidance. Engaging in forums and discussion groups can also provide valuable insights and problem-solving tips. By understanding and addressing these challenges, you can enjoy a smooth and exciting journey in Raspberry Pi machine learning projects.
Conclusion
Exploring machine learning with Raspberry Pi opens a world of opportunities for tech enthusiasts and educators. By starting with simple projects, you can gradually build the skills needed to create more complex applications. Dive into the exciting intersection of hardware and AI, and begin your innovative journey today!