
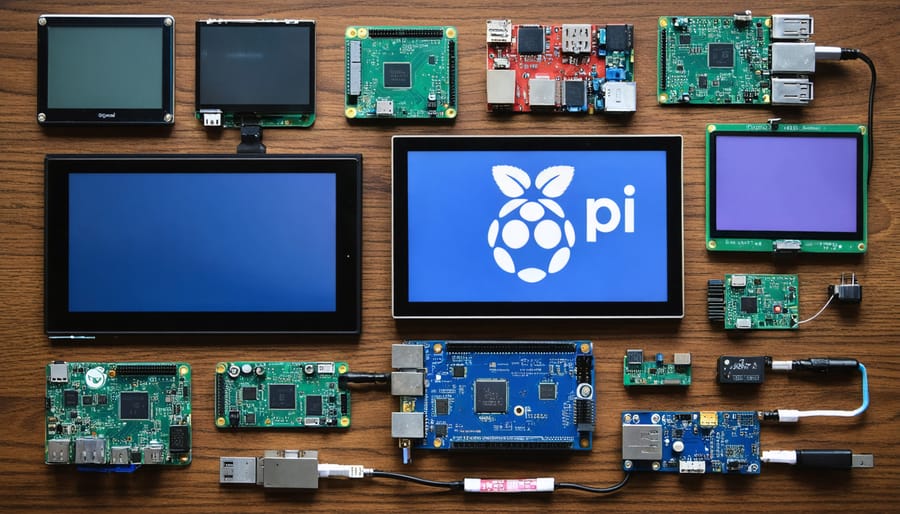
Transform your Raspberry Pi into a powerful visual computing platform with today’s diverse display options, ranging from compact LCD screens to full-sized HDMI monitors. Whether you’re building a portable retro gaming console, a smart home dashboard, or an industrial control panel, selecting the right display critically impacts your project’s success. Modern Raspberry Pi boards support multiple display interfaces including HDMI, DSI, DPI, and SPI, enabling resolutions from basic 480p up to crisp 4K output on compatible screens.
The display ecosystem has evolved significantly since the original Raspberry Pi, now offering solutions for every budget and use case. From the official 7-inch touchscreen display perfect for interactive projects, to third-party e-ink displays ideal for low-power applications, to professional-grade LCD panels for commercial deployments – each option presents unique advantages and technical considerations. Understanding these choices, their connection methods, and compatibility requirements ensures you’ll select the perfect display solution for your specific Raspberry Pi project needs.
Official Raspberry Pi Display Options
Official 7-inch Touchscreen Display
The official Raspberry Pi 7-inch touchscreen display stands as a premium solution for makers seeking reliable touch input and crisp visuals. This display features a vibrant 800×480 pixel resolution with 10-point capacitive touch capability, making it perfect for interactive projects and user interfaces. The screen connects directly to the Raspberry Pi’s DSI port, leaving the HDMI port free for additional displays.
What sets this display apart is its seamless integration with the Raspberry Pi ecosystem. It’s compatible with all Raspberry Pi models (except Pi 1 Model A and B) and requires minimal setup – simply connect the ribbon cable, and you’re ready to go. The display also supports mounting your display in a case for a professional finish.
The screen draws power directly from the Pi’s GPIO pins and typically consumes around 2.25W during operation. Its viewing angles of 70 degrees in all directions ensure good visibility for most applications. Common use cases include home automation control panels, portable gaming consoles, and digital signage projects. While the price point is higher than some alternatives, the quality and official support make it a worthwhile investment for projects requiring reliable touch input.
DSI Display Connection
The DSI (Display Serial Interface) connector is a dedicated display port found on most Raspberry Pi models, offering a direct and efficient way to connect compatible displays. This specialized connection uses a 15-pin flat ribbon cable and provides several advantages over other display options. The DSI interface supports high-resolution displays while consuming minimal system resources, making it ideal for projects requiring optimal performance.
One of the main benefits of DSI displays is their plug-and-play nature. Once connected, these displays typically work without requiring additional configuration or driver installation. The direct connection also ensures reliable performance and reduces potential compatibility issues that might arise with other connection methods.
The DSI port supports various official Raspberry Pi displays, including the popular 7-inch touchscreen display, which offers 800×480 resolution and capacitive touch input. These displays are particularly suitable for portable projects, embedded systems, and interactive applications where touch functionality is essential.
While DSI displays tend to be more expensive than some alternatives, they offer superior reliability and integration with the Raspberry Pi ecosystem, making them an excellent choice for long-term projects and professional applications.
HDMI Display Solutions
Computer Monitors
Standard computer monitors offer one of the most straightforward display solutions for your Raspberry Pi. Using the built-in HDMI port, you can connect virtually any modern monitor, making it an excellent choice for desktop-style setups. Most monitors will work right out of the box once you optimize your Raspberry Pi OS settings for the best resolution.
The Raspberry Pi supports both HDMI and DVI monitors (with an adapter), offering resolutions up to 1920×1200 on most models. For newer Pi 4 models, you can even utilize dual monitors through the two micro-HDMI ports, enabling a more productive workspace. When selecting a monitor, consider factors like resolution, refresh rate, and input options.
Budget-friendly options include repurposing old computer monitors or purchasing basic 1080p displays. For better visual quality, IPS panels offer superior color accuracy and viewing angles. Remember to check your monitor’s power consumption, as some larger displays might require more power than your Pi’s power supply can handle when using peripherals.
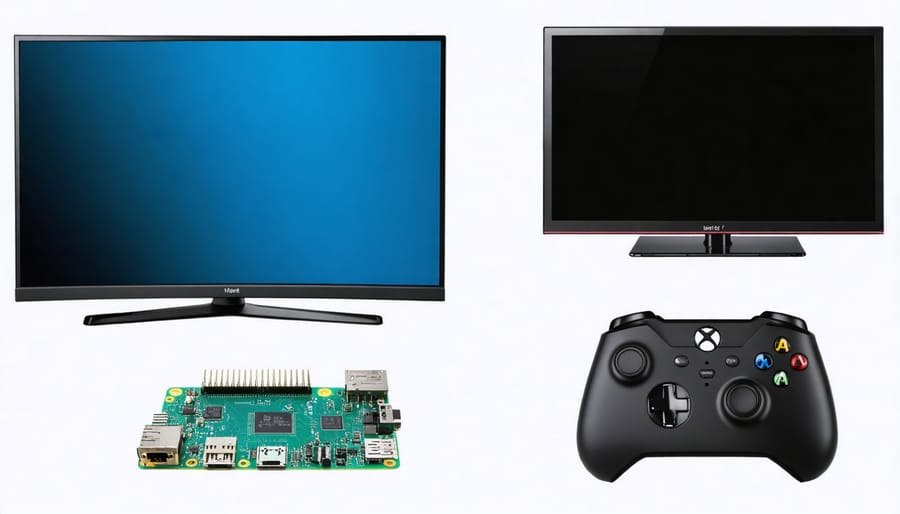
TV Screens
Television screens offer one of the most accessible display solutions for Raspberry Pi projects, thanks to the built-in HDMI port found on most Pi models. Nearly any modern TV with an HDMI input can serve as a display, making this option particularly cost-effective if you already own one. The Pi supports resolutions up to 4K on compatible models, though most users find 1080p provides the sweet spot between performance and visual quality.
When connecting to a TV, it’s important to consider the display settings in your Raspberry Pi configuration. Some TVs may experience overscan issues, where the edges of the screen are cut off. This can be easily adjusted through the raspi-config tool or by editing the config.txt file. For optimal performance, ensure your HDMI cable meets the required specifications for your intended resolution.
One notable advantage of using a TV is the built-in audio output through HDMI, eliminating the need for separate speakers. However, keep in mind that TVs typically have higher power consumption and take up more space compared to dedicated monitors, which might be important factors depending on your project requirements.
Portable HDMI Displays
Portable HDMI displays offer an excellent balance of convenience and functionality for Raspberry Pi projects. These lightweight screens typically range from 7 to 15.6 inches and connect directly via HDMI, making them perfect for mobile applications and temporary setups. Many models feature built-in speakers and USB-powered operation, eliminating the need for additional power supplies.
Popular options include the GeekPi 7-inch display and the Elecrow 10.1-inch portable monitor, both offering crisp resolution and good color reproduction. These displays often come with protective cases and adjustable stands, making them ideal for both desktop use and on-the-go projects. Some advanced models even offer touchscreen capabilities, though these typically command a higher price point.
When choosing a portable display, consider factors like resolution, power consumption, and mounting options. Budget-friendly models start around $60, while premium touchscreen versions can reach $200 or more.
Alternative Display Solutions
E-Paper Displays
E-Paper displays, also known as e-ink displays, offer a unique solution for Raspberry Pi projects requiring low power consumption and excellent readability in bright light conditions. These displays mimic the appearance of paper by using electrically charged particles to create text and images, making them perfect for projects like weather stations, digital signage, and information displays that don’t require frequent updates.
Popular options include the Waveshare e-Paper HAT series, which comes in various sizes from 2.13″ to 7.5″, and the Pimoroni Inky series, which offers both monochrome and limited color options. These displays typically connect via SPI interface and are supported by well-maintained Python libraries, making them relatively straightforward to implement.
The main advantages of e-Paper displays include their ultra-low power consumption (they only use power when updating the display), excellent sunlight readability, and their ability to retain images even when powered off. However, they do have limitations, such as slow refresh rates and limited color options. Most e-Paper displays are best suited for static content that updates occasionally rather than dynamic content requiring frequent changes.
Small LCD Screens
Small LCD screens connected via GPIO pins offer a compact and cost-effective display solution for Raspberry Pi projects. These displays typically range from 0.96 to 2.8 inches and use either I2C or SPI protocols for communication. Character LCDs, which display text in a grid format (like 16×2 or 20×4), are popular for basic data readouts and status displays. For more versatility, small TFT displays provide full-color graphics capabilities while maintaining a minimal footprint.
Setting up these displays requires careful GPIO pin connections and appropriate library installations. Most character LCDs use the HD44780 controller, which has extensive Python library support. For TFT displays, libraries like Adafruit’s CircuitPython make implementation straightforward.
These compact displays are ideal for projects where space is limited, such as weather stations, system monitors, or portable game consoles. They’re also excellent for learning GPIO programming and display interfacing basics. While their size limits complex visual applications, their low power consumption and direct GPIO connection make them perfect for battery-powered projects and embedded systems.
Keep in mind that some displays may require level shifters if they operate at different voltage levels than the Raspberry Pi’s 3.3V GPIO pins.
OLED Displays
OLED displays offer exceptional contrast ratios and vibrant colors, making them ideal for projects requiring high visibility in various lighting conditions. These compact displays are particularly suited for portable projects and applications where power efficiency is crucial for maintaining optimal performance.
Most OLED displays for Raspberry Pi connect via I2C or SPI interfaces and come in sizes ranging from 0.91″ to 2.42″. Popular options include the SSD1306-based displays, which offer 128×64 pixel resolution and are perfect for displaying system statistics, sensor readings, or simple user interfaces.
The main advantages of OLED displays include their self-illuminating pixels (requiring no backlight), wide viewing angles, and quick response times. However, they typically come with lower resolutions compared to LCD alternatives and can be susceptible to burn-in if static images are displayed for extended periods.
For makers working on wearables, IoT devices, or compact monitoring systems, OLED displays provide an excellent balance of visibility and power efficiency. They’re particularly effective for displaying scrolling text, simple graphics, and real-time data in a space-conscious format.
Multi-Display Setups
The Raspberry Pi supports multiple display configurations, allowing you to expand your workspace across two or more screens. To set up dual monitors, you’ll need to modify the config.txt file and use the appropriate video output ports. The Pi 4 model makes this especially convenient with its dual micro HDMI ports, supporting up to two 4K displays simultaneously.
For older Pi models with a single HDMI port, you can still achieve a multi-display setup using a combination of HDMI and DSI displays, or by utilizing USB-to-HDMI adapters. The official 7-inch touchscreen can work alongside an HDMI monitor, creating an interactive secondary display perfect for control panels or system monitoring.
Screen configuration can be managed through the desktop environment or using command-line tools like xrandr. You can arrange displays side-by-side or in a stacked configuration, adjust individual resolution settings, and even rotate displays. Remember that running multiple displays may require additional power, so using a reliable power supply rated at least 3A is recommended for stable performance.
For specialized projects, you can also combine different display types, such as using an HDMI monitor with an e-paper display or LCD screen, though this requires additional configuration and proper GPIO management.
Making the Right Choice
Project Requirements
When selecting a display for your Raspberry Pi project, it’s essential to carefully consider your specific requirements to ensure the best possible outcome. As you customize your Pi setup, start by evaluating these key factors:
Resolution requirements should match your project’s needs. For basic monitoring or information displays, a 480p or 720p screen might suffice, while multimedia projects typically demand 1080p or higher resolution.
Physical size constraints are crucial – portable projects might require compact displays under 7 inches, while desktop applications could benefit from larger screens up to 15 inches or more.
Power consumption becomes particularly important for battery-powered projects. E-paper displays excel in power efficiency but sacrifice refresh rates, while LCD panels offer better performance at the cost of higher power draw.
Consider your interface requirements carefully. Touch functionality might be essential for interactive projects, while basic displays suffice for monitoring applications. Additionally, think about viewing angles, especially for public installations or multi-user scenarios.
Budget constraints often influence display choices significantly. While official Raspberry Pi displays offer guaranteed compatibility, third-party options can provide better value or specific features needed for your project.
Match your display’s durability to the intended environment. Indoor projects have different requirements compared to outdoor installations, which might need weather resistance and higher brightness levels.
Budget Considerations
When considering display options for your Raspberry Pi project, budget plays a crucial role in decision-making. Entry-level LCD displays typically range from $15 to $30, making them an excellent choice for beginners and budget-conscious makers. These basic displays usually offer decent functionality but might lack features like touch capability or high resolution.
Mid-range options, including 7-inch touchscreen displays officially supported by Raspberry Pi, generally cost between $60 and $90. These displays offer good value for money, providing touch functionality and reliable performance for most projects.
For those seeking premium solutions, high-resolution displays with features like IPS panels and capacitive touch can cost anywhere from $100 to $200. While expensive, these displays offer superior image quality and responsiveness, making them ideal for professional projects or interactive applications.
Keep in mind that additional costs may include:
– Display cases ($5-$20)
– Connection cables ($2-$10)
– Power supplies ($5-$15)
– Mounting hardware ($3-$10)
Budget-saving tips include watching for sales on popular electronics sites, considering slightly used displays from reputable sellers, or opting for display-only models if touch functionality isn’t necessary. Remember that cheaper options might require more setup time and troubleshooting, while premium displays typically offer plug-and-play convenience.
Choosing the right display for your Raspberry Pi project doesn’t have to be overwhelming. From the versatile HDMI monitors that offer plug-and-play convenience to the compact LCD HATs perfect for portable projects, each display option serves specific needs and use cases. For beginners, we recommend starting with a standard HDMI monitor for its ease of setup and universal compatibility. If you’re building a portable project, consider the official 7-inch Raspberry Pi touchscreen display, which offers an excellent balance of functionality and ease of use.
For advanced users working on embedded systems, DSI displays provide superior performance and reliability, while SPI displays offer a budget-friendly solution for simple display needs. Remember to consider factors like power consumption, resolution requirements, and physical space constraints when making your choice.
Ultimately, the best display solution depends on your specific project requirements, technical expertise, and budget. Whether you’re building a home automation system, a retro gaming console, or an educational tool, there’s a Raspberry Pi display option that will help bring your project to life.