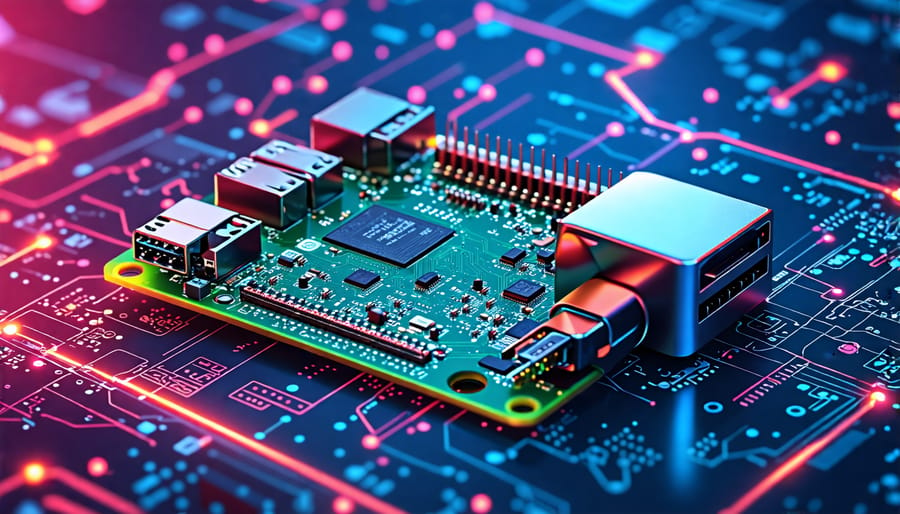
Unlock the power of machine learning with Raspberry Pi, the credit card-sized computer that’s revolutionizing hands-on learning and innovation. With its benefits of Raspberry Pi like affordability, flexibility, and an active community, this tiny device opens up a world of possibilities for tech enthusiasts, hobbyists, and educators alike. From object detection and facial recognition to predictive maintenance and autonomous vehicles, machine learning projects on Raspberry Pi offer an engaging way to dive into the exciting field of AI. In this comprehensive guide, we’ll walk you through setting up your Raspberry Pi for machine learning, explore essential tools and libraries, and provide step-by-step tutorials for real-world projects that showcase the incredible potential of this pocket-sized powerhouse. Get ready to embark on a thrilling journey of discovery and innovation as we unlock the secrets of machine learning with Raspberry Pi!
Setting Up Your Raspberry Pi for Machine Learning

Hardware Requirements
To get started with machine learning Raspberry Pi projects, you’ll need a Raspberry Pi board (3B+ or 4 recommended), a microSD card (at least 16GB), a power supply, and a monitor or TV with HDMI input. Additionally, a keyboard and mouse are necessary for setup and interaction. Depending on your project, you may require additional components such as a camera module for computer vision applications or sensors for data collection. A breadboard, jumper wires, and LEDs can be useful for prototyping and displaying outputs. Ensure you have a stable internet connection for downloading software and libraries.
Software Setup
To set up your Raspberry Pi for machine learning projects, you’ll need to install the necessary software and libraries. Start by installing the latest version of Raspberry Pi OS using the official installer. Once your Pi is up and running, open the terminal and update the system packages with the commands “sudo apt update” and “sudo apt upgrade”.
Next, install Python 3 and pip, the Python package installer, by running “sudo apt install python3 python3-pip”. Many machine learning libraries require additional dependencies, so install them using “sudo apt install libatlas-base-dev libopenblas-dev libblas-dev m4 cmake cython python3-dev python3-yaml python3-setuptools”.
Now, you can install popular machine learning libraries like TensorFlow, Keras, and scikit-learn. For TensorFlow, use the command “pip3 install tensorflow”. Install Keras with “pip3 install keras”, and scikit-learn with “pip3 install scikit-learn”.
To work with computer vision projects, install OpenCV by running “pip3 install opencv-python”. For natural language processing tasks, install the Natural Language Toolkit (NLTK) using “pip3 install nltk”.
Remember to create a virtual environment for your projects to keep your system’s Python installation clean. With these software and libraries set up, your Raspberry Pi is ready to tackle exciting machine learning projects!

Project 1: Handwritten Digit Recognition
Dataset and Libraries
The MNIST dataset, consisting of 70,000 handwritten digit images, is a popular choice for machine learning projects. To work with this dataset on your Raspberry Pi, you’ll need to install several required libraries such as TensorFlow, Keras, NumPy, and Matplotlib. These libraries provide the necessary tools for data preprocessing, model training, and visualization. With the dataset and libraries set up, you’ll be ready to dive into building your own handwritten digit recognition system on the Raspberry Pi.
Training the Model
Training the model on the Raspberry Pi involves feeding it labeled data and adjusting its parameters to minimize the difference between predicted and actual outputs. This process can be computationally intensive, but the Raspberry Pi’s GPU can accelerate it. Using libraries like TensorFlow or PyTorch, you can load your dataset, define the model architecture, and specify the loss function and optimizer. The training loop iterates over the data, forward propagating inputs, calculating the loss, and backpropagating gradients to update the model’s weights. Monitor the model’s performance on a validation set and adjust hyperparameters as needed. Once trained, evaluate the model on a test set to assess its generalization ability.
Testing and Deploying
To test your machine learning model, split your dataset into training and testing sets. Train the model on the training set and evaluate its performance on the testing set using metrics like accuracy, precision, and recall. Once you’re satisfied with the model’s performance, deploy it on your Raspberry Pi for real-world use. You can create a simple user interface or integrate the model into an existing application. Ensure that the model can handle real-time data input and provide accurate predictions. With proper testing and deployment, your machine learning Raspberry Pi project can be a powerful tool for various applications.
Project 2: Smart Home Assistant
Setting Up Voice Recognition
To set up voice recognition on your Raspberry Pi, CMUSphinx is a powerful open-source library that can help you get started. Begin by installing the necessary dependencies, such as PocketSphinx and sphinxbase. Next, configure your microphone and ensure it’s properly detected by the Raspberry Pi. Create a new project directory and download the required language models and acoustic models for your desired language. Write a Python script that initializes the recognizer, listens for audio input, and processes the speech using the CMUSphinx library. Test your setup by running the script and speaking into the microphone. With a bit of tweaking and optimization, you’ll have a functional voice recognition system running on your Raspberry Pi in no time!
Integrating with Smart Home Devices
Integrating your Raspberry Pi-based machine learning projects with smart home devices is a fantastic way to create a more connected and automated living space. By leveraging APIs provided by smart home platforms like Amazon Alexa, Google Home, or Apple HomeKit, you can enable your Raspberry Pi to communicate with and control various smart devices. For example, you can develop a voice-controlled assistant that can turn lights on or off, adjust thermostat settings, or even unlock doors using facial recognition. To get started, explore the documentation and developer resources offered by your chosen smart home platform, and use Python libraries like Flask or Django to build the necessary API integrations. With a little creativity and coding skills, you can transform your Raspberry Pi into a powerful smart home hub.
Creating Custom Skills
To create custom skills for your smart home assistant, start by identifying the specific task you want your assistant to perform. This could be anything from setting reminders to controlling smart devices. Once you have a clear idea, use the Raspberry Pi’s built-in software or third-party libraries to develop the necessary code. For example, you can use Python and the Home Assistant API to create a skill that turns on your smart lights when you say a specific phrase. Test your code thoroughly and refine it as needed. Finally, integrate your custom skill into your smart home setup and enjoy the convenience of a personalized voice assistant.
Project 3: Real-Time Object Detection

Setting Up the Camera and Libraries
To set up the Raspberry Pi camera, first connect the camera module to the CSI port on your Raspberry Pi. Then, enable the camera in the Raspberry Pi configuration menu. Install the required libraries, such as OpenCV and TensorFlow, using pip. For OpenCV, run pip install opencv-python, and for TensorFlow, use pip install tensorflow. Verify the camera is working by running a simple script that captures an image or video. With the camera and libraries set up, you’re ready to start building your machine learning projects on the Raspberry Pi.
Training the Object Detection Model
To train an object detection model using TensorFlow, start by gathering and labeling a dataset of images containing the objects you want to detect. Use tools like LabelImg to annotate the images, drawing bounding boxes around the objects and assigning them appropriate labels. Next, split the dataset into training and validation sets. Configure a pre-trained object detection model, such as SSD MobileNet or Faster R-CNN, using the TensorFlow Object Detection API. Modify the pipeline configuration file to specify the model architecture, dataset paths, and training parameters. Begin training the model on the Raspberry Pi, which may take several hours or even days, depending on the dataset size and model complexity. Monitor the training progress using TensorBoard to ensure the model converges and achieves satisfactory performance on the validation set. Finally, save the trained model for inference on new images or real-time video streams.
Real-Time Inference
With the trained model in hand, it’s time to put it to the test with real-time object detection on your Raspberry Pi. Using the camera module, capture live video feed and pass each frame through the model for inference. The model will analyze the frame and identify objects, drawing bounding boxes and labels around them in real-time. You can display the processed video feed on a connected monitor or stream it over the network for remote viewing. Experiment with different camera angles, lighting conditions, and objects to see how well your model performs. This real-time inference showcases the power of machine learning on the Raspberry Pi, opening up possibilities for innovative applications in various domains.
Conclusion
In conclusion, machine learning with Raspberry Pi opens up a world of exciting possibilities for tech enthusiasts, hobbyists, and educators alike. By mastering the fundamentals of setting up your Raspberry Pi, understanding the basics of machine learning, and implementing real-world projects, you can unlock the true potential of this powerful single-board computer. Remember, the key to success lies in experimentation, perseverance, and a willingness to learn from your mistakes. As you continue your journey into the fascinating realm of machine learning with Raspberry Pi, don’t be afraid to explore more machine learning projects and push the boundaries of what’s possible. With the right tools, knowledge, and a creative mindset, you can transform your Raspberry Pi into a cutting-edge machine learning powerhouse and bring your innovative ideas to life. So, embrace the challenge, let your imagination run wild, and enjoy the rewarding experience of building your own intelligent systems with Raspberry Pi.


